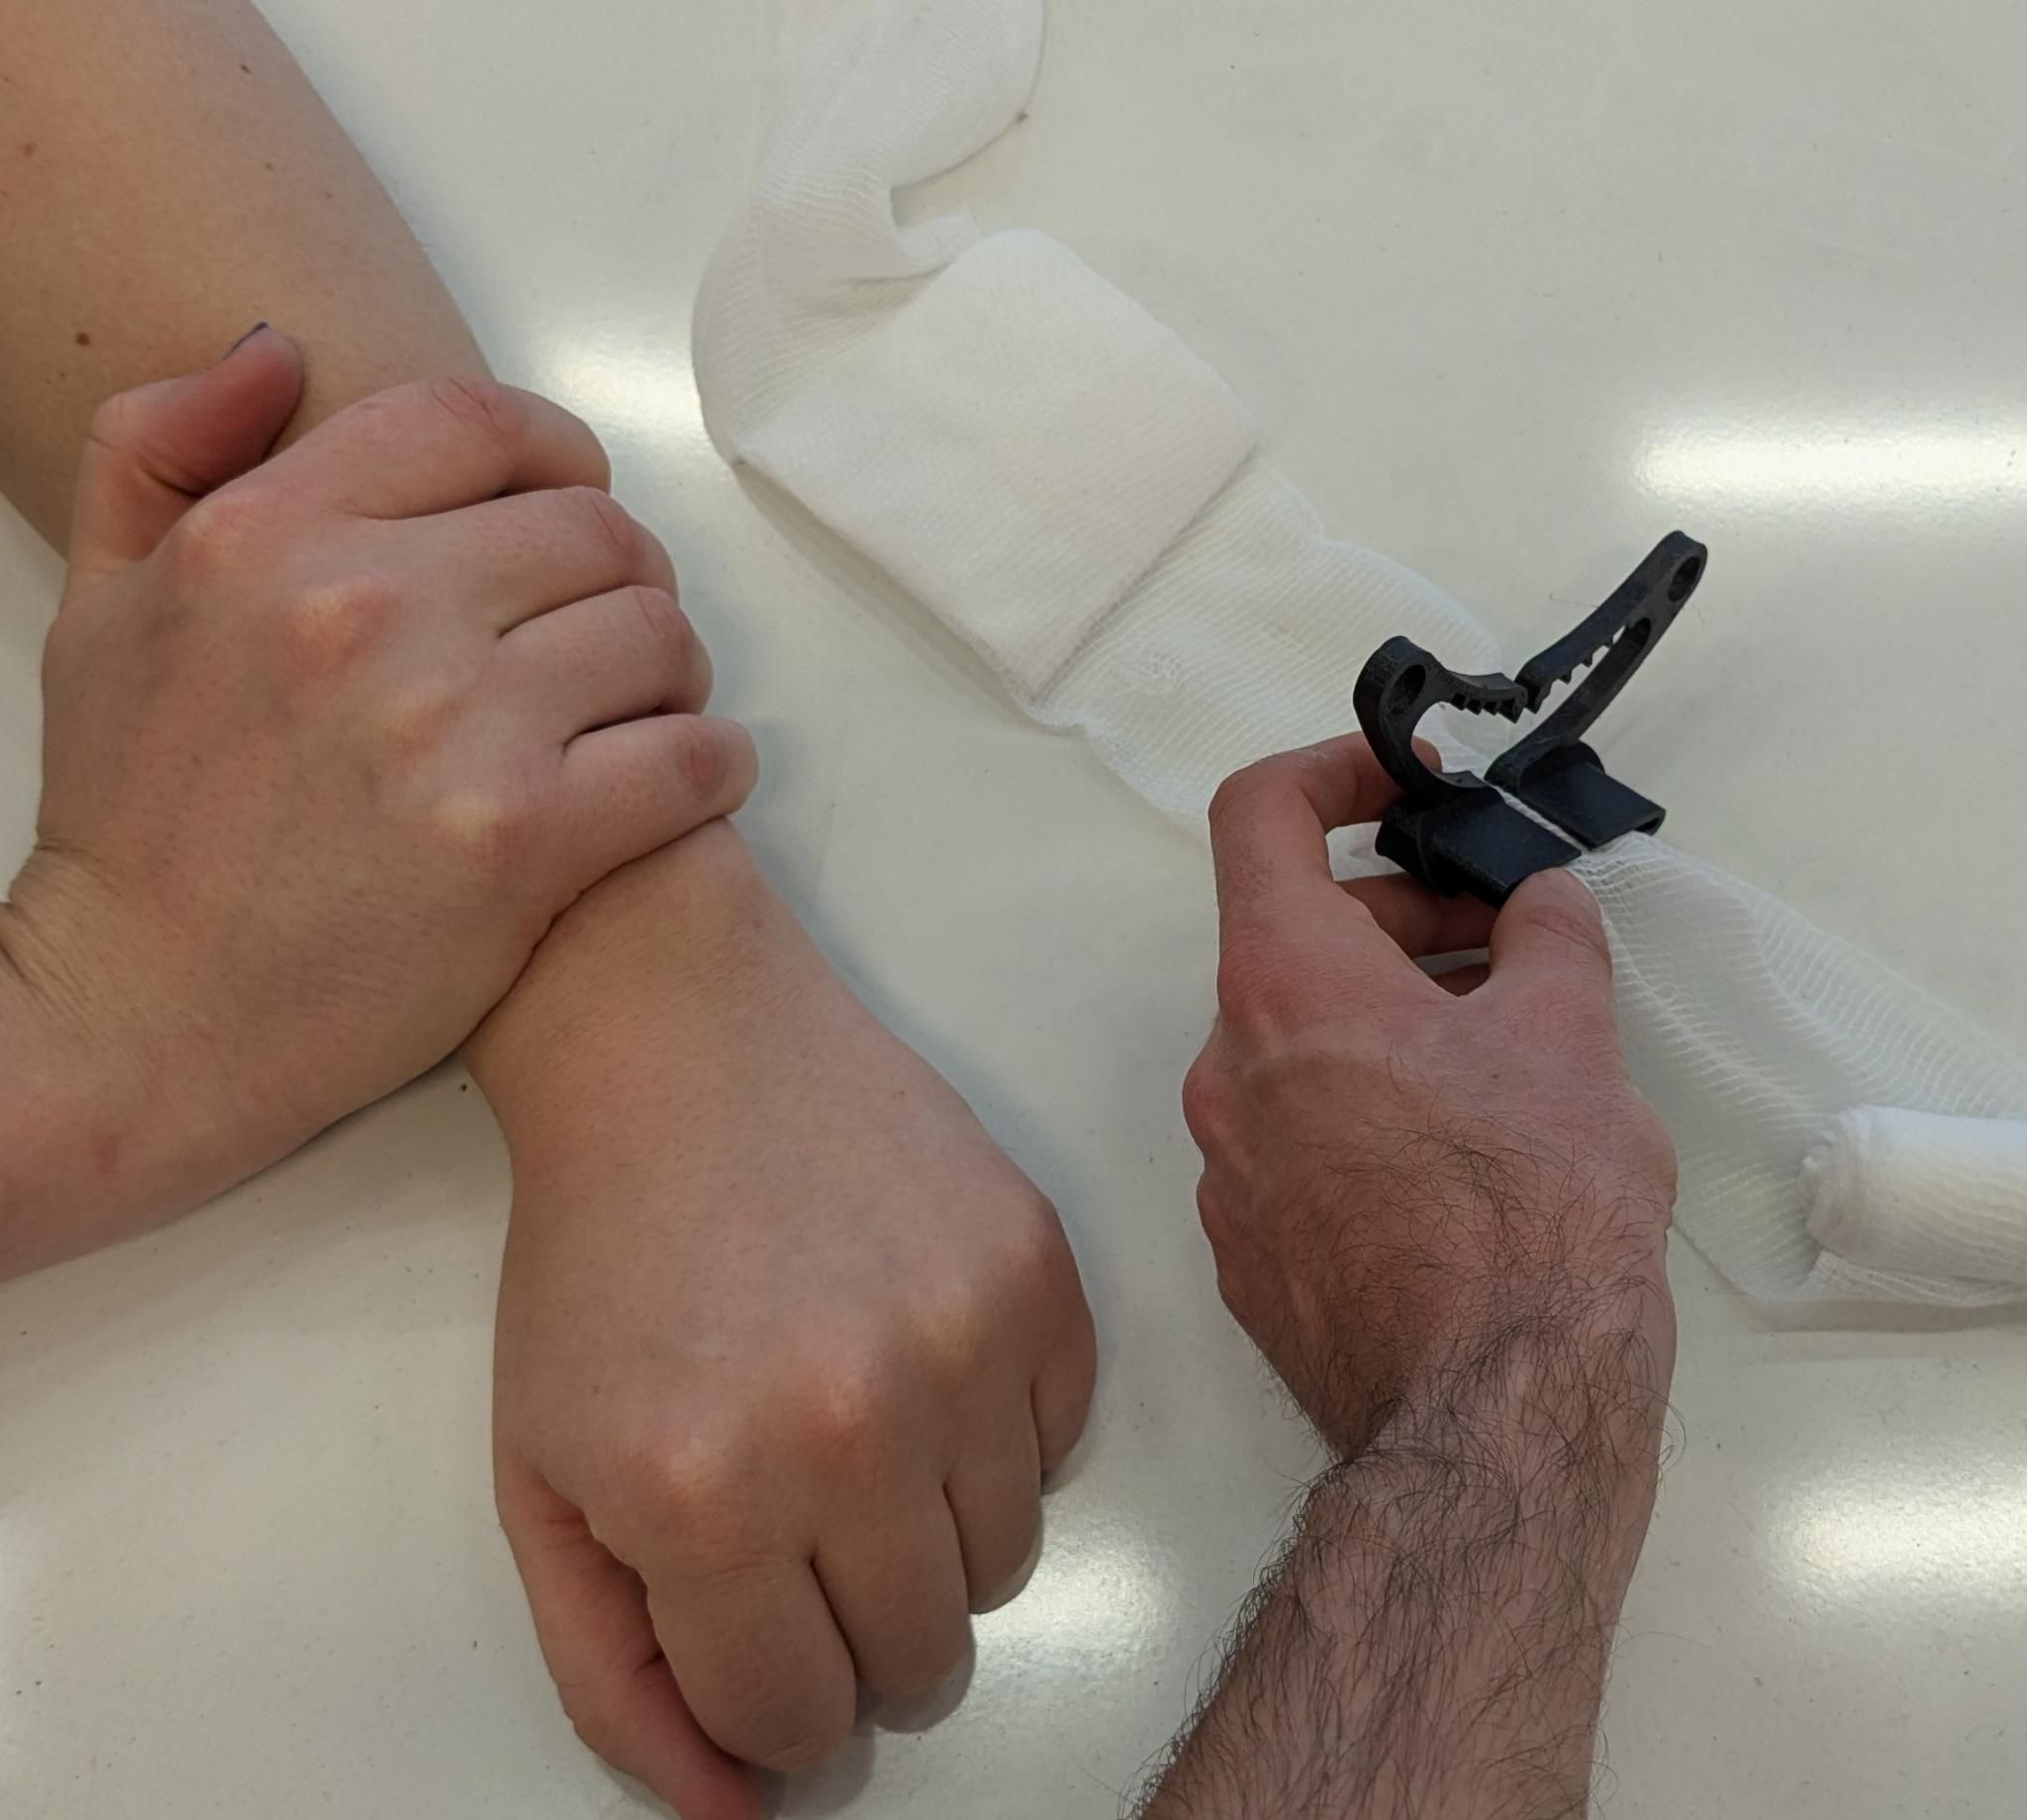
Step 1.a : Clip the lever on the compressive bandage, while holding pressure on the victim's wound (if they are conscious they can apply pressure themself).
Step 1.b (alternative) : Apply the bandage to the wound and do a single turn around the victim's limb.
(using velcro) : if you are using Velcro, you can attach the lever directly over the wound now.
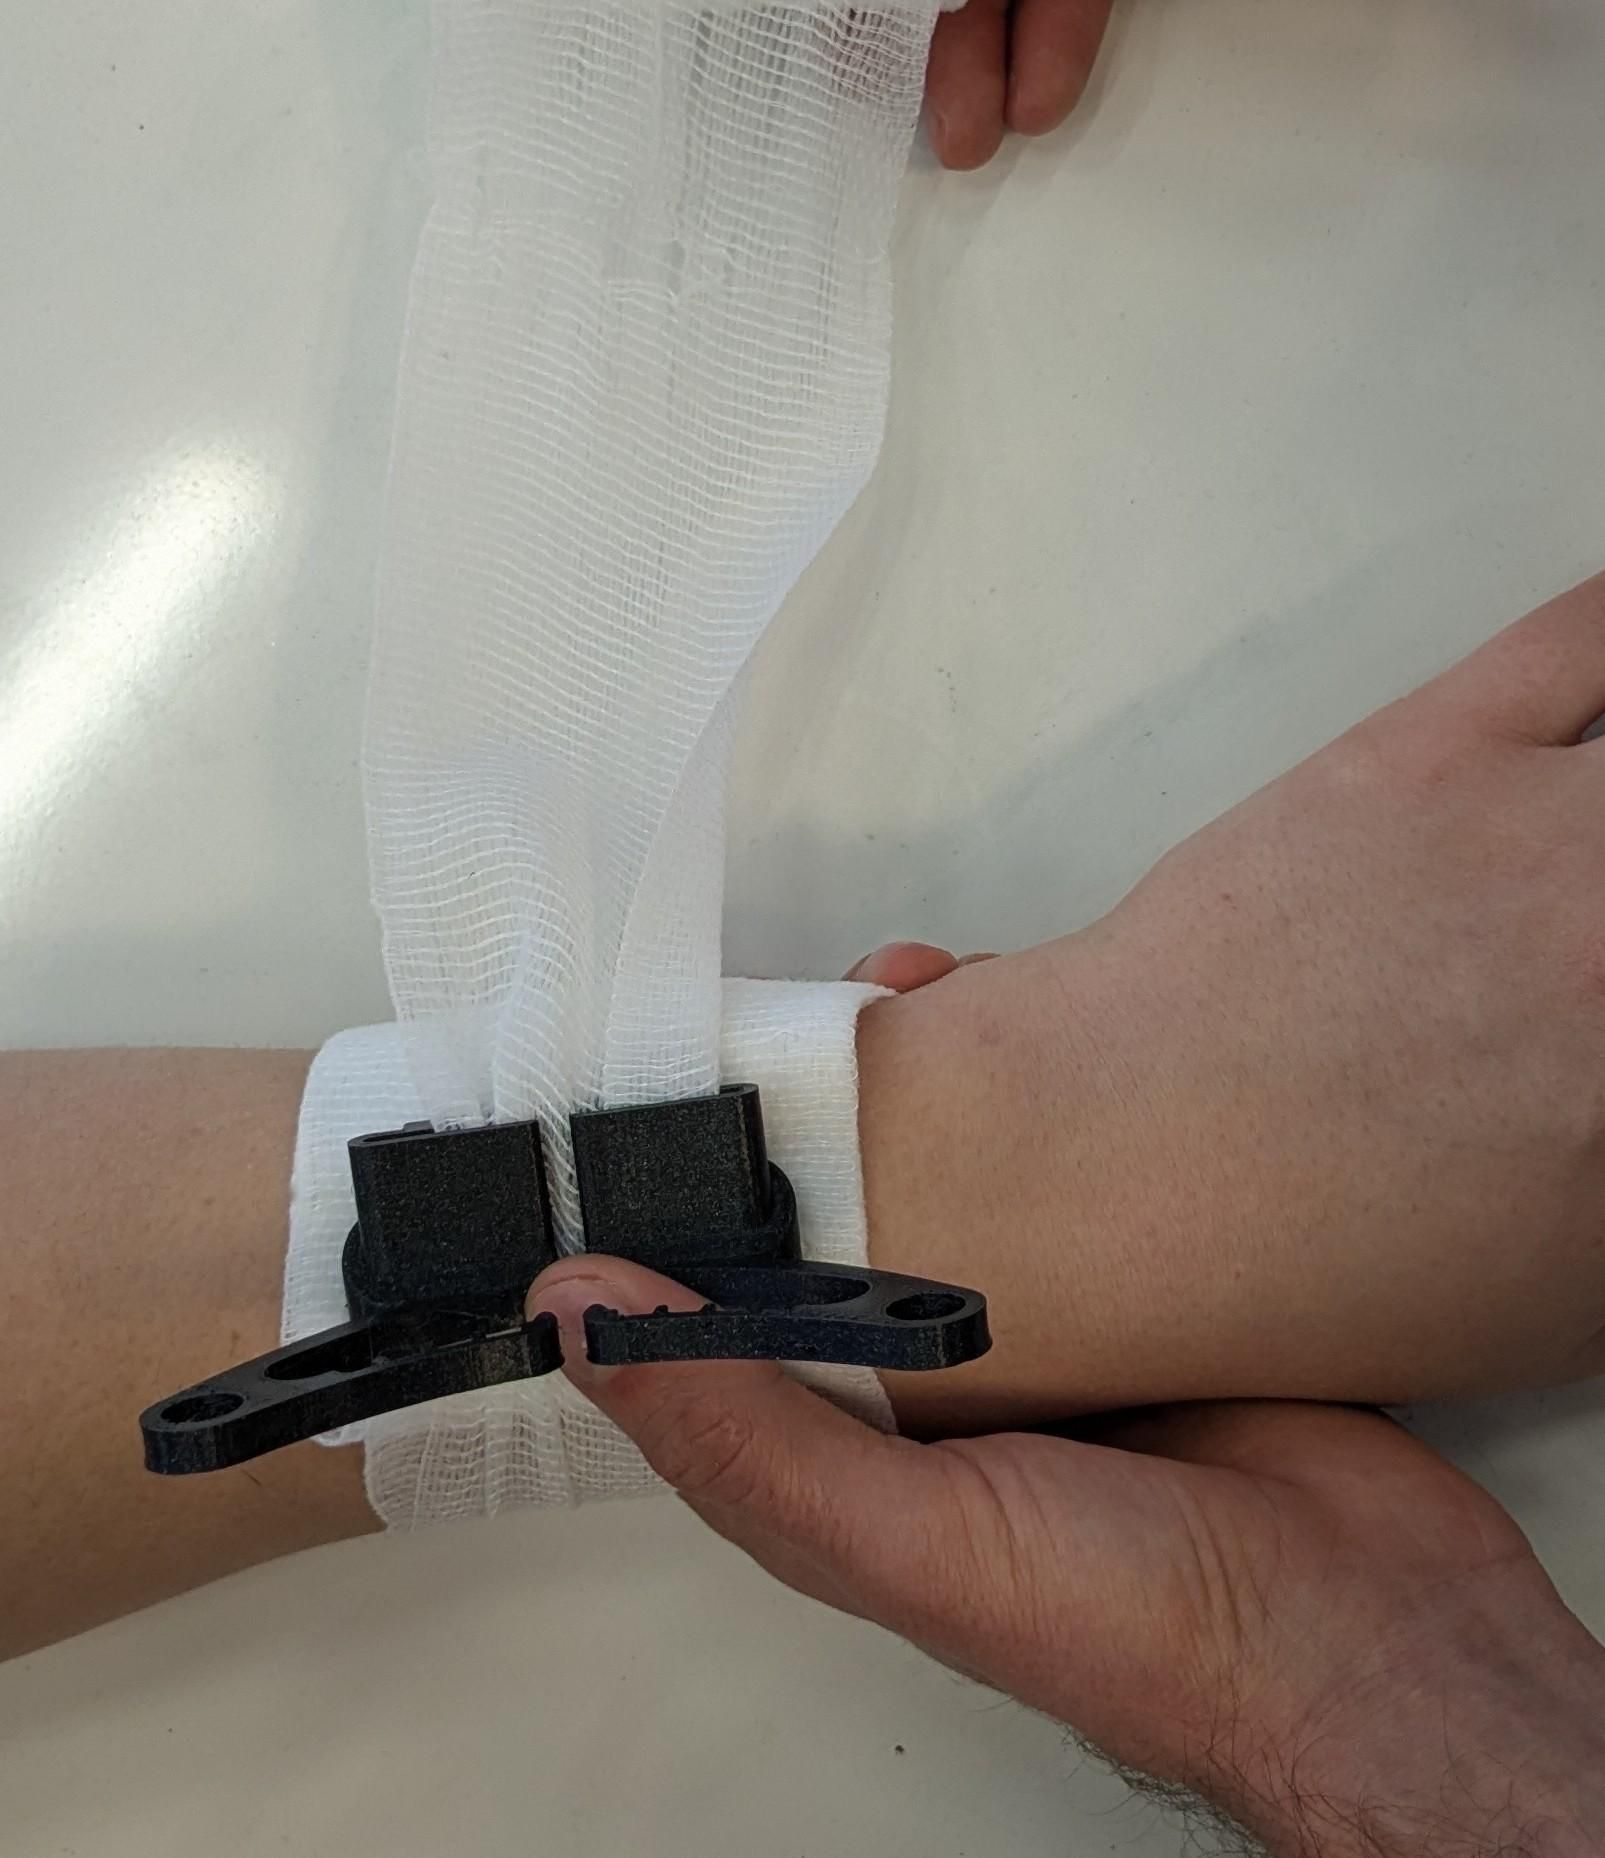
Step 2.a : Do a single turn around the victim's limb and slide the lever over the wound.
Step 2.b (alternative) : Put the lever directly over the wound before finishing the first turn and pass the bandage through the inner passage.
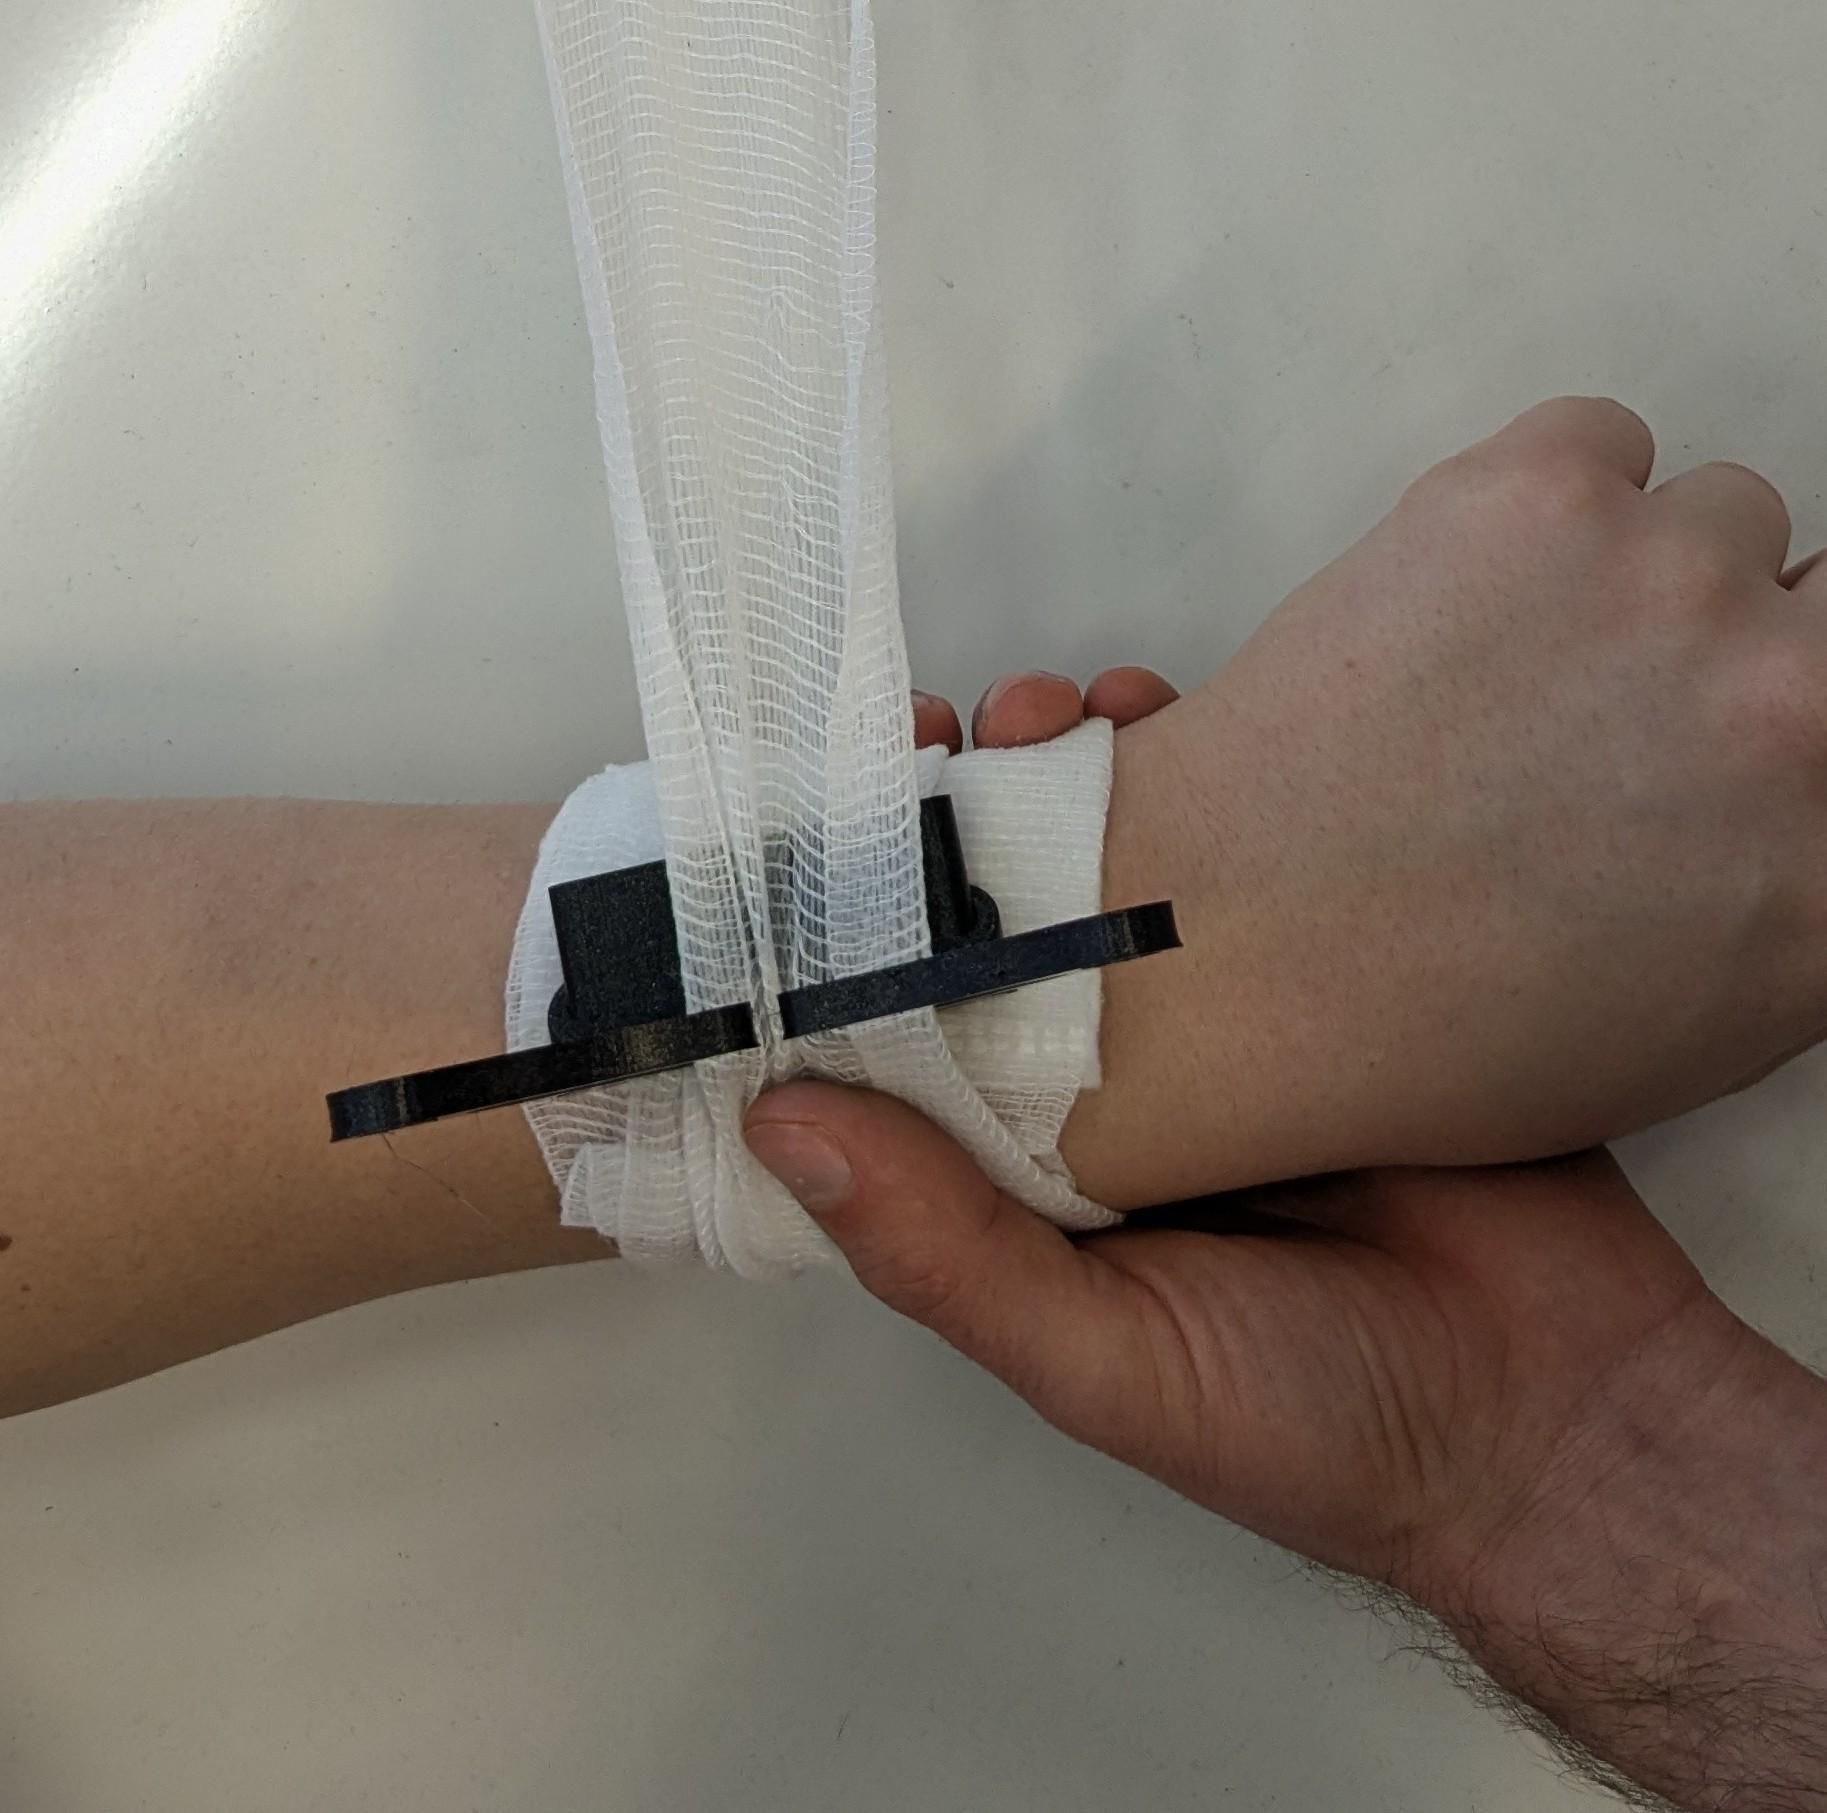
Step 3 : Do another turn around the limb and pass through the normal lever passage.
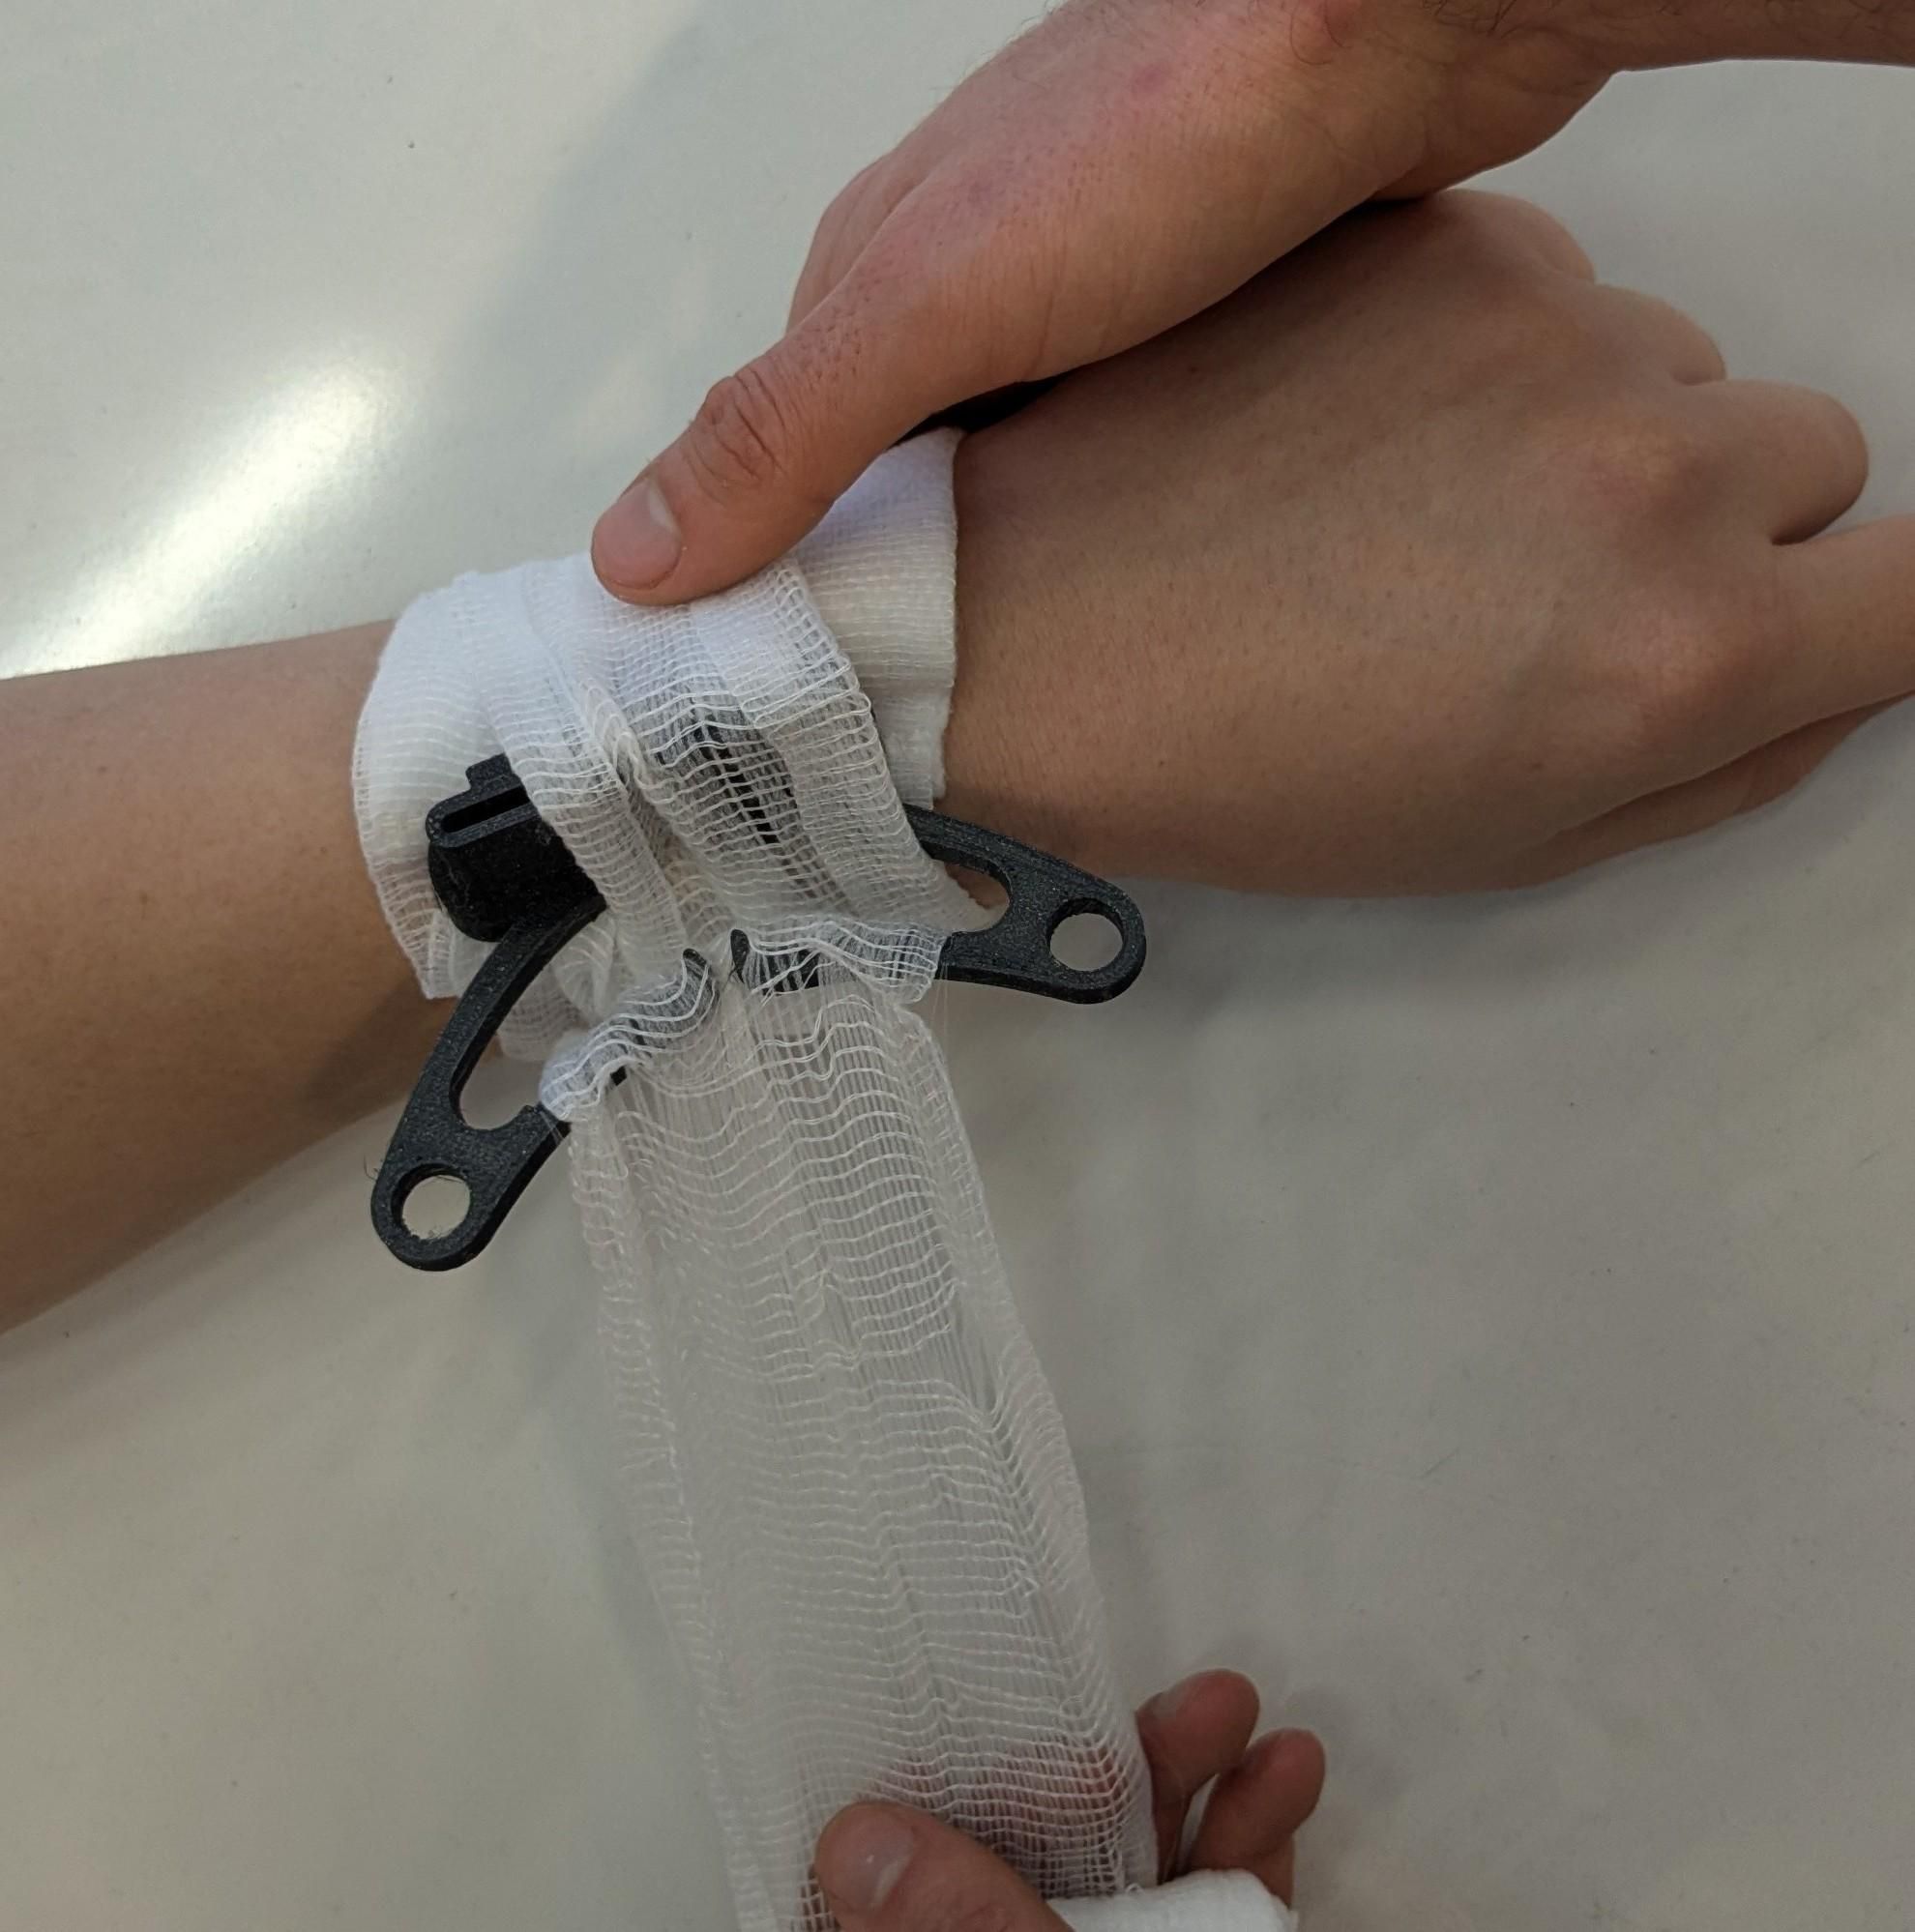
Step 4 : You can do an additional turn, and then you have to start widing the other way around the limb to flip the lever back to generate pressure.
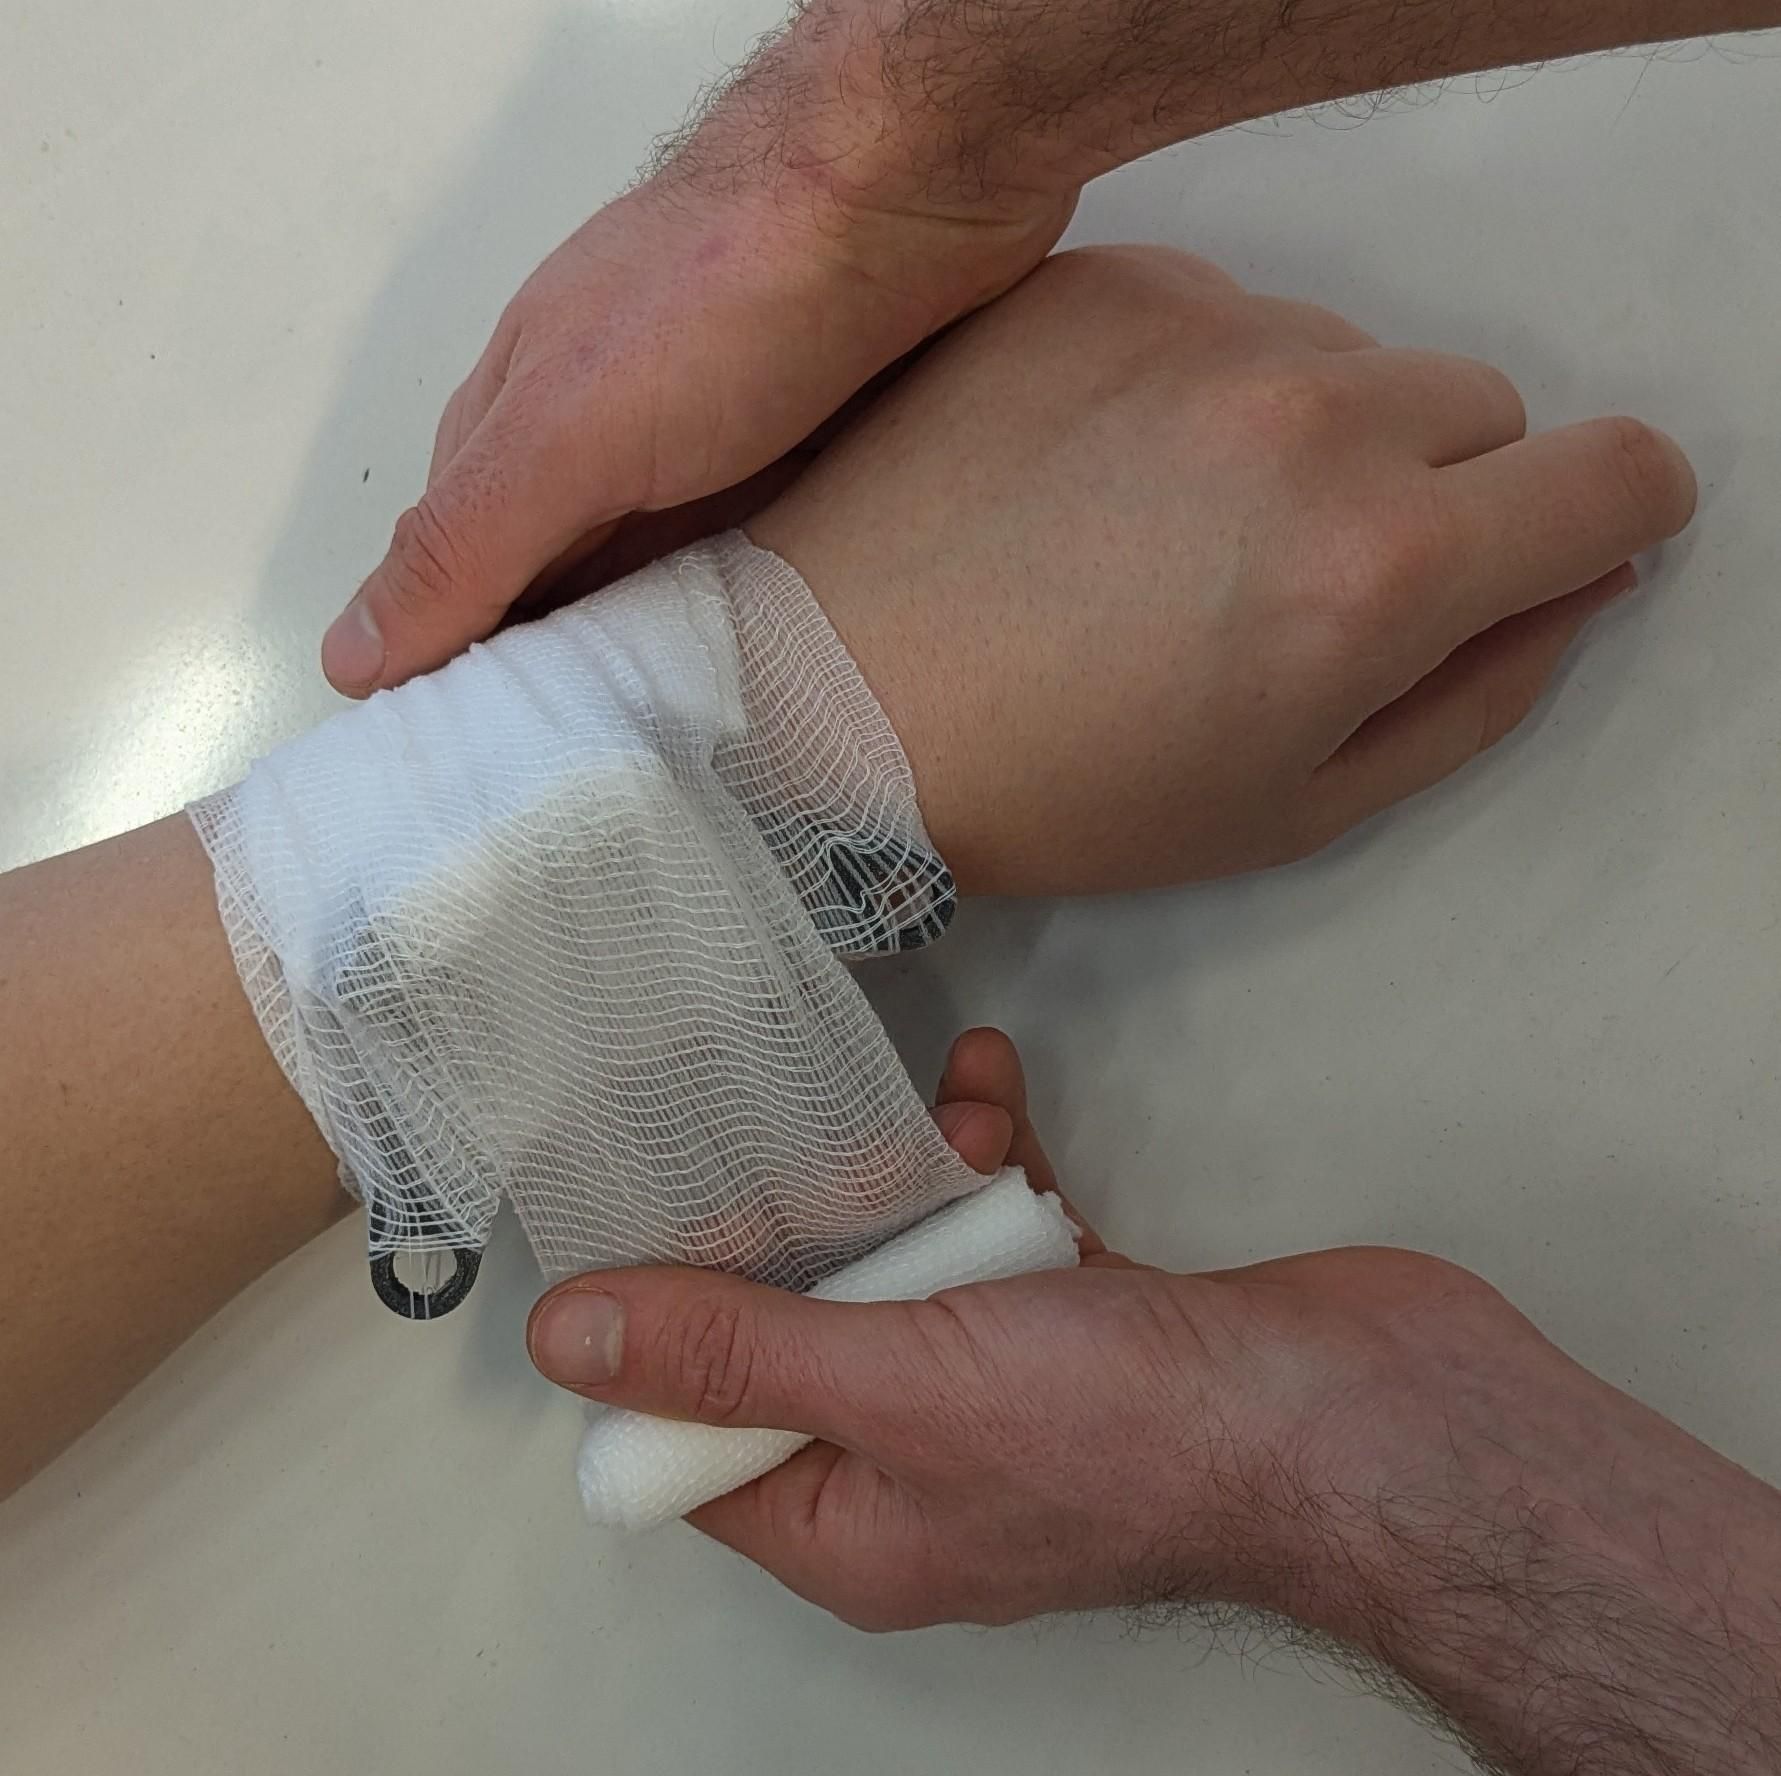
Step 5 : Keep winding around the limb to firmly hold the lever into place.
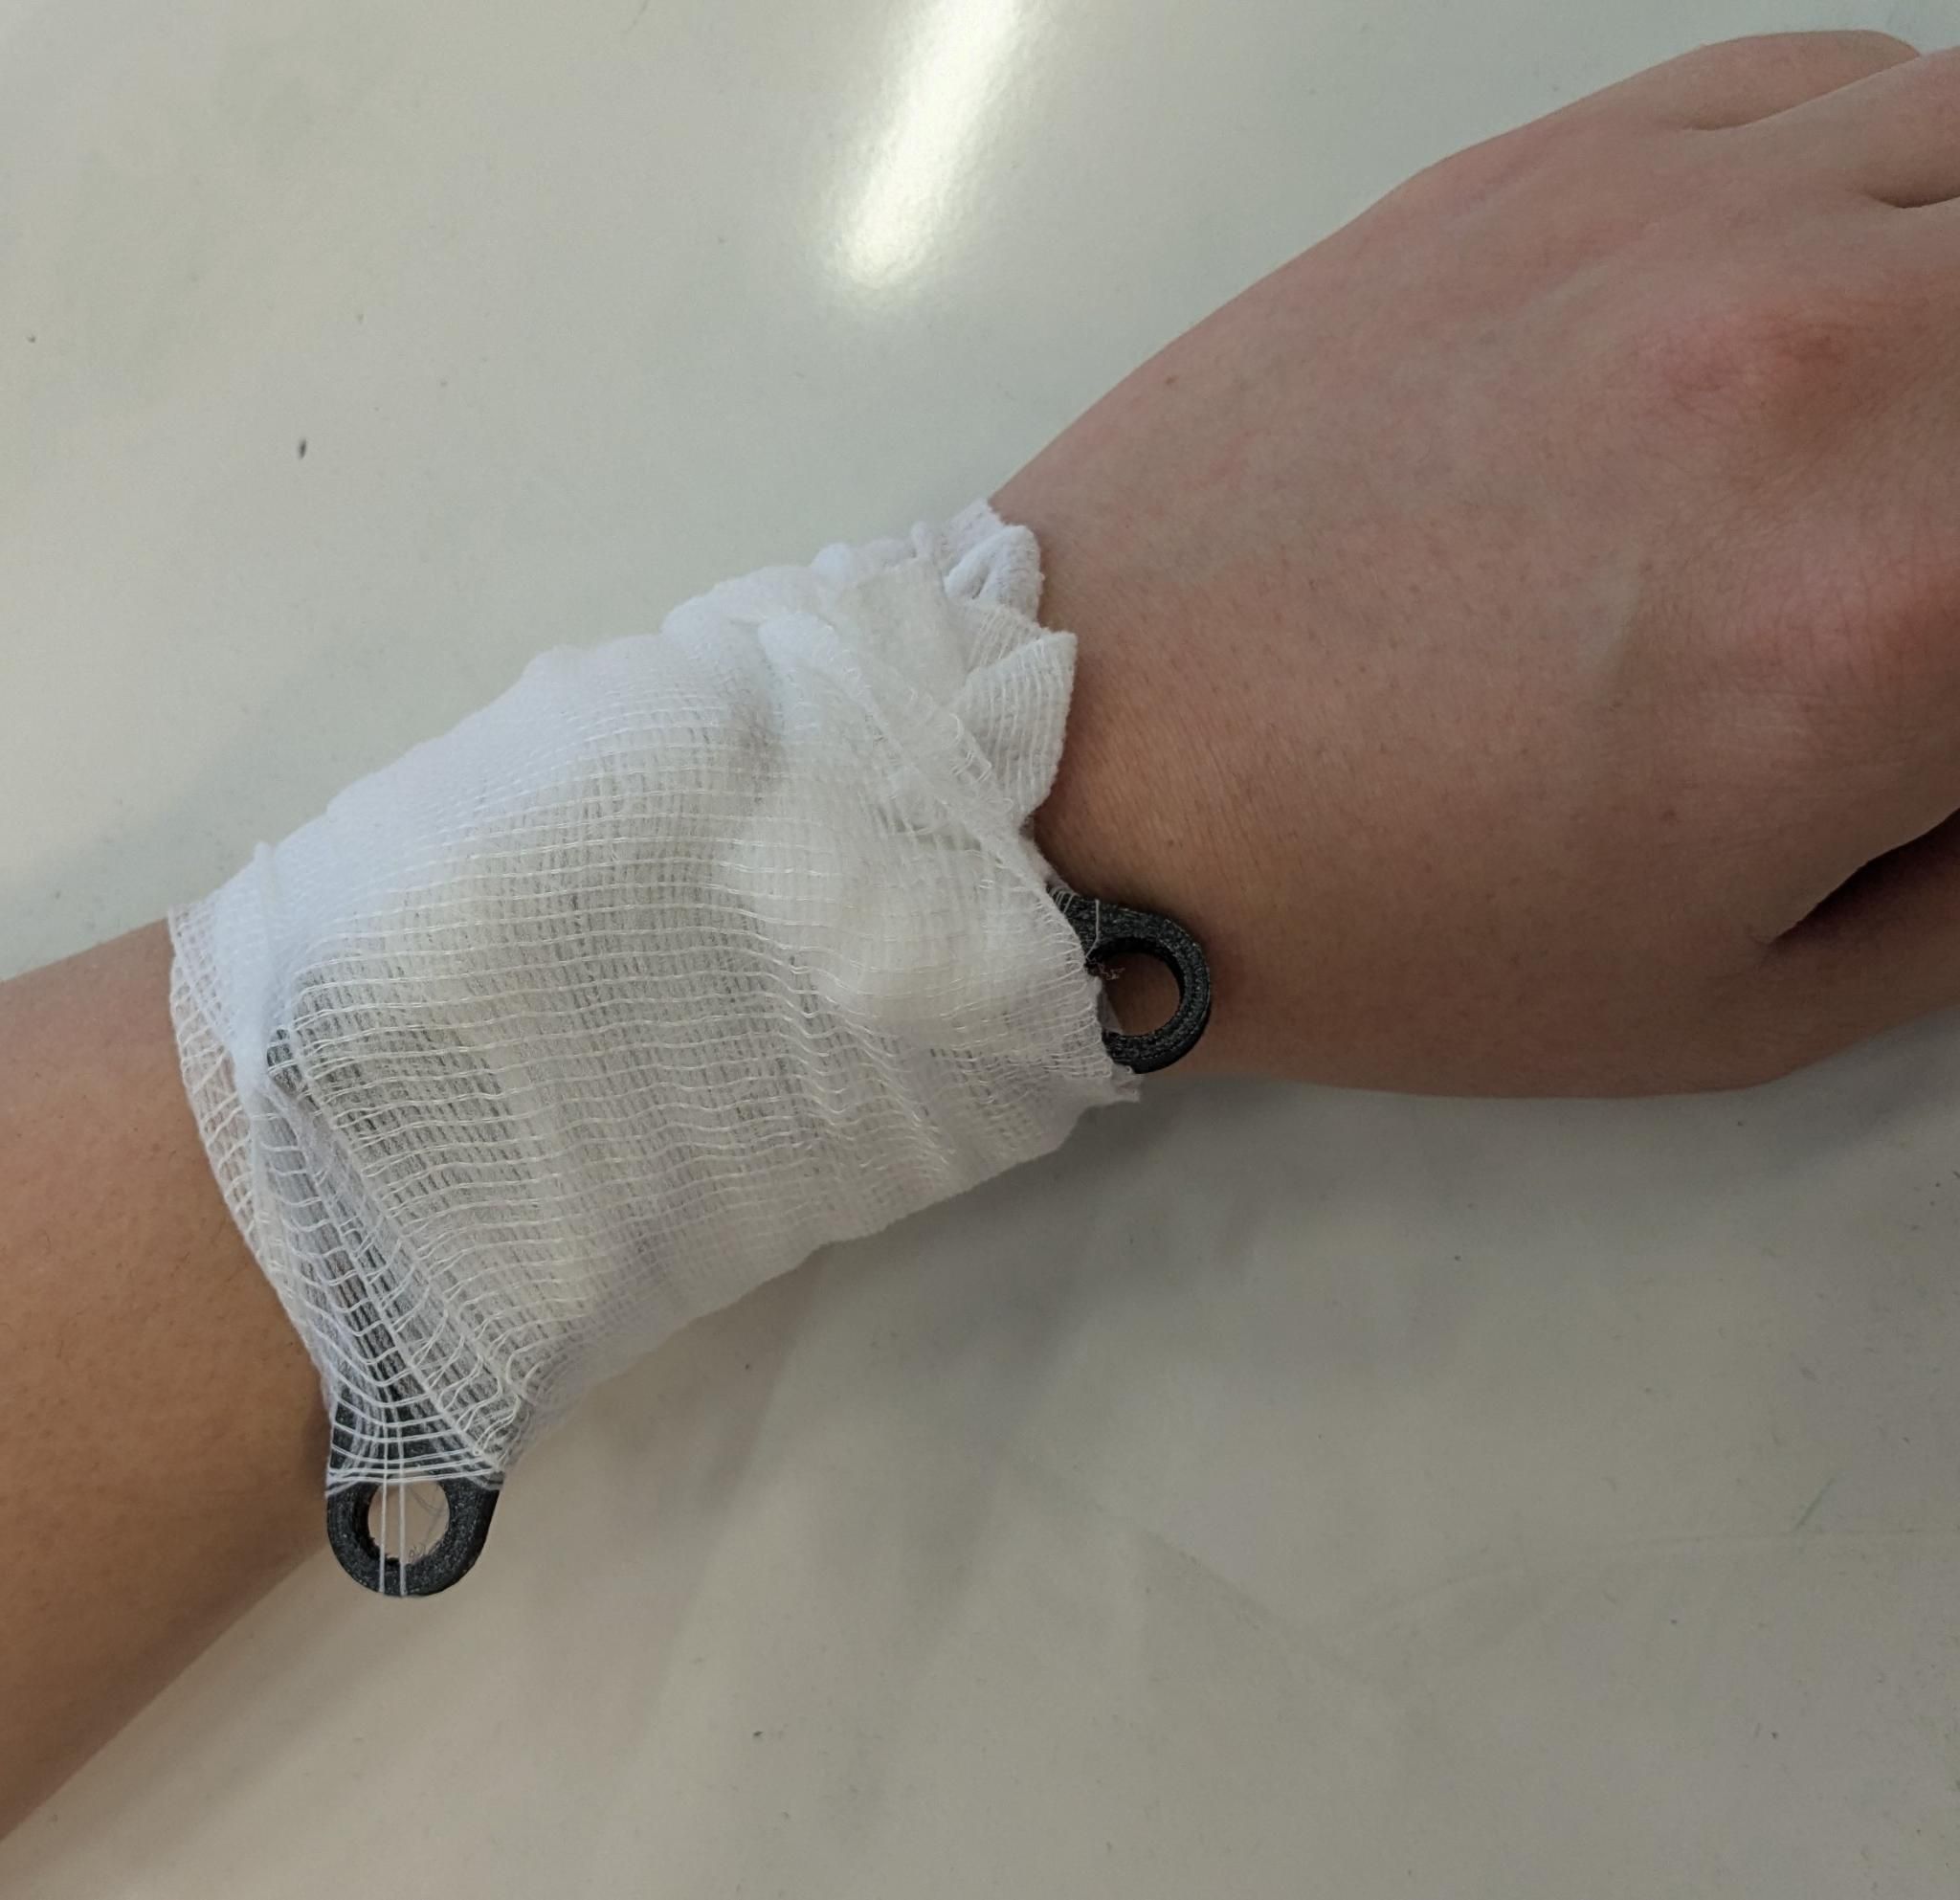
Step 6 : Once you have finished you can simply fix the end of the bandage into a tight part of the bandage to hold it in place.
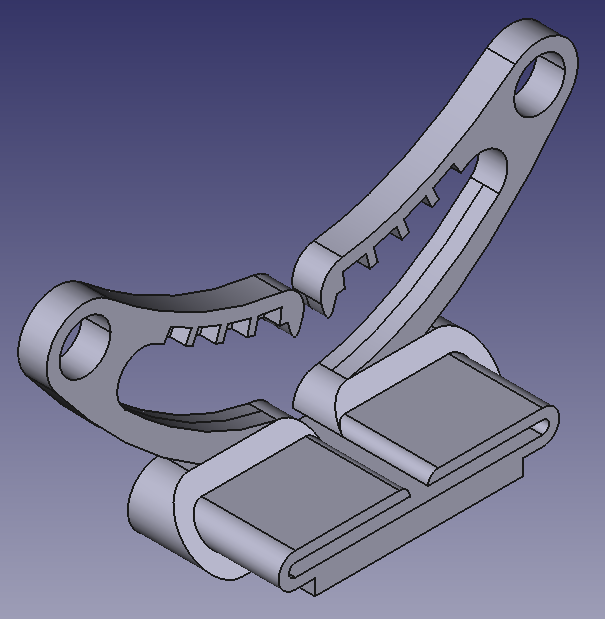 ## 1 - Design and usage
:warning: **WARNING : _This bandage was designed based on existing israeli bandages, however it wasn't certified as a medical device and should thus be used based on your own jugment._** :warning:
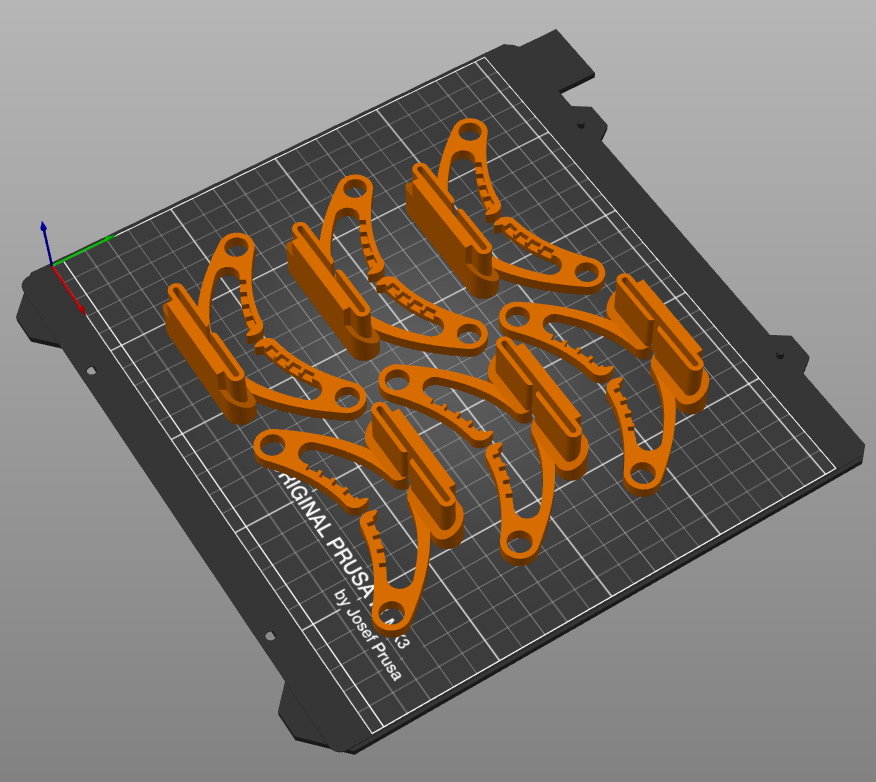 You can print this israeli bandage lever from the [3Dfiles/israeli_bandage.stl](./3Dfiles/) file, with the "lever" part pointing up so that you don't need to use any support material.
Using default parameter the lever is quite strong and thus resilient to different printing parameters and materials. We would recommend to use a strong material like PETG rather than PLA, and not using too low of an infill ratio (> 20%).
## 4 - Parameters
If you want to changes the parameters of this design, you can edit the _Freecad_ file [3Dfiles/israeli_bandage_v3.FCStd](./3Dfiles/), which is fully parametric, with parameters present in the **Spreadsheet**.
## License
```
"3D Printed israeli bandages" (c) by @distorsion
"3D Printed israeli bandages" is licensed under a
Creative Commons Attribution 4.0 International License.
You should have received a copy of the license along with this
work. If not, see