|
|
||
|---|---|---|
| 3Dfiles | ||
| pictures | ||
| .gitignore | ||
| Readme.fr.md | ||
| Readme.md | ||
3D Printed parametric respiratory one-way-valve
Valve paramétrique adaptable à la réspiration imprimé en 3D (version francaise ici)
[English version automatically spell checked with minimum effort put into proofreading]
Here is the printable page for this model.
1 - Design
We call this one-way valve "respiratory" because it was designed to be adaptable to the low cracking-pressure required by breathing-related application. This is because this one-way valve was designed to integrate with our open-source 3D-printed gas mask : distorsion/3D-printed-parametric-gas-mask
In this repo we provide all the element of the valve (as described bellow), and the body of the valve (either 3Dfiles/owv_input_body.stl or 3Dfiles/owv_output_body.stl depending on if you want a filter at the output/input or not) that can be integrated into your project.
1.a - Membrane design
In the first design of one-way valve for ou gas mask, we first used a very soft membrane made of thin silicone. In this design, the membrane is actually 3D printable, either out of "normal" material (preferably PETG) or out of flexible filament.
While this requires a larger diameter to obtain the low cracking pressure, this allows the valve to automatically close without negative pressure, which is needed for breathing-related application as we aren't constantly breathing in an out, and there can be a second of hang during which a softer membrane wouldn't close and would let air go the wrong way.

The valve insert shown above (located at 3Dfiles/owv_membrane_insert.stl) is a thin membrane made out of "normal" 3D printing material, with the membrane being one part with the threaded insert that screw into the body of the valve.


Here we see the second alternative which is a slightly thicker membrane (located at 3Dfiles/owv_separate_membrane.stl) made out off flexible filament (here shown in blue), with a separate rigid insert (located at 3Dfiles/owv_separate_membrane_insert.stl) that hold this membrane.
There is no large advantage from using a flexible filament, apart from a potentially lower cracking pressure obtainable from a smaller valve diameter.
1.b - Stopper
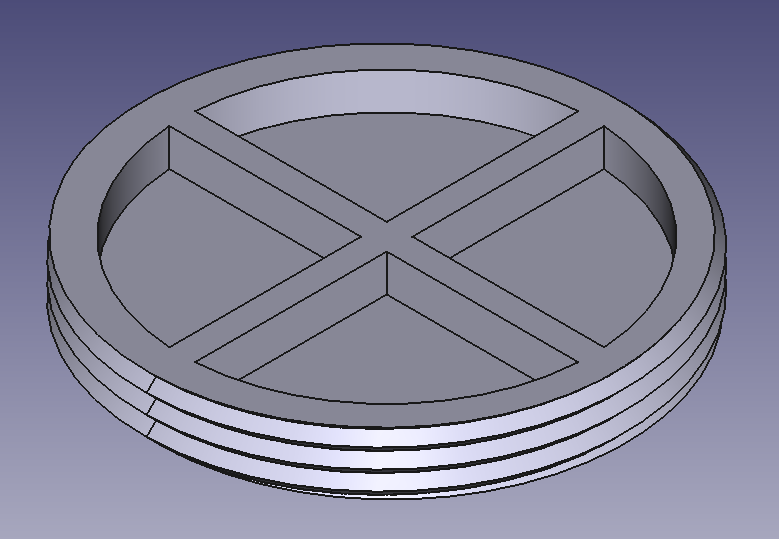
We also provide a stopper insert (located at 3Dfiles/owv_stopper.stl) which can be used to temporarily fully close the one-way valve.
2 - Assembly
Once you have printed all the required pieces as described in the 3D printing section, the assembly is simply done in three steps :
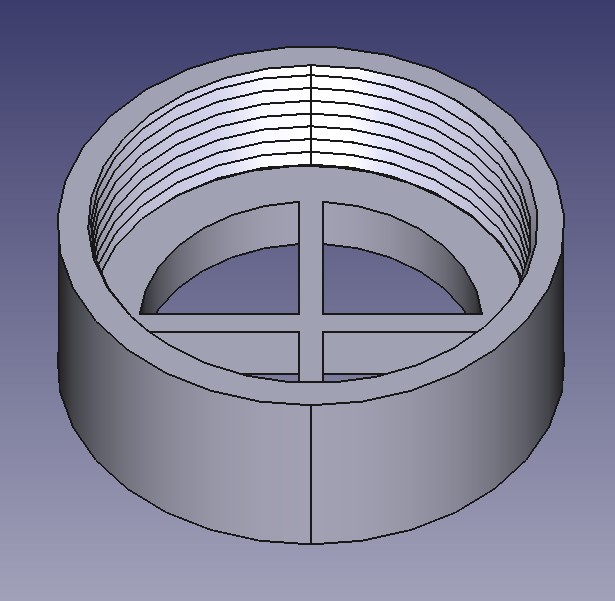
We first screw the base (located at 3Dfiles/owv_base_cap.stl) into the valve body, with the smoothest part of the insert (typically the part that was printed down) pointing toward the exit of the valve (where this face will interface with the membrane).
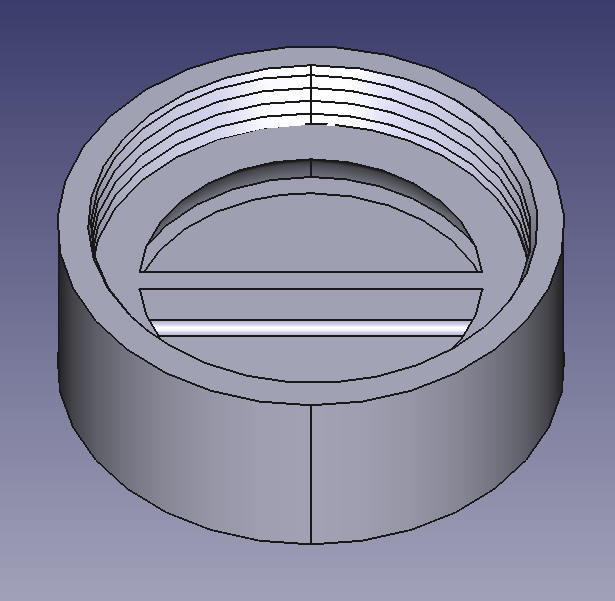
We then screw the membrane (either one of the options shown in the membrane section) so that it seals with the cap we just screwed in.
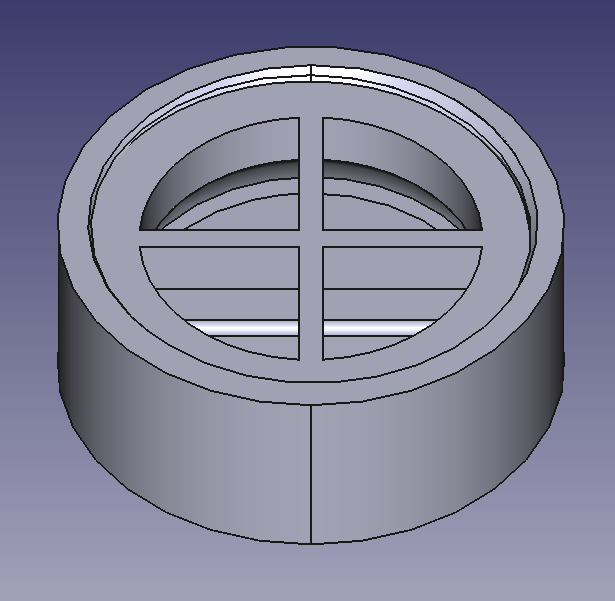
Finaly, if we want to have a filter we can now put it into the body and hold it by screwing in anther cap (located at 3Dfiles/owv_base_cap.stl). This can also be done at the other hand of the valve, where then the cap and the base (which are the same model) will be stuck together with the filter material in-between.
3 - 3D printing
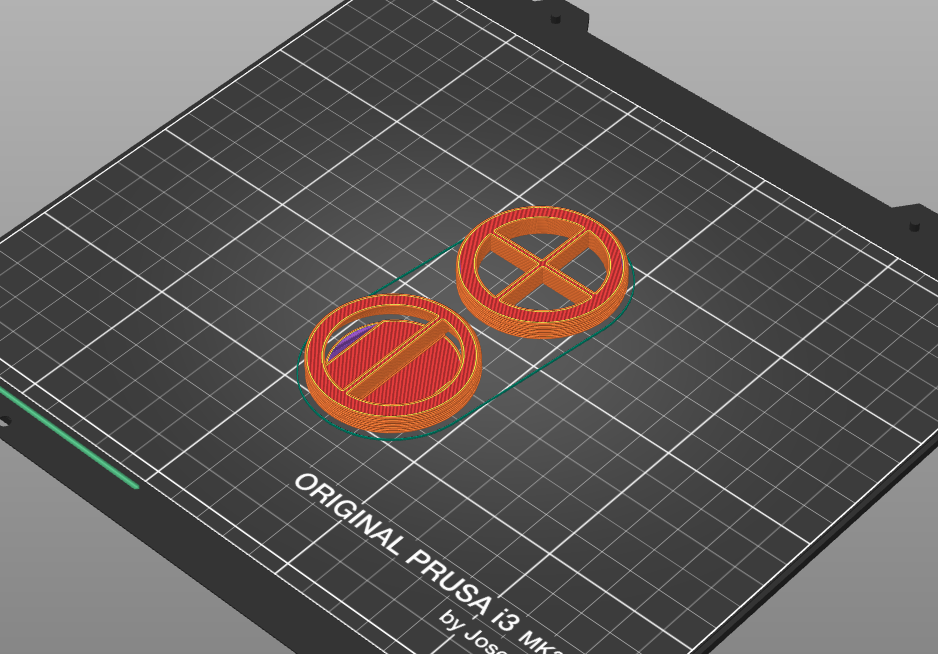

There is not much to be know about printing this one-way valve : You can use pretty much any material, although PETG is preferred for he membrane as it is flexible and won't fatigue over time.
When choosing the thickness of the membrane (either the rigid membrane as on the picture on the left, or the flexible membrane for the picture on the right), you can think about the layer height you will be using, and try to slice the membrane with different parameters before printing.
4 - Parameters
If you want to changes the parameters of this design, you can edit the Freecad file 3Dfiles/one_way_valve.FCStd, which is fully parametric, with parameters present in the Spreadsheet.
If you want/need to change parameters, we would suggest you play with them and try to understand the impact of each parameters. We will only explain a small selection of important parameters that you are most likely to have to edit.
We will only describe a few parameters that you are most likely to have to change.
4.a - Structural parameters
wall_thickness : [default=2.7mm] The wall thickness across the print (except for the strap attachment point). Can be tweaked to make the print either stronger or weaker but lighter and faster to print.
snap_fit_clearance : [default=0.09mm] The clearance between two objects that would fit together with difficulty. Also impact the clearance between threads.
4.b - Geometrical parameters
owv_membrane_diameter : [default=40mm] Diameter of the membrane, he bigger the membrane the more airflow there will be and the lower the cracking pressure will be, with the obvious drawback of having a larger valve.
owv_membrane_center_thickness and owv_separate_membrane_center_thickness : [default=0.53mm and 1mm] Thickness at the center of the membrane (respectively for the membrane insert and for the separate membrane), the thicker the membrane the higher the cracking pressure, but also the quicker the valve will close when airflow is stopped. The center thickness of the membrane has more impact on the bending force required to bend the whole membrane.
owv_membrane_side_thickness and owv_separate_membrane_side_thickness : [default=0.3mm and 5mm] Thickness at the side of the membrane (respectively for the membrane insert and for the separate membrane). The side thickness of the membrane has more impact on the bending force required to bend only the tip of the membrane, where most of the airflow actually passes.
License
"3D Printed parametric respiratory one-way-valve" (c) by @distorsion

"3D Printed parametric respiratory one-way-valve" is licensed under a
Creative Commons Attribution 4.0 International License.

You should have received a copy of the license along with this
work. If not, see <https://creativecommons.org/licenses/by/4.0/>.

