| 3Dfiles | ||
| manual | ||
| pictures | ||
| .gitignore | ||
| Readme.fr.md | ||
| Readme.md | ||
3D Printed israeli bandages
Pansement israelien imprimé en 3D (version francaise ici)
[English version automatically spell checked with minimum effort put into proofreading]
![]()
![]()
🇵🇸 Israeli bandages are a very efficient medical devices, that are used by first responders all around the world and save life each day. However we should remember that they were first conceived by the genocidal israeli army. Free Palestine. 🇵🇸
Please checkout the comparable (although way more developed and tested) GliaX/tourniquet project about 3D-printing tourniquet, which are used in the Gaza strip and in Ukraine.
Here is the printable page for this model.
1 - Design and usage
⚠️ WARNING : This bandage was designed based on existing israeli bandages, however it wasn't certified as a medical device and should thus be used based on your own jugment. ⚠️
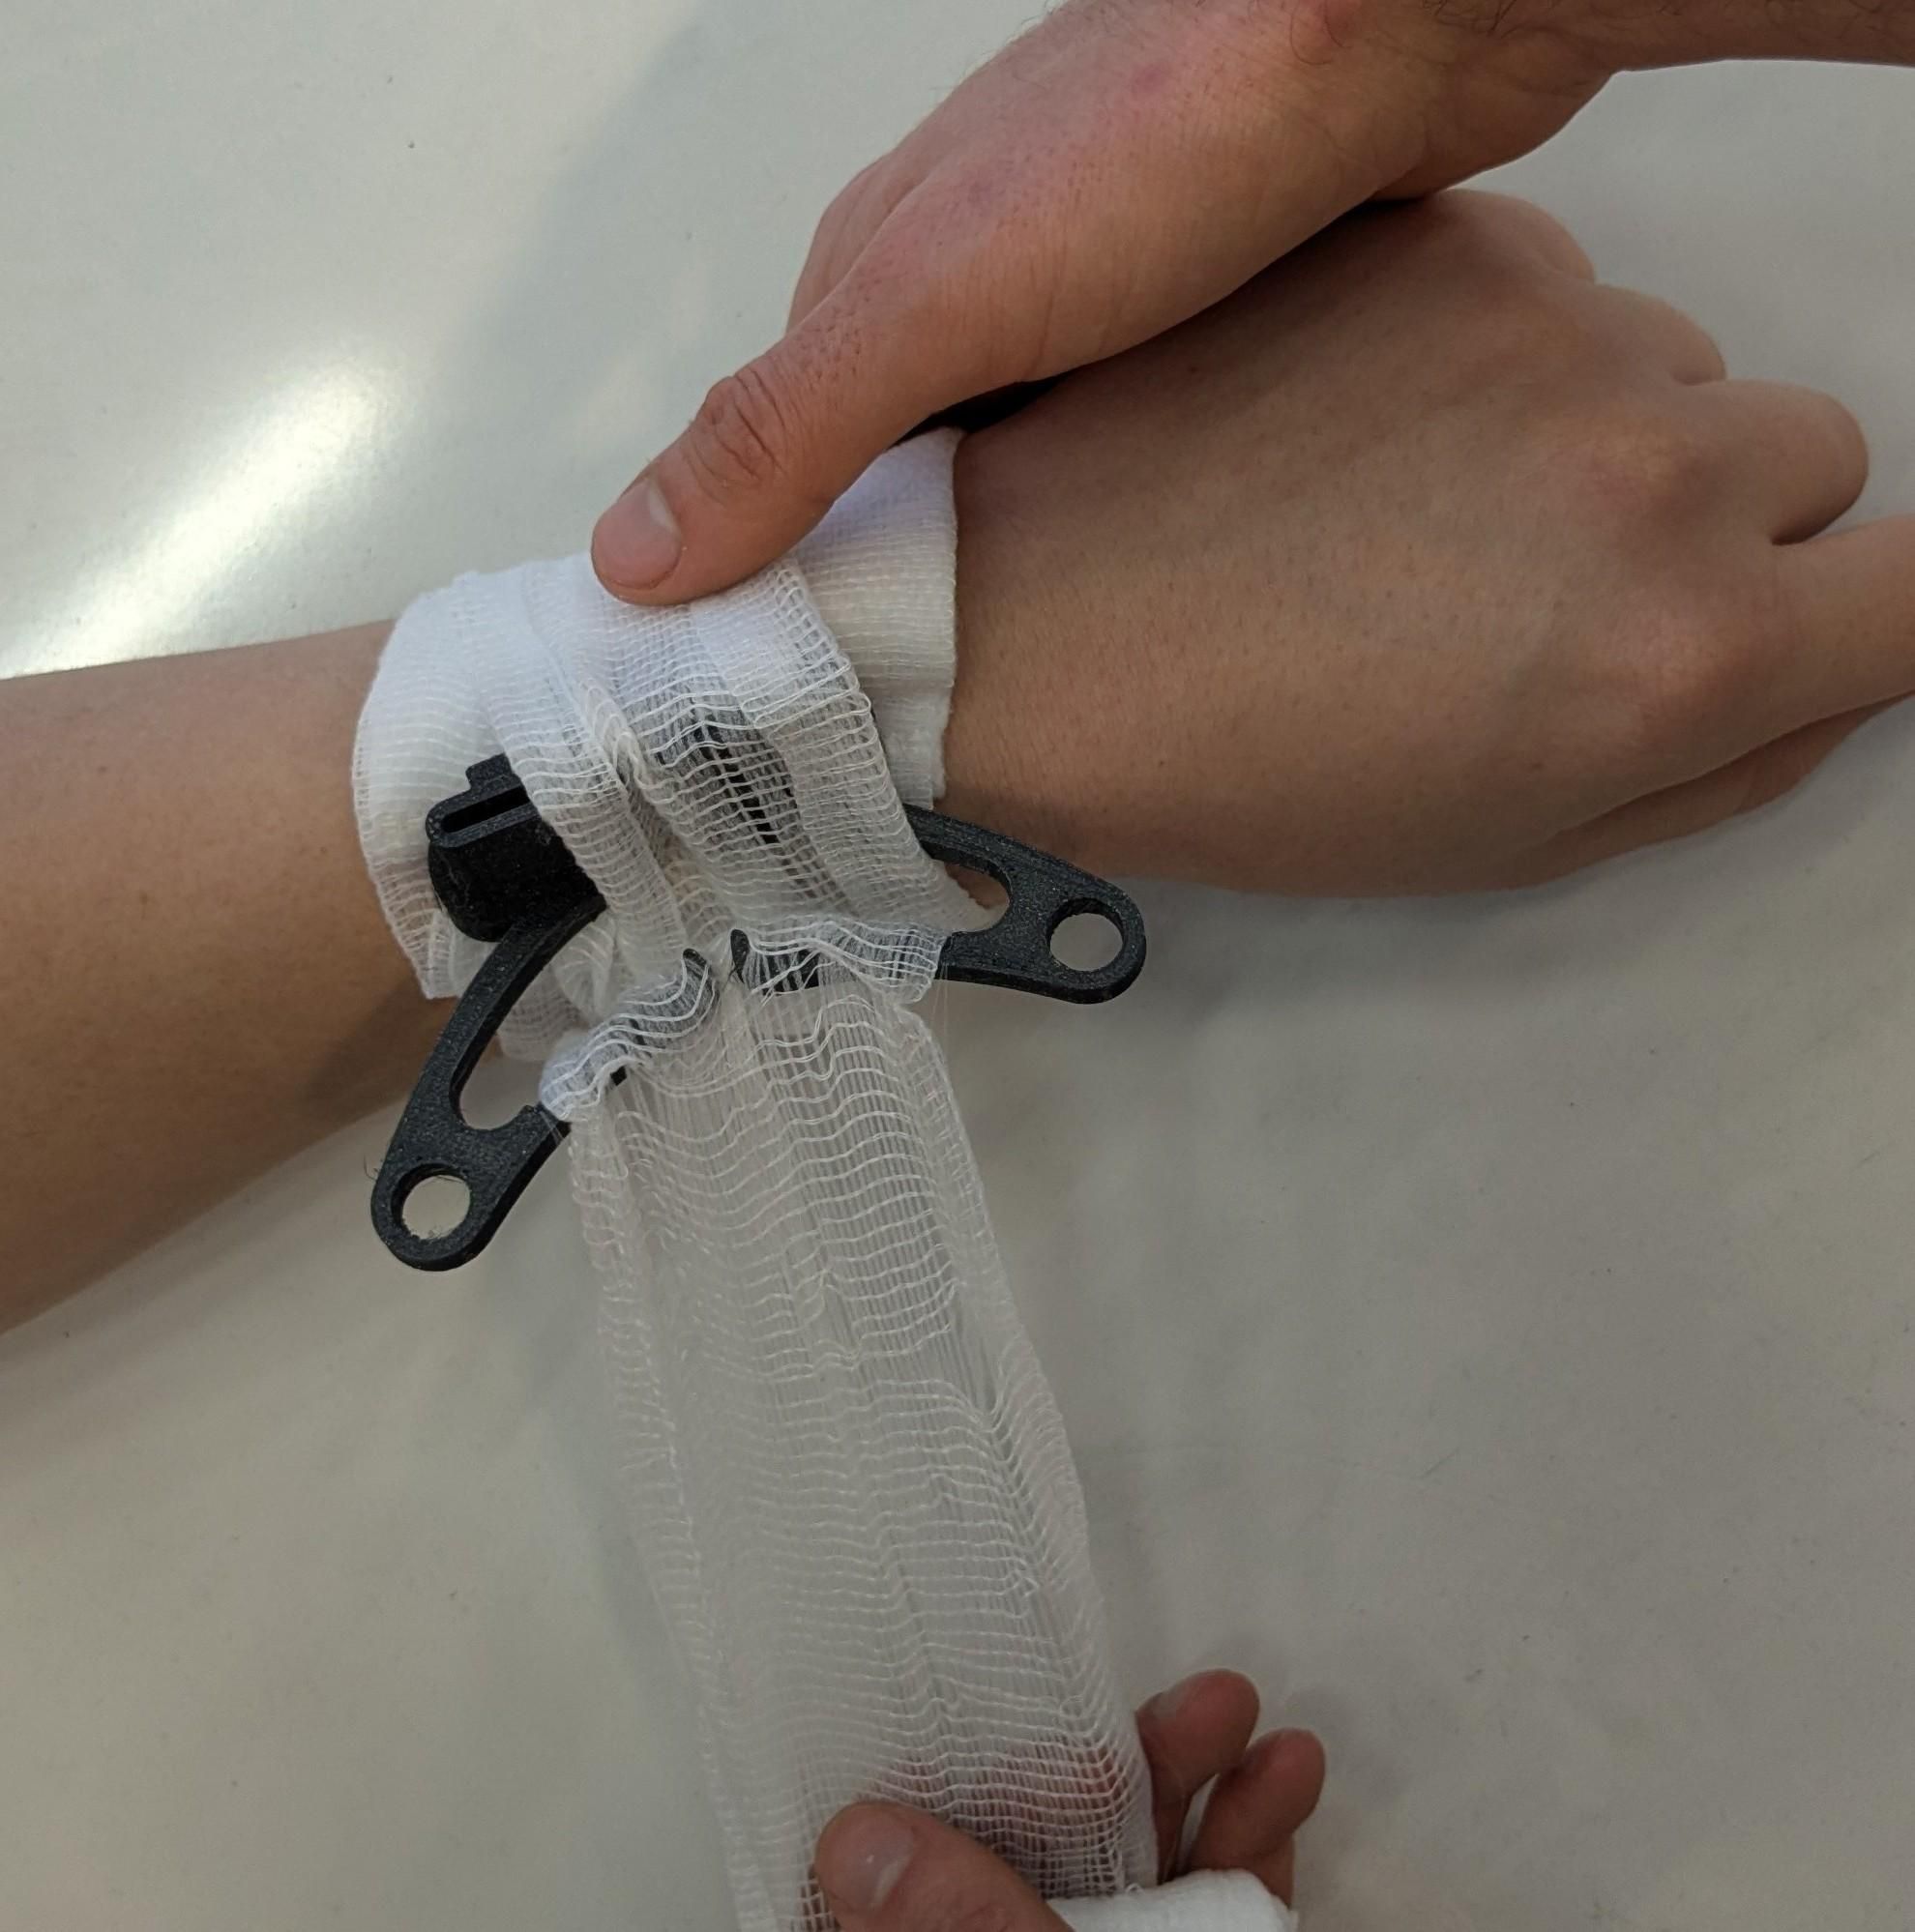
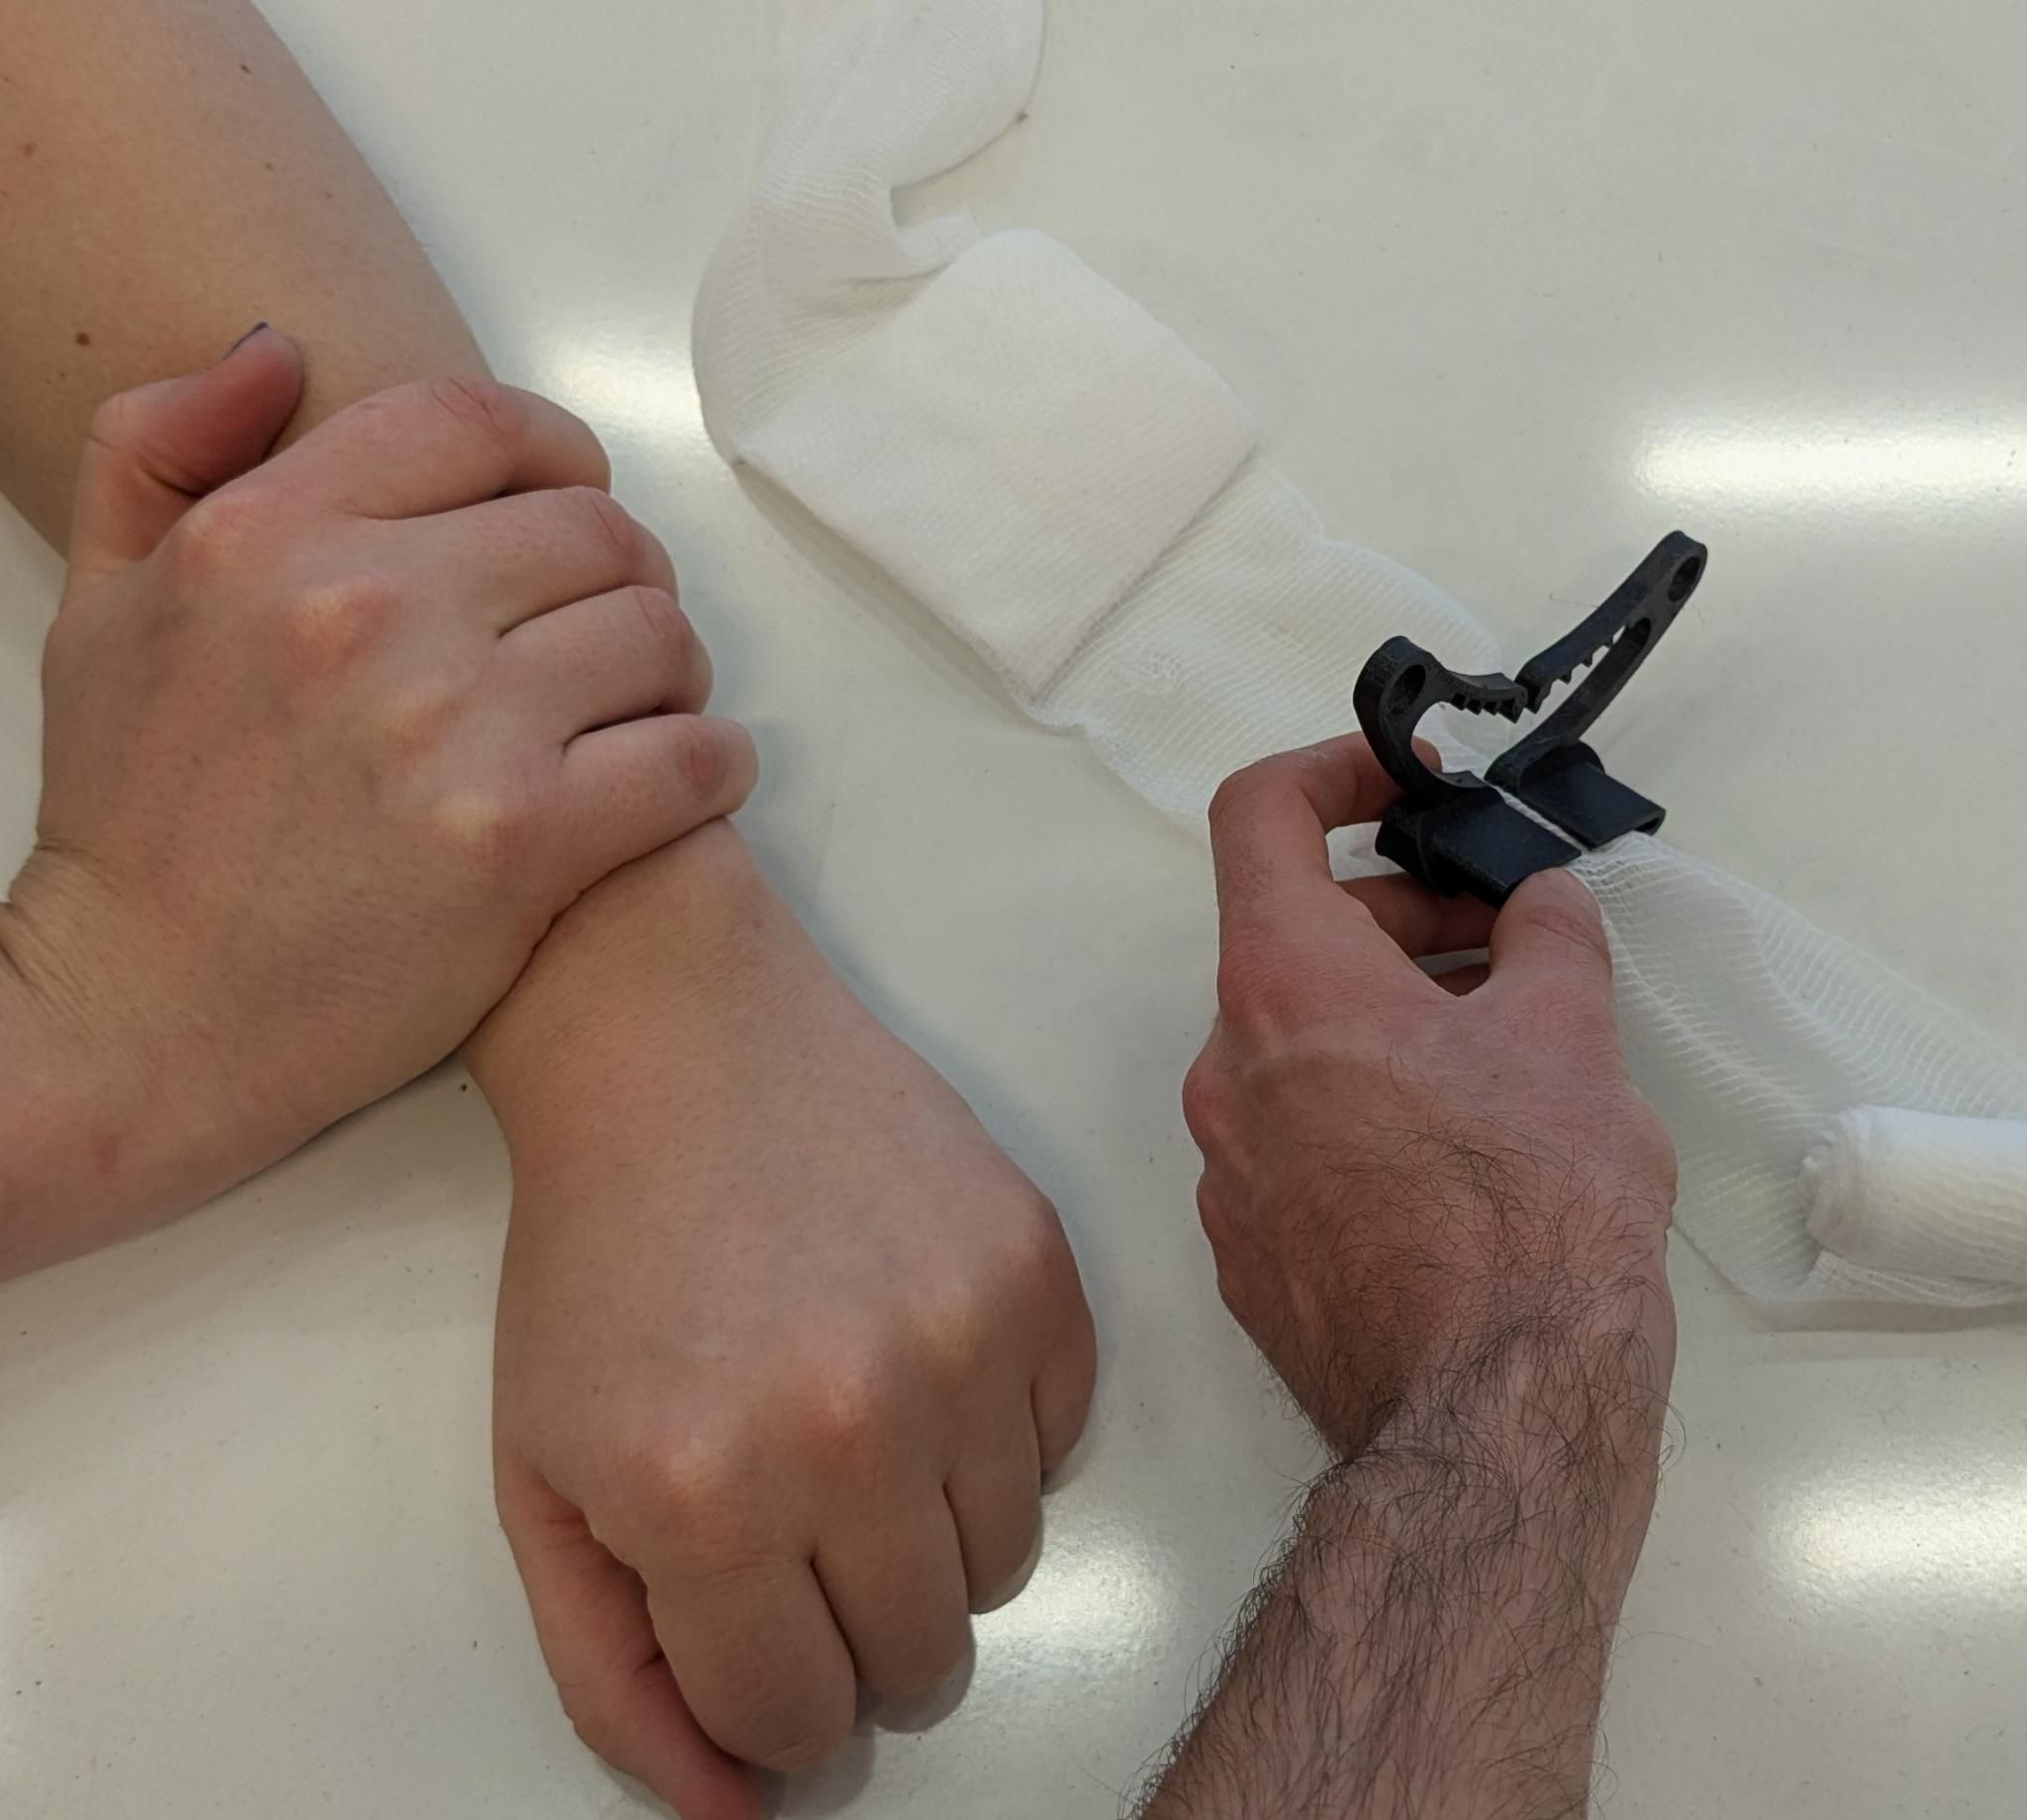 Step 1.a : Clip the lever on the compressive bandage, while holding pressure on the victim's wound (if they are conscious they can apply pressure themself). Step 1.b (alternative) : Apply the bandage to the wound and do a single turn around the victim's limb. (using velcro) : if you are using Velcro, you can attach the lever directly over the wound now. |
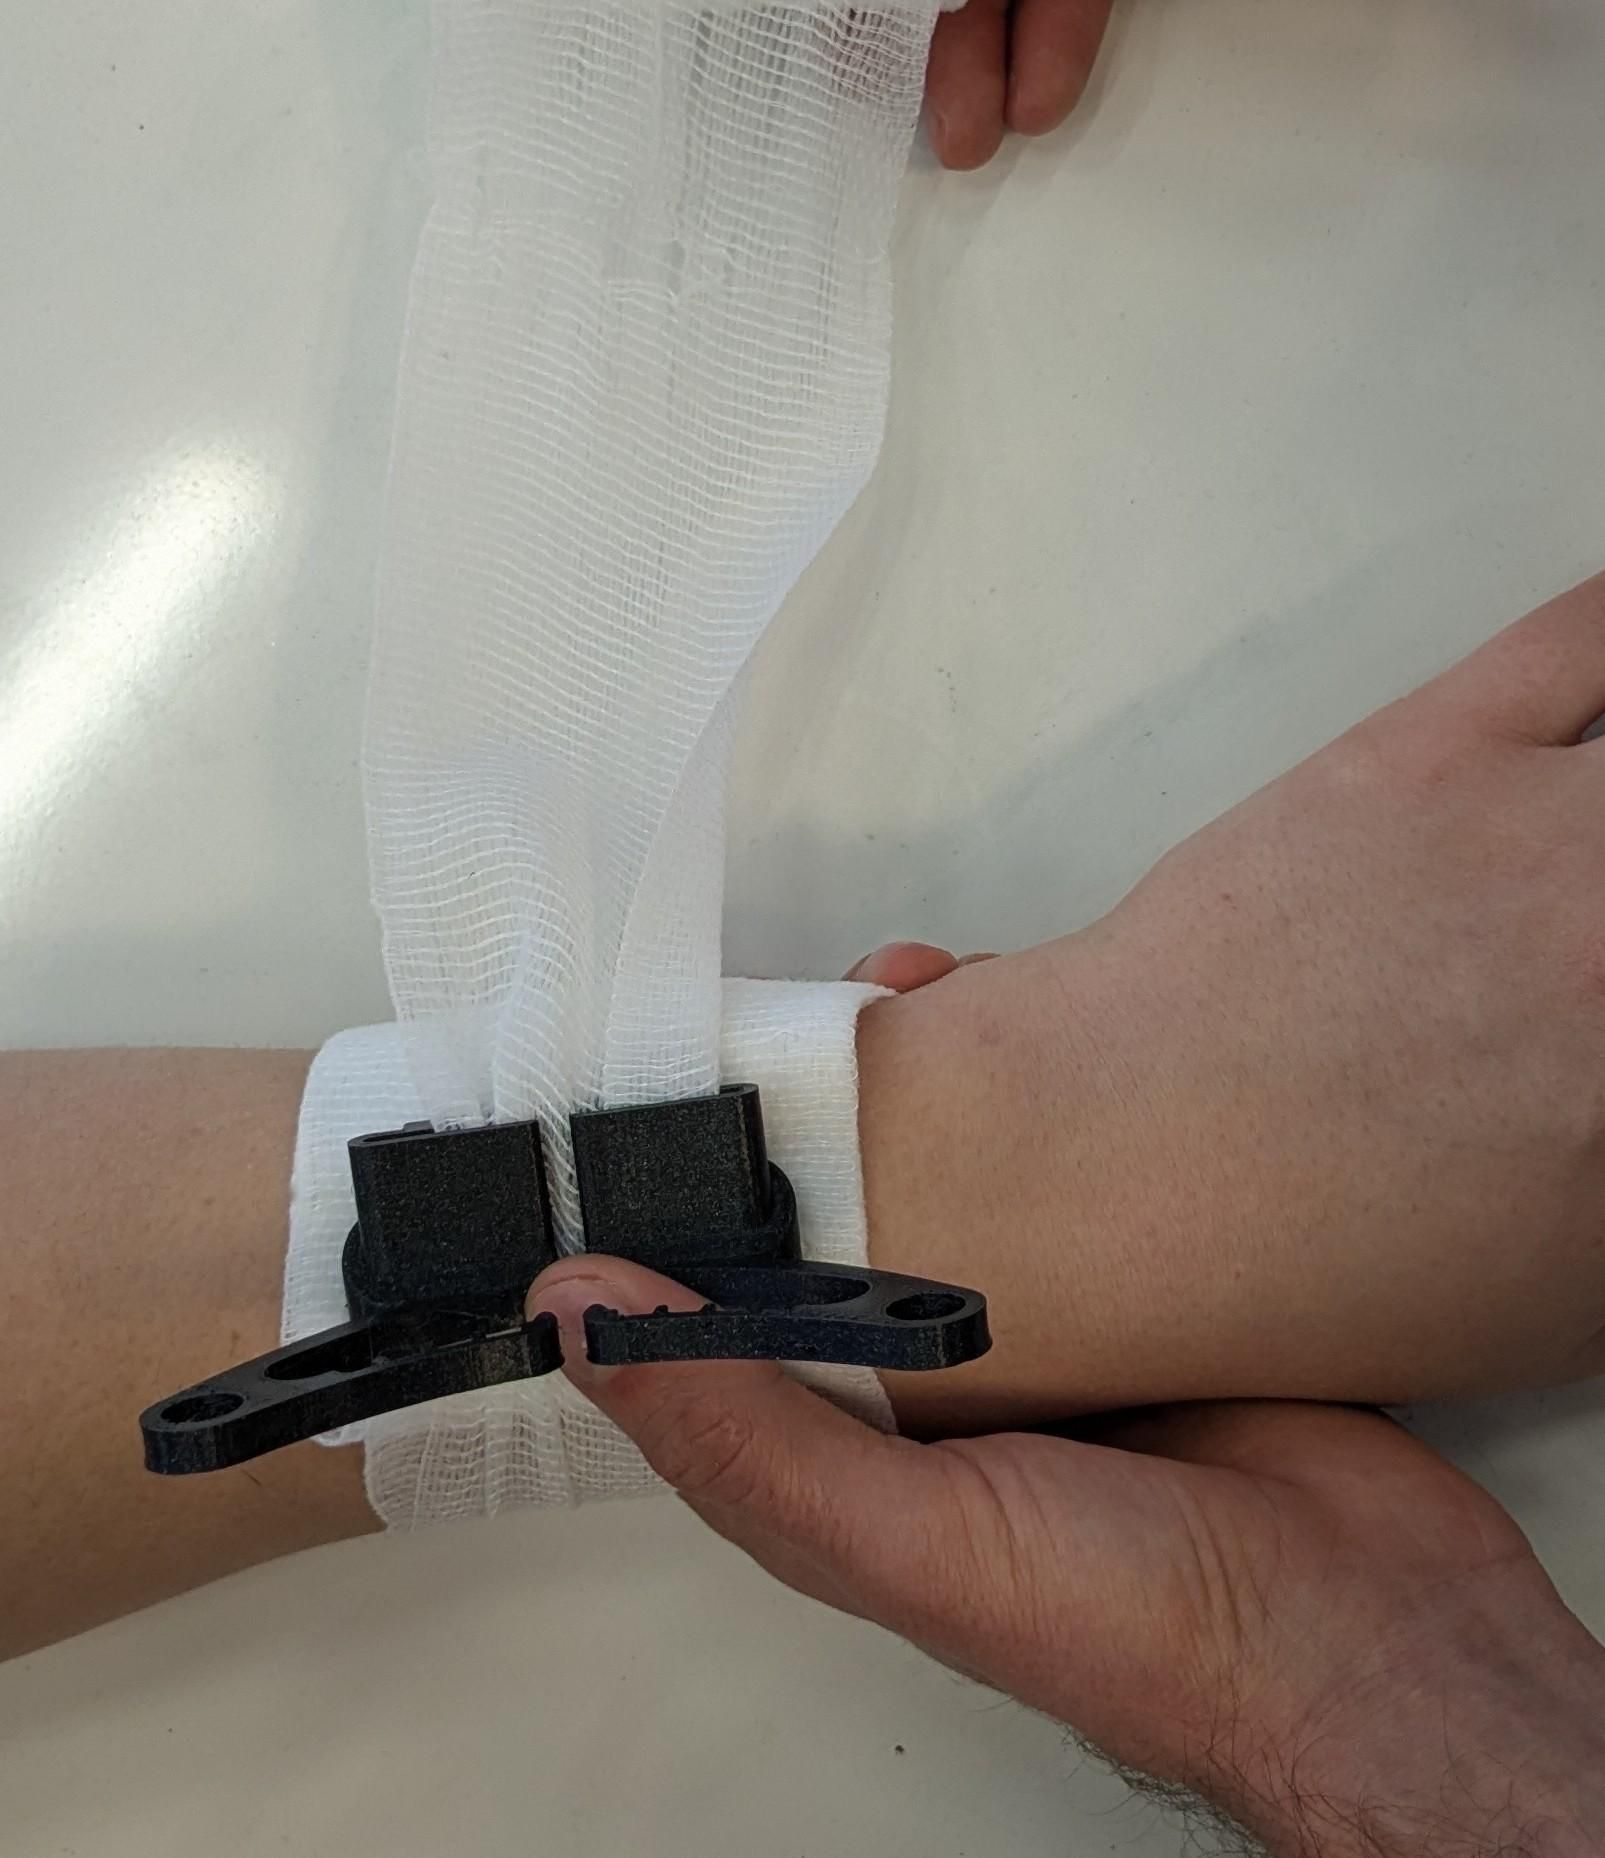 Step 2.a : Do a single turn around the victim's limb and slide the lever over the wound. Step 2.b (alternative) : Put the lever directly over the wound before finishing the first turn and pass the bandage through the inner passage. |
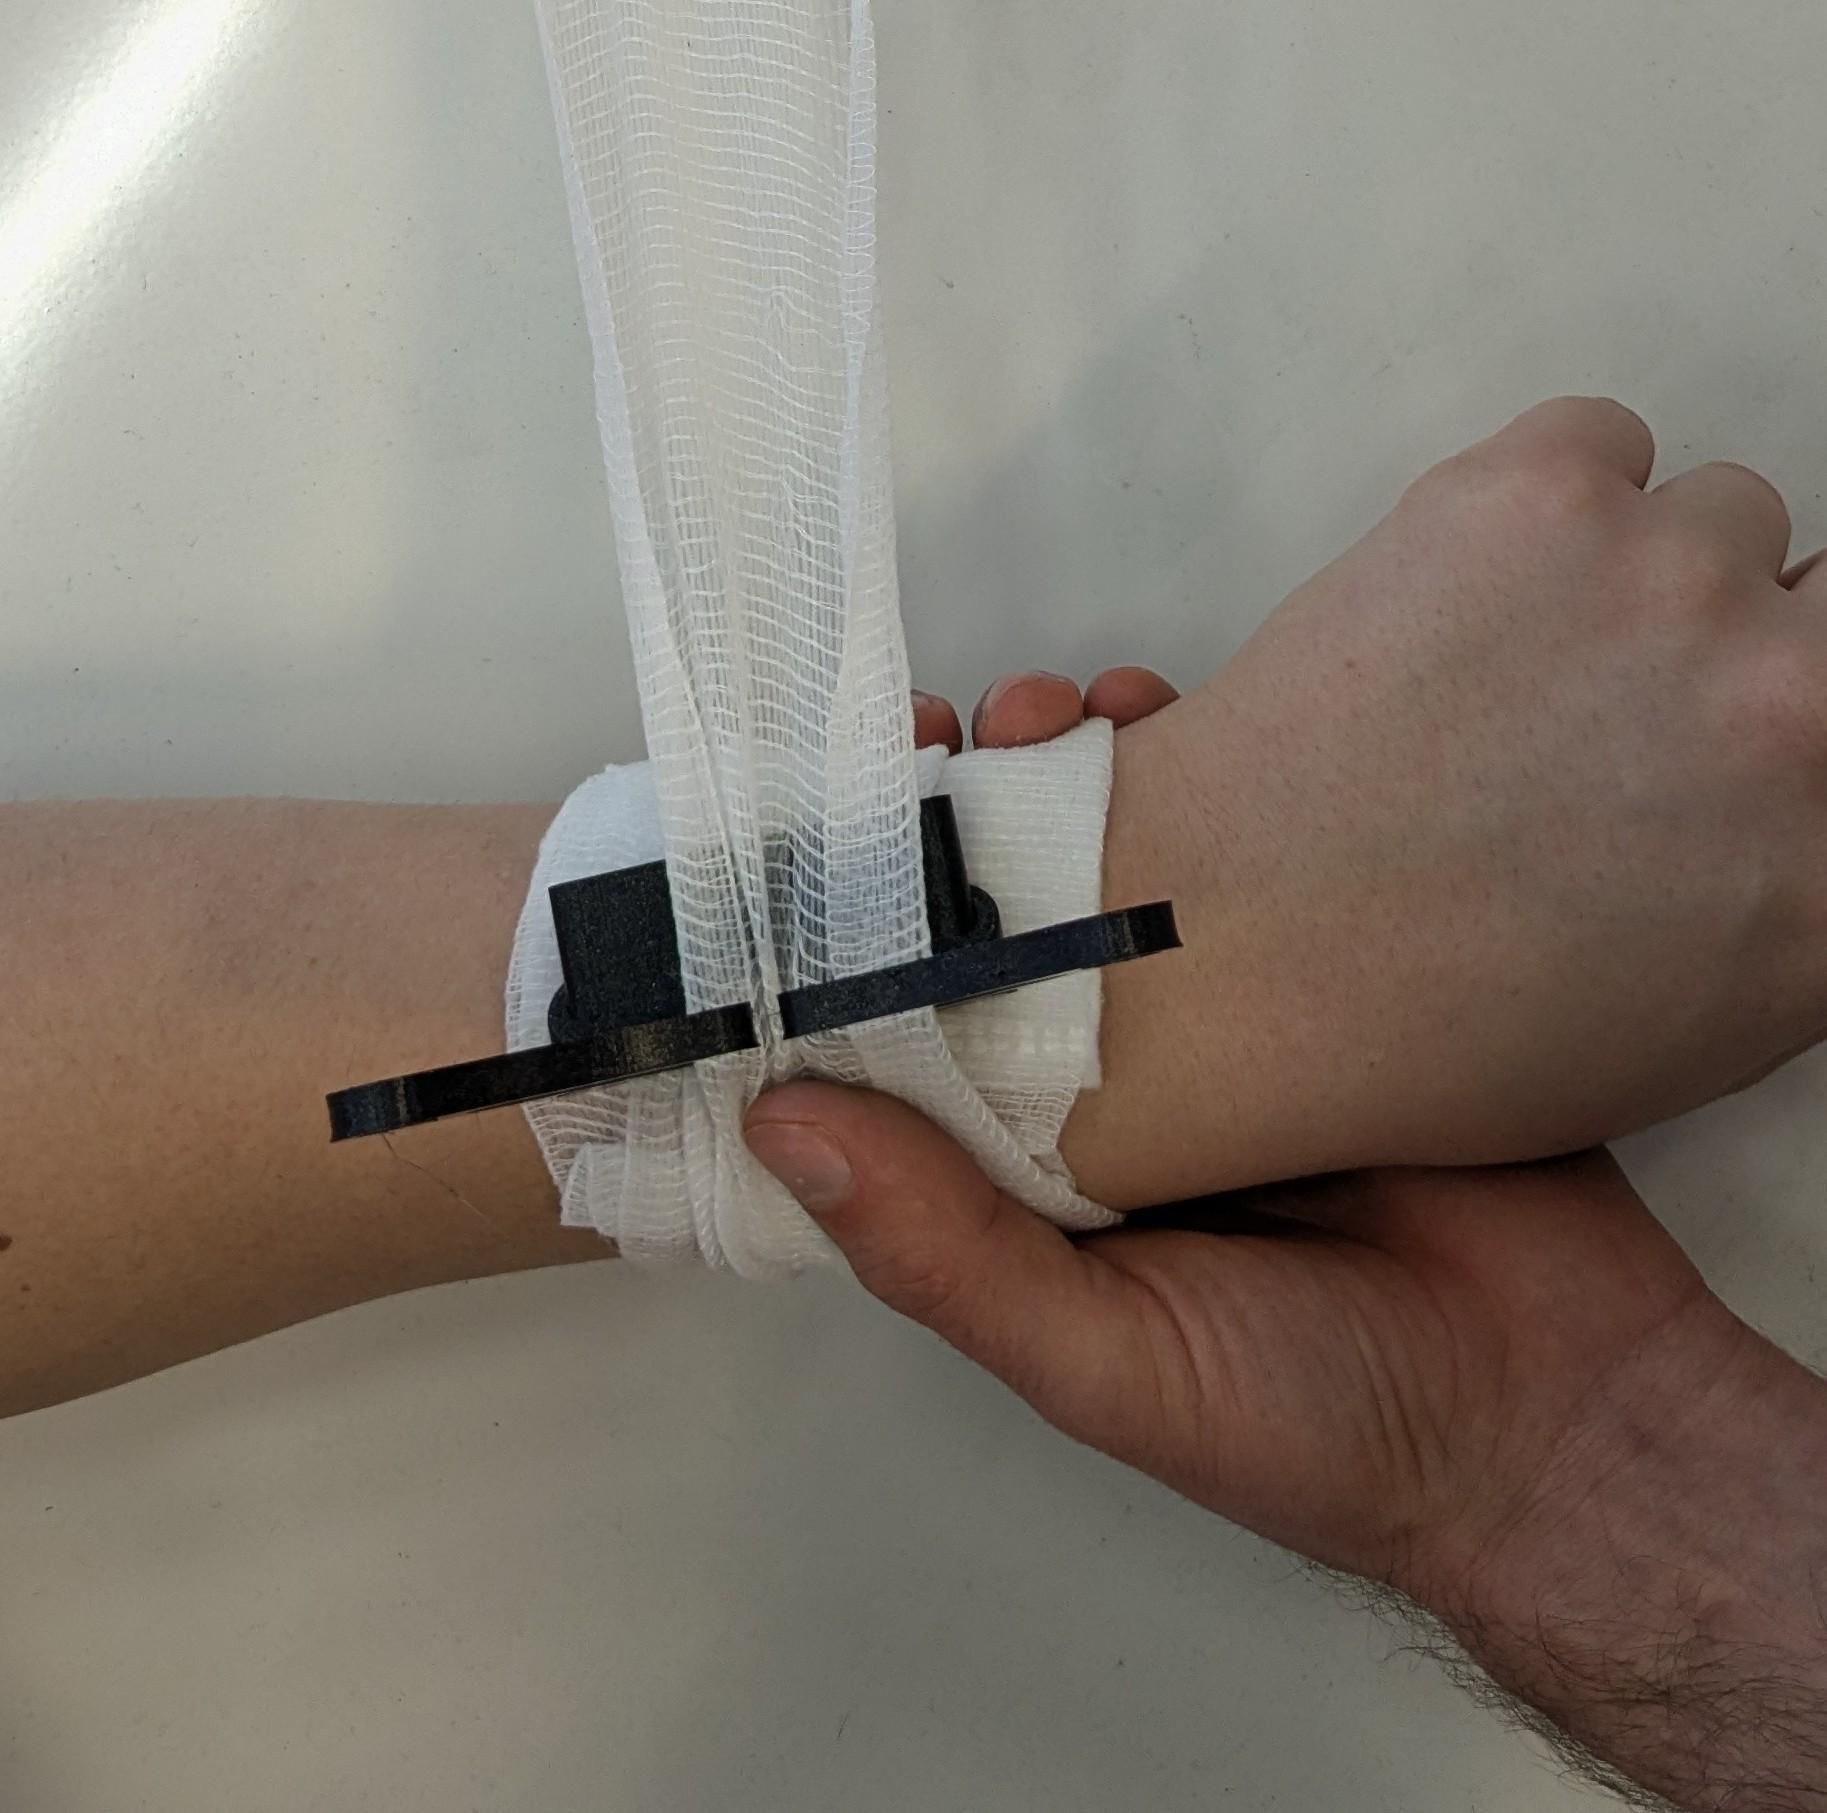 Step 3 : Do another turn around the limb and pass through the normal lever passage. |
 Step 4 : You can optionally do an additional turn, and then you have to start widing the other way around the limb to flip the lever back to generate pressure. ⚠️ Insure the lever flips 90° and not less, you can help it flip all the way by hand. ⚠️ |
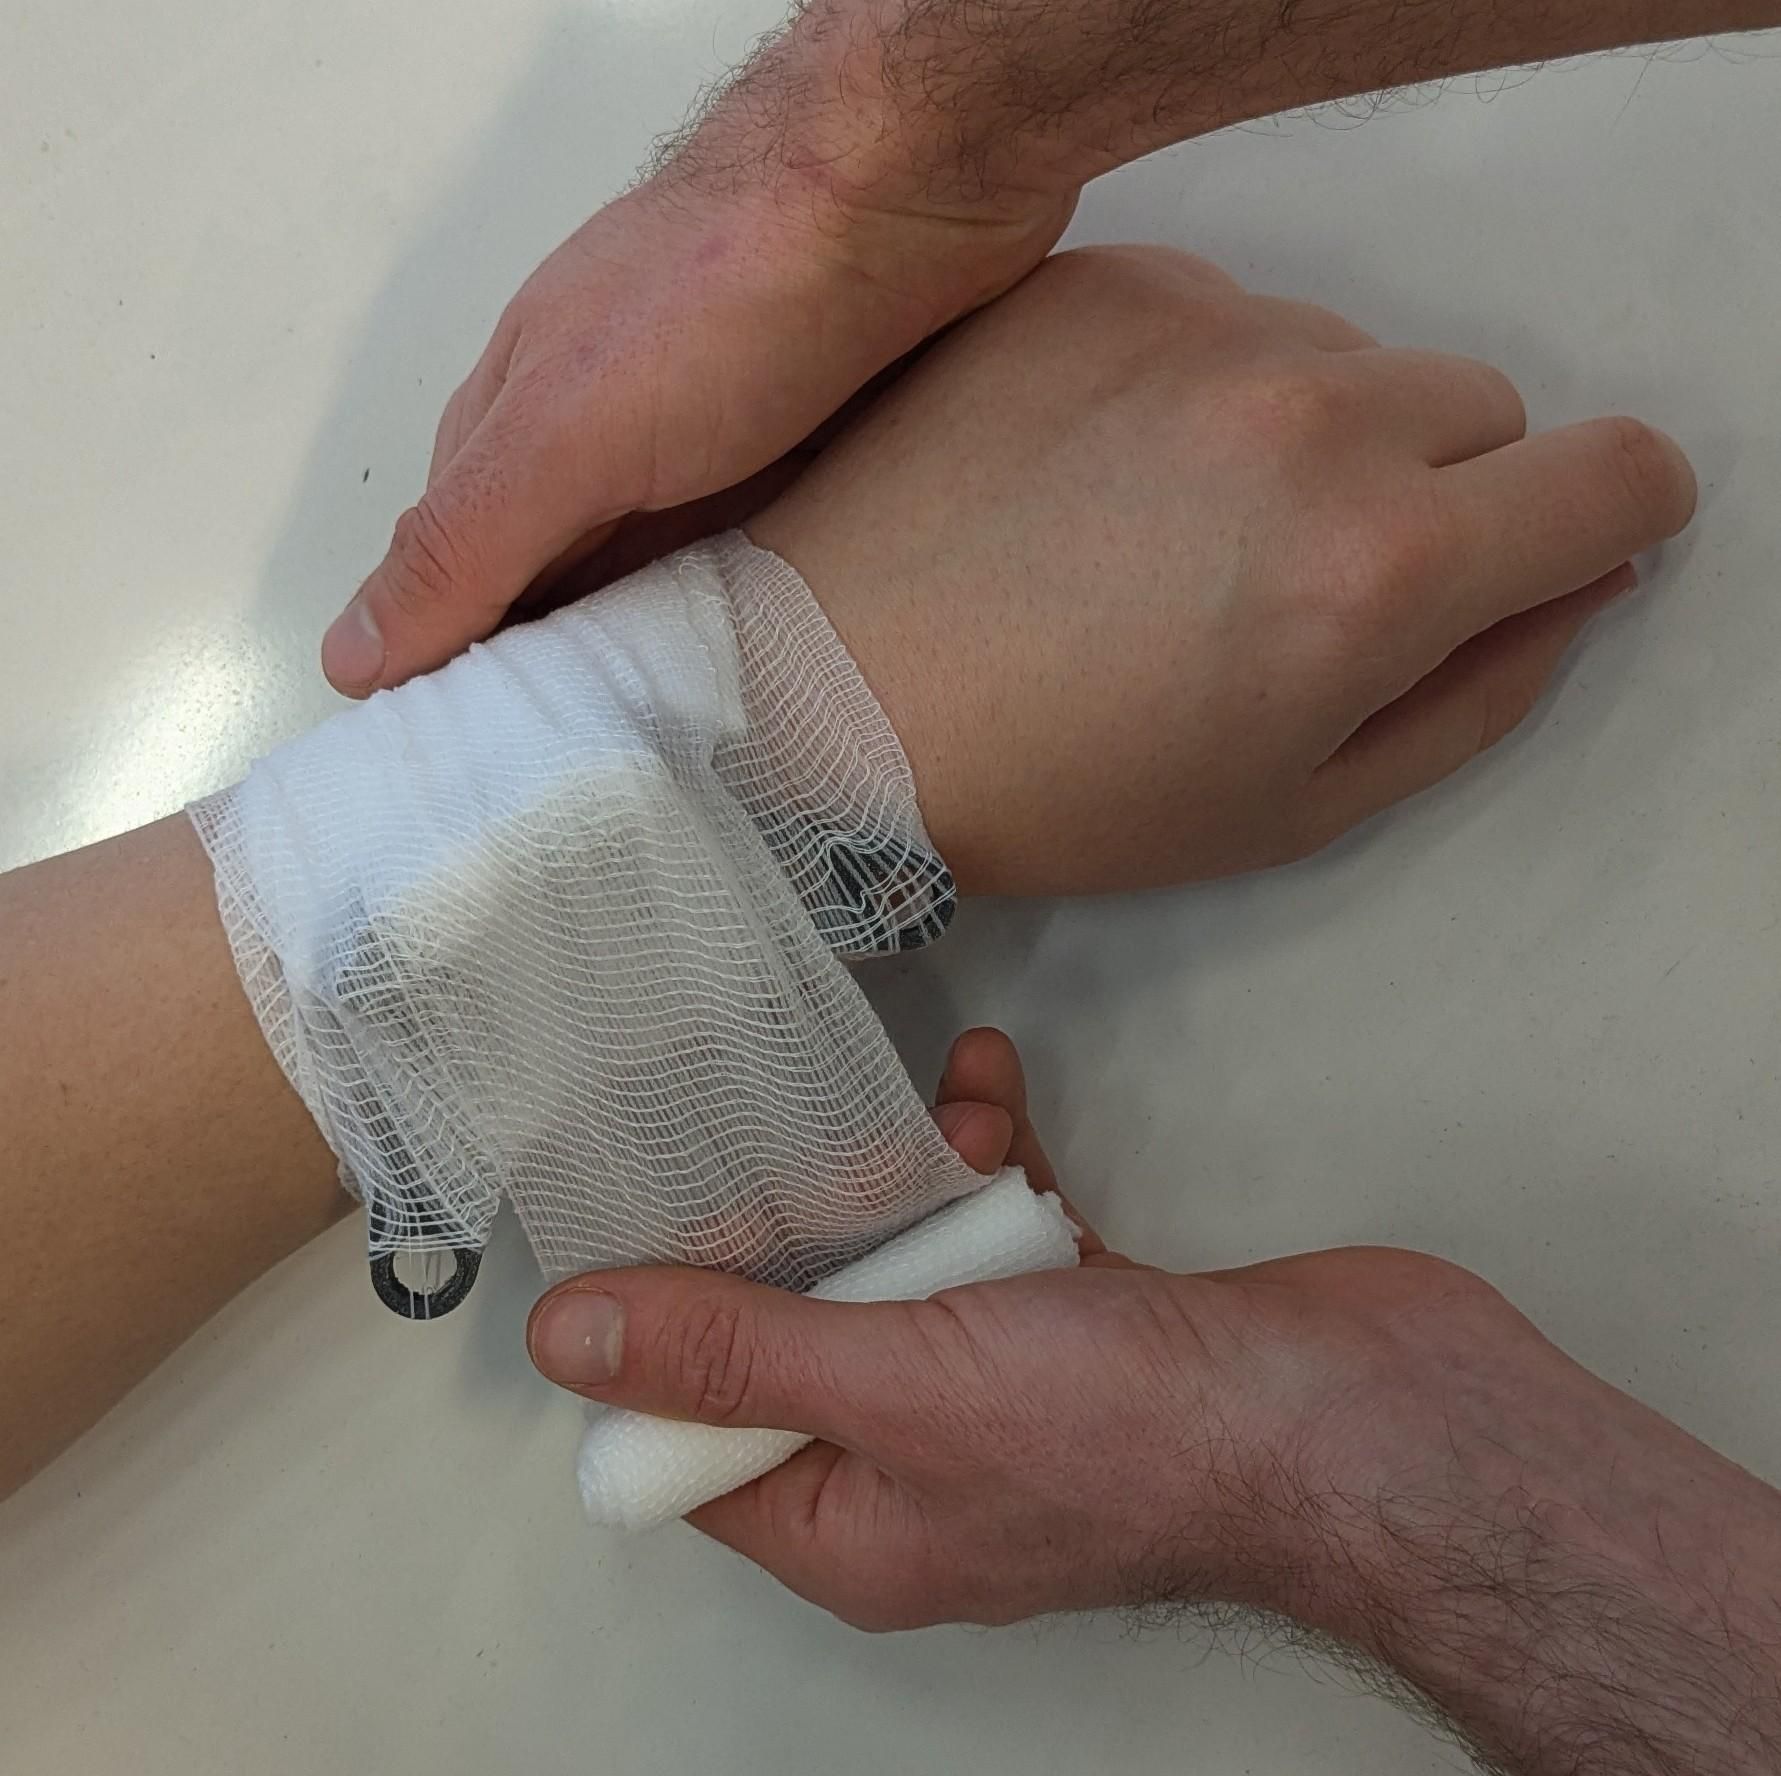 Step 5 : Keep winding around the limb to firmly hold the lever into place. |
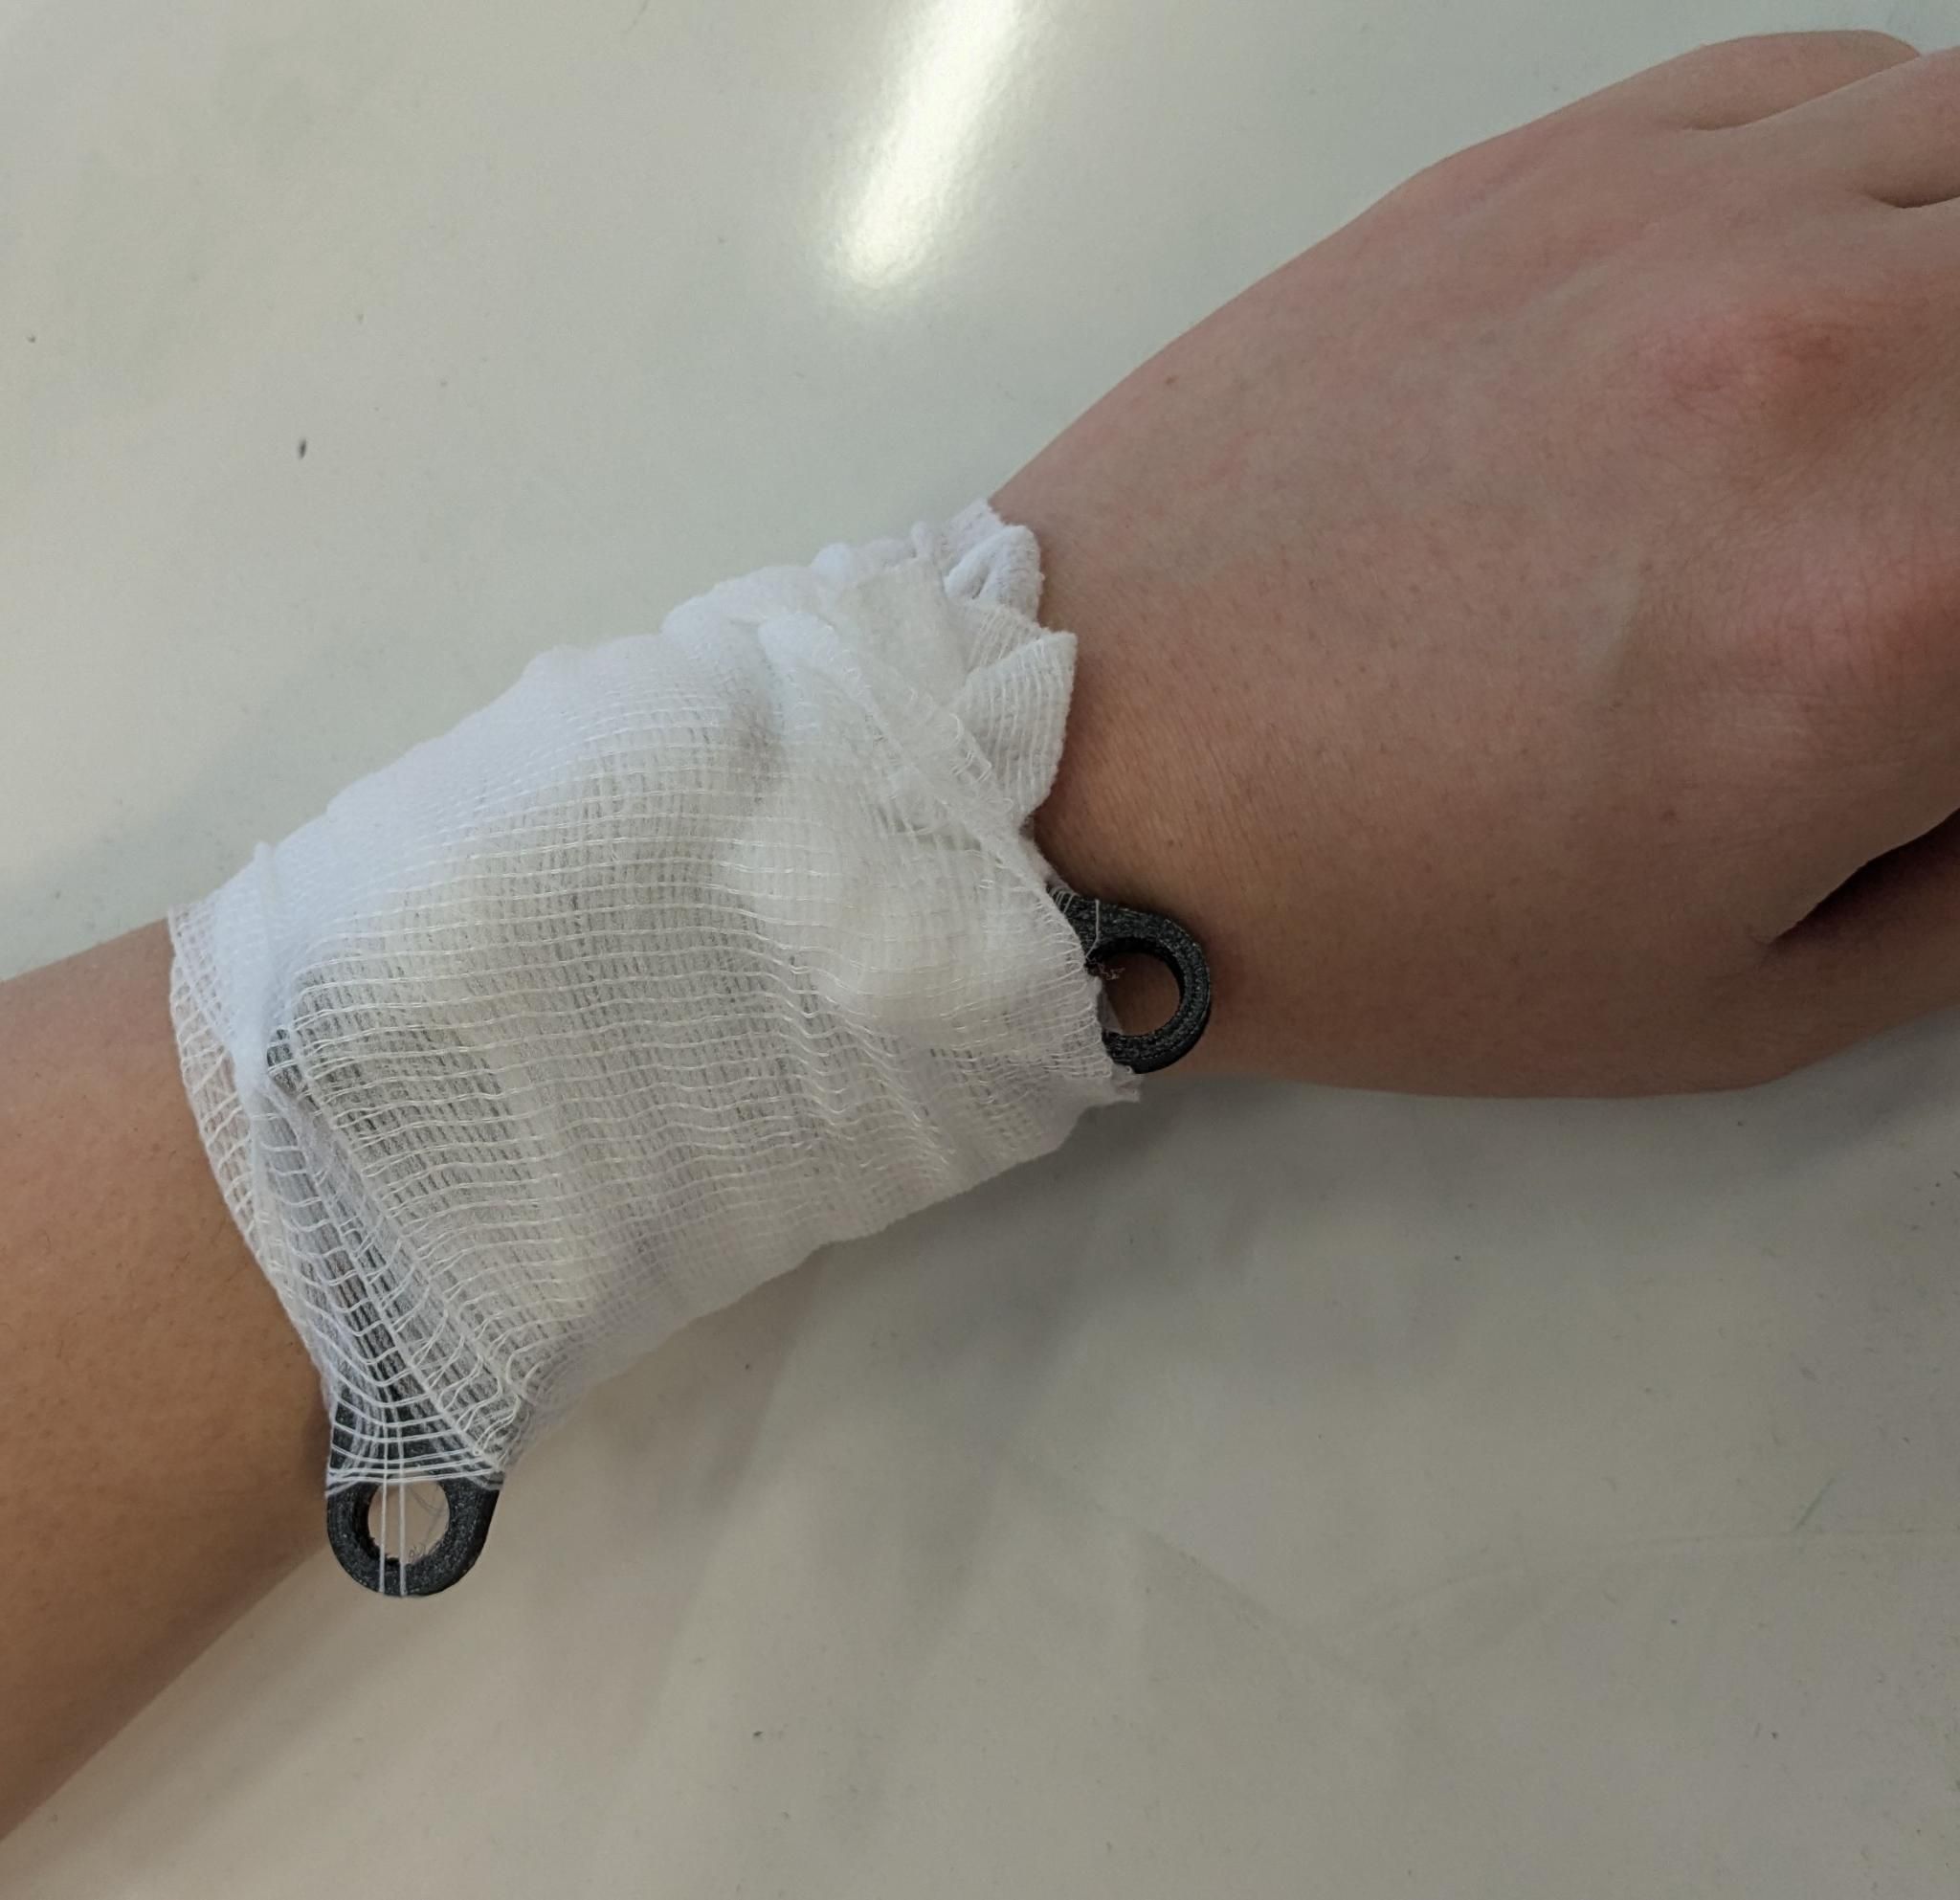 Step 6 : Once you have finished you can simply fix the end of the bandage into a tight part of the bandage to hold it in place. |
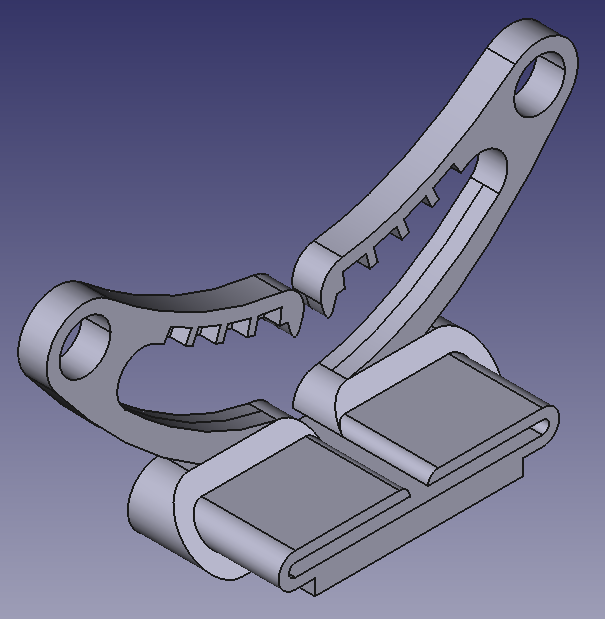
This repo is a simple proposition of a 3D-printed israeli bandage (or "lever"), that is made to be clipped right at the time of application on any normal compression bandage (preferably homeostatic) - which can be found for multiple time cheaper than an equivalent israeli bandage (there are some available for around 2€ at medisafe.fr compared to around 10€ for a comparable israeli bandage).
It is also possible to use this lever with a compress and a band, but this would make the application more complicated. Before carrying this lever we would recommend you train using any simple and cheap bandage or just band, to be sure you are able to use it efficiently.
There is a narrow clip at the bottom of the passage of the lever, which you can use to secure it after doing a single turn around the limb of the victim, so the bandage you are using can then be used as any bought israeli bandage.
The lever can either be clipped before applying the bandage to the victim (as recommended, and shown in the above table), then sliding the lever over the wound after a single turn ; or can be added after doing the first turn. In any case, the lever should "point" toward the winding direction (thus away from the wound) so that pressure is applied when the lever is flipped back.
1.a - Self application
Compared to a standard israeli bandage, it is both significantly harder and slower to apply this lever to ones self. It takes more time as you have to additionally clip the lever to the bandage, and it is harder as clipping requires two free hands, thus making it hard to self apply to upper limbs.
This does not prevent you from using our bandage (always according to your own judgment), but if you are printing it for use on other people and you are in a context where you may be injured, you can buy normal israeli bandages to use on yourself if needed, hoping not to have to use them.
It is also possible to use Velcro as explained in the next section, which would allow self-application to be almost as simple as with a normal israeli bandage. Further testing has to be done to validate this.
1.b - Optionally using a Velcro
It is possible to add a small piece of self-adhesive Velcro (the "hook" face) to the bottom of the lever, thus allowing you to attach the lever onto the bandage directly on top of the wound ; and then follow the instructions laid out in section 1. This would make application very similar to a normal israeli bandage, with the only difference being the inner passage that should be used during the first turn to securely hold the lever in place (as the Velcro shouldn't be trusted for that). Note that the velcro is just made to stick to the bandage for a few second during the first turn around the victim's limb.
⚠️ If you use Velcro, check that the velcro will stick to the model of bandage you will be using ! ⚠️
2 - Testing and validation
2.a - Lab testing
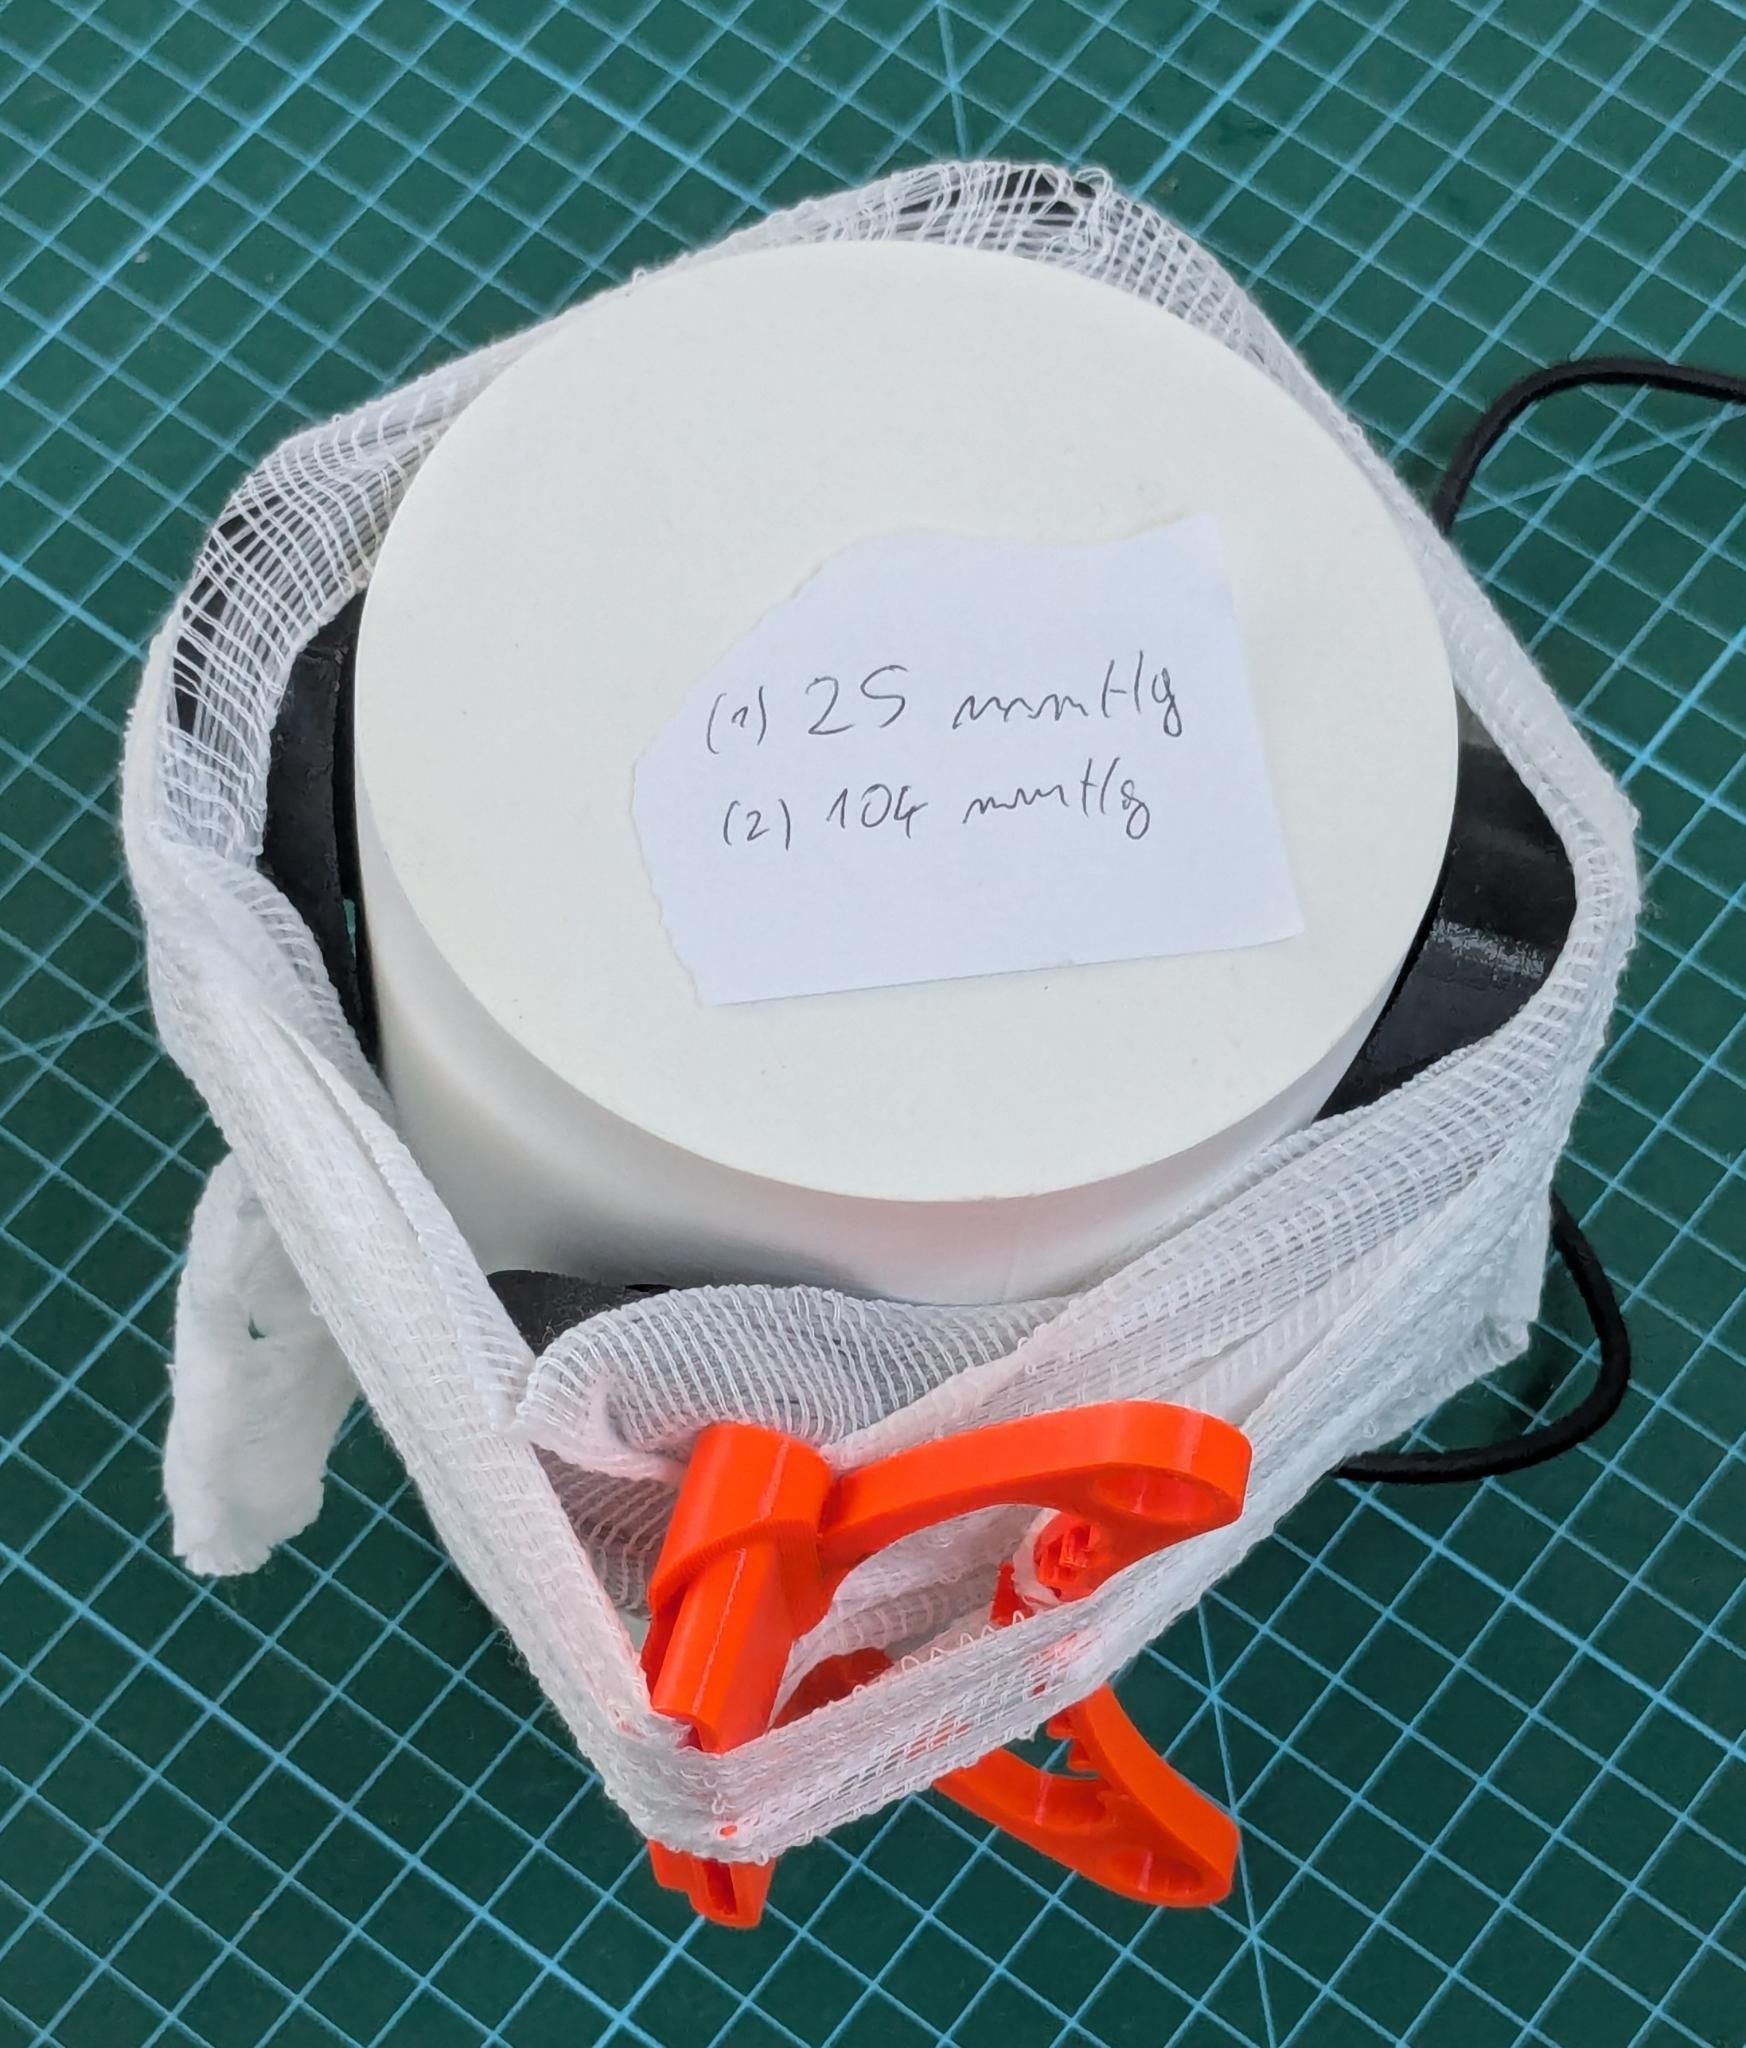
We tested our design using an open source tourniquet tester (Distributed manufacturing of an open-source tourniquet testing system, march 2023, Dawei Liu et al.).
During our preliminary testing we found a pressure at the wound (2) of 100 mmHg (we estimate a realistic manual compression of 180 mmHg to 200 mmHg from our testing and the literature), and of 25 mmHg not at the wound (1) (the literature site around 30 mmHg with a normal dressing).
In comparison the best pressure at the wound that we could achieve with a generic off the shelf israeli bandage was 110 mmHg at the wound, although depending on the application it could be as low as 80mmhg, and 40 mmHg to 70 mmHg not at the wound (90° offset around the limb). We note however that applying the off the shelf bandage was far easier than our design. In general on the tourniquet tester applying tourniquets and bandages is harder than on a limb due to the 4 contact patch not being flush with the body of the tester, but here the off the shelf bandage was almost as easy to apply as on an actual limb, whereas our lever was quite tricky to install.
2.b - Field testing
There is an extended guide on field testing found at manual/field-testing-guide.md or as a printable pdf file at manual/field-testing-guide.pdf.
If you are able to field test this design, don't hesitate to contact us at distorsion@systemli.org !
We are considering doing some field testing as street medics during demonstration, and will update the design and this readme with any new information.
We think that the following questions should be answered during field testing :
- Is the lever easy and fast to apply compared to a normal israeli bandage ?
- Does the lever allow more pressure to be applied to the wound compared to a normal bandage, without acting as a tourniquet ?
- Is our application technique good, and can it be improved ?
- Is the inner passage enough to hold the lever into place ? Even without using a Velcro ?
- Does the Velcro make the application faster and/or easier ?
- Is self-application possible with the Velcro ? Is it possible without ?
3 - 3D printing

You can print this israeli bandage lever from the 3Dfiles/israeli_bandage.stl file, with the "lever" part pointing up so that you don't need to use any support material.
Using default parameter the lever is quite strong and thus resilient to different printing parameters and materials. We would recommend to use a strong material like PETG rather than PLA, and not using too low of an infill ratio (> 20%).
4 - Parameters
If you want to changes the parameters of this design, you can edit the Freecad file 3Dfiles/israeli_bandage_v3.FCStd, which is fully parametric, with parameters present in the Spreadsheet.
License
"3D Printed israeli bandages" (c) by @distorsion

"3D Printed israeli bandages" is licensed under a
Creative Commons Attribution 4.0 International License.

You should have received a copy of the license along with this
work. If not, see <https://creativecommons.org/licenses/by/4.0/>.