5.5 KiB
3D Printed israeli bandages - Field testing guide
More information is available at https://git.deuxfleurs.fr/distorsion/3D-printed-israeli-bandage, and if ou need to don't hesitate to contact us by email at distorsion@systemli.org. We are interested in suggestions and feedback !
1 - Before field testing
⚠️ WARNING : This bandage was designed based on existing israeli bandages, however it wasn't certified as a medical device and should thus be used based on your own judgment. ⚠️
Before starting field testing, we would suggest you test out the lever to be able to use it sufficiently, and so you can judge by yourself if you believe that you can safely use it.
We can't choose for you if field testing (especially in your particular context) is doable without putting people in danger. We want you to judge that using your experience and expertise.
2 - What to buy
To use this lever, we suggest you use single piece bandage, preferably hemostatic, although you can also use a compress with a band.
The bandage has to be long (preferably 2 meters or more for sage around limbs, and 4 meters or more for usage at the neck or at junctional area) to be usable efficiently with the bandage.
You can also buy adhesive velcro to add to the bottom of levers (see the variants section bellow).
3 - Application procedure
See next page.
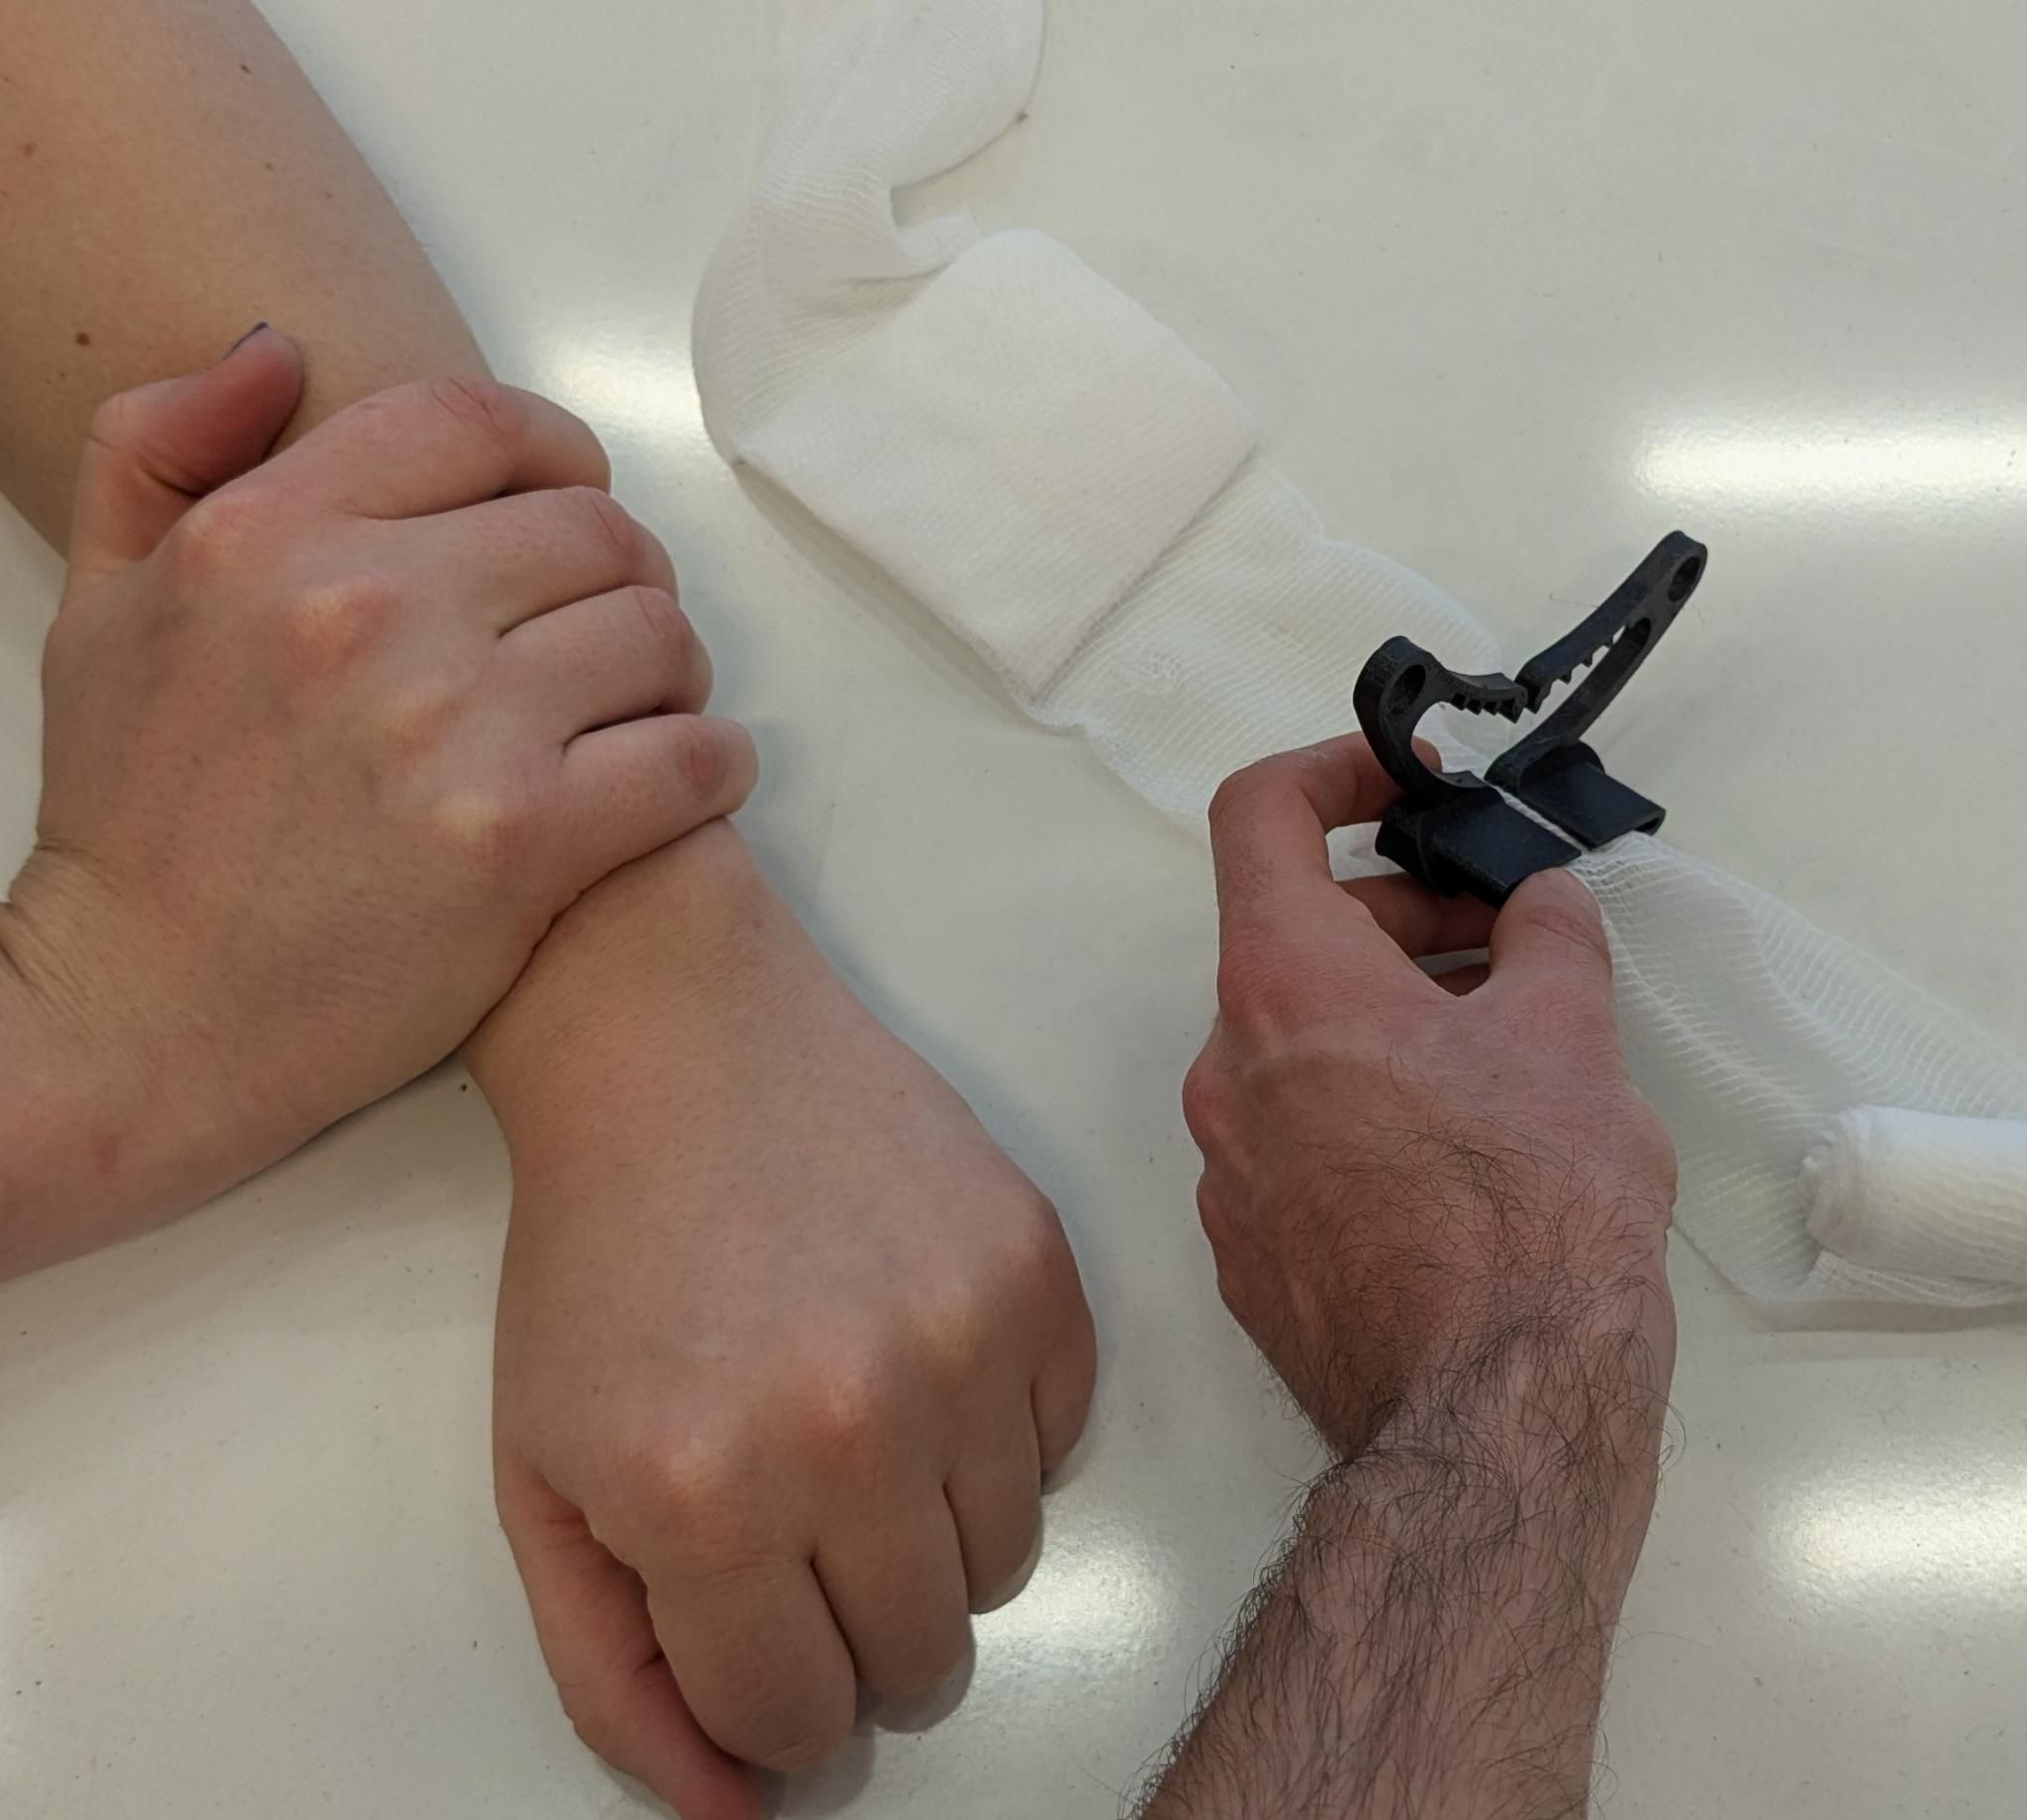 Step 1.a : Clip the lever on the compressive bandage, while holding pressure on the victim's wound (if they are conscious they can apply pressure themself). Step 1.b (alternative) : Apply the bandage to the wound and do a single turn around the victim's limb. (using velcro) : if you are using Velcro, you can attach the lever directly over the wound now. |
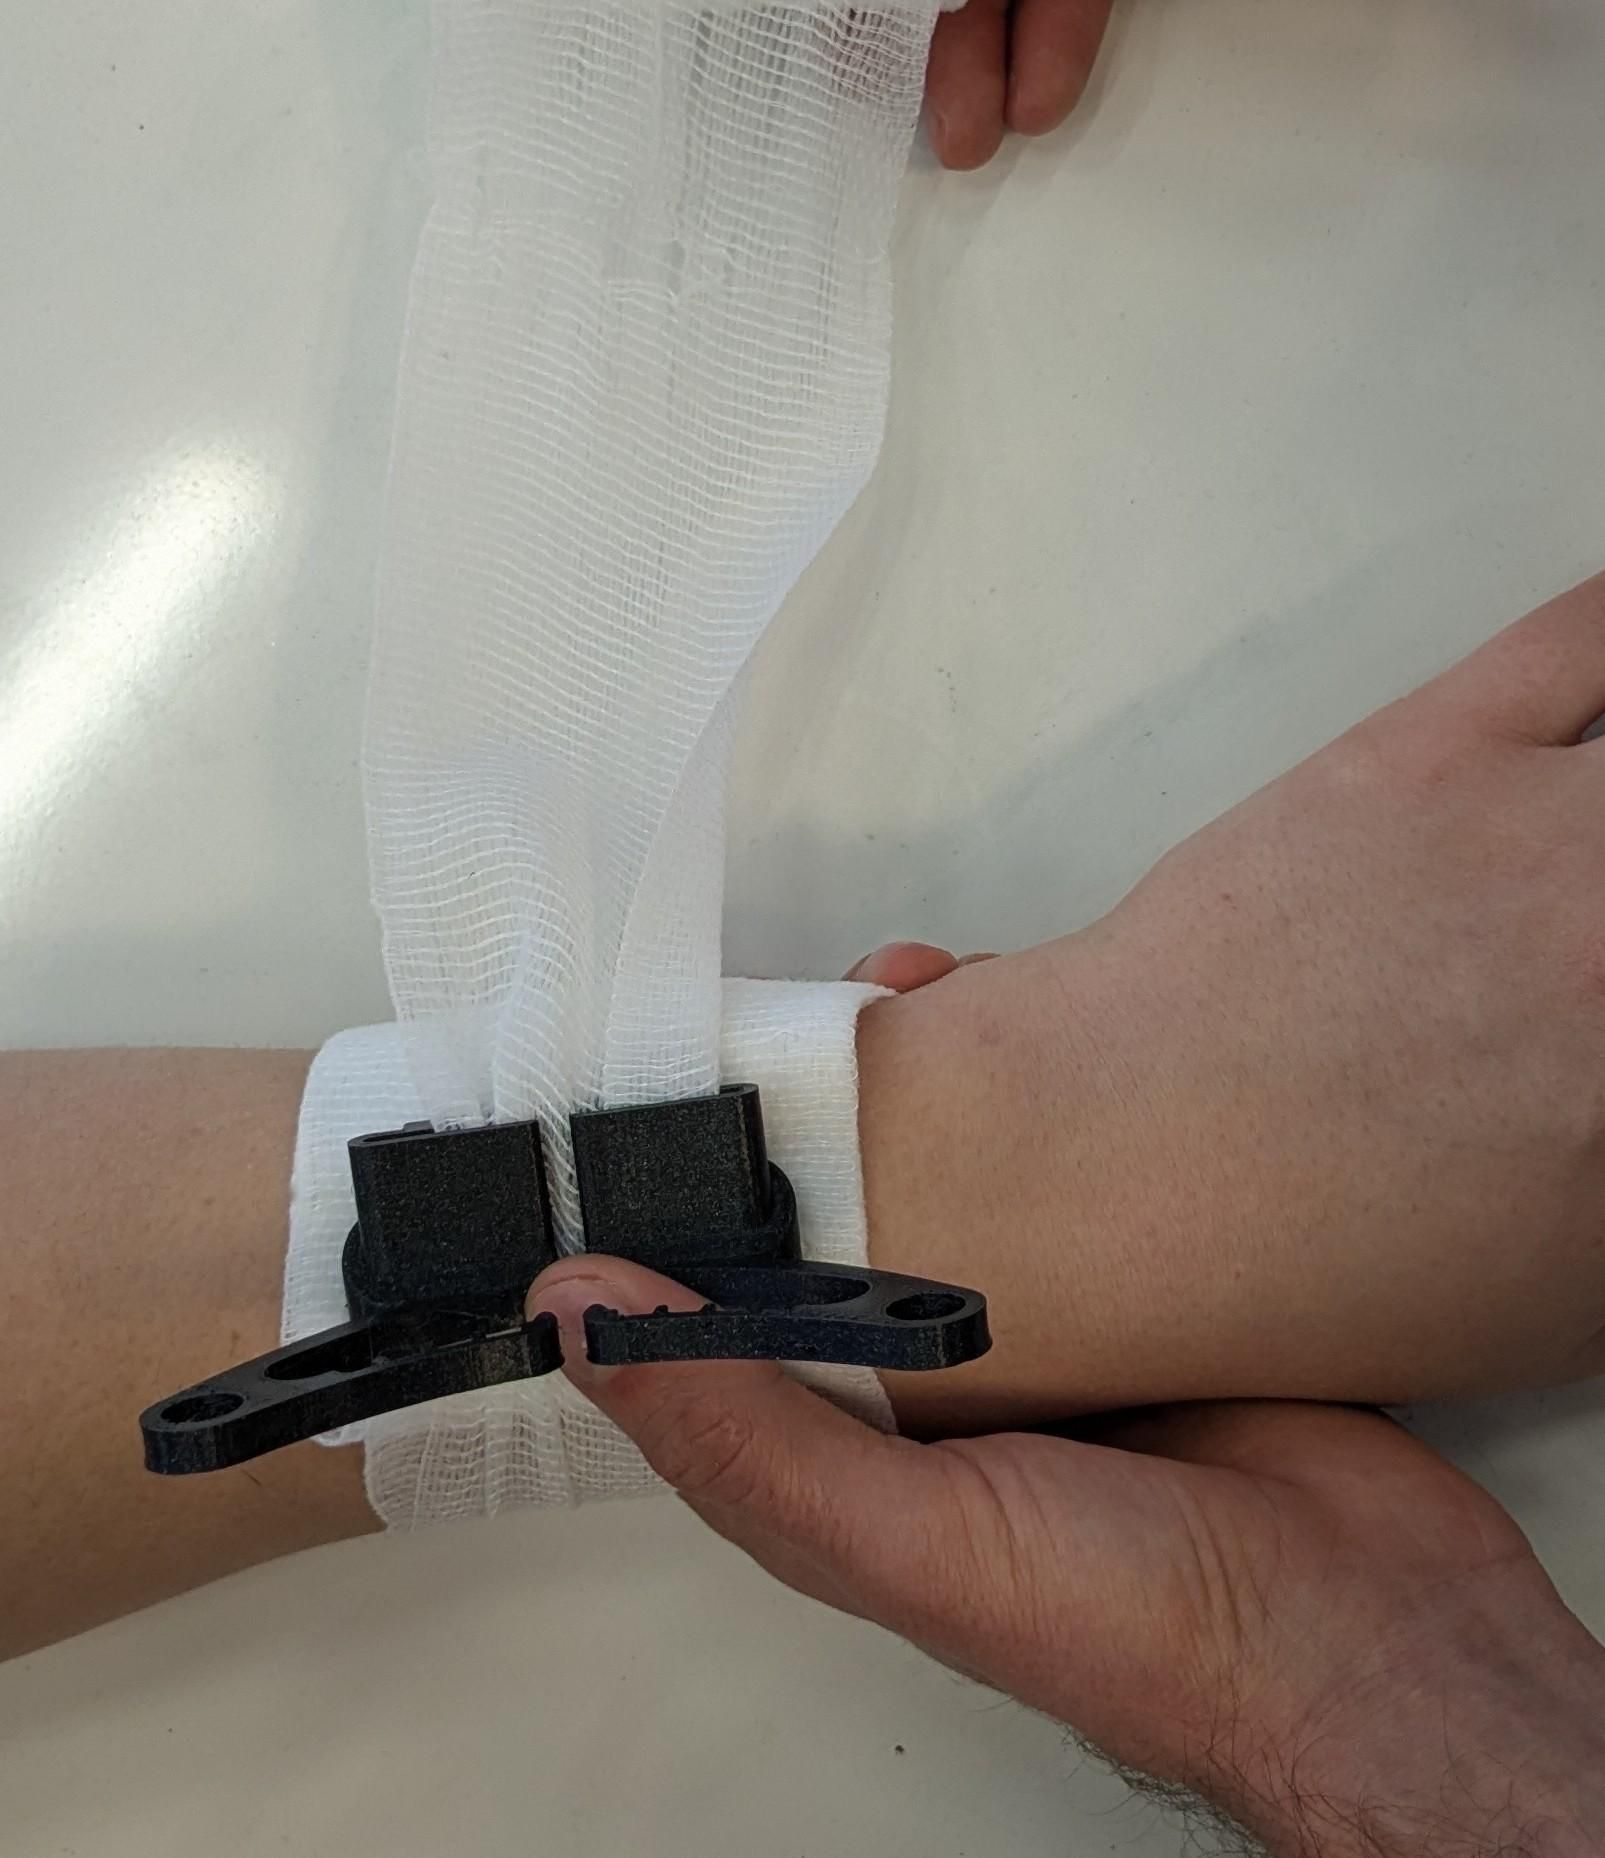 Step 2.a : Do a single turn around the victim's limb and slide the lever over the wound. Step 2.b (alternative) : Put the lever directly over the wound before finishing the first turn and pass the bandage through the inner passage. |
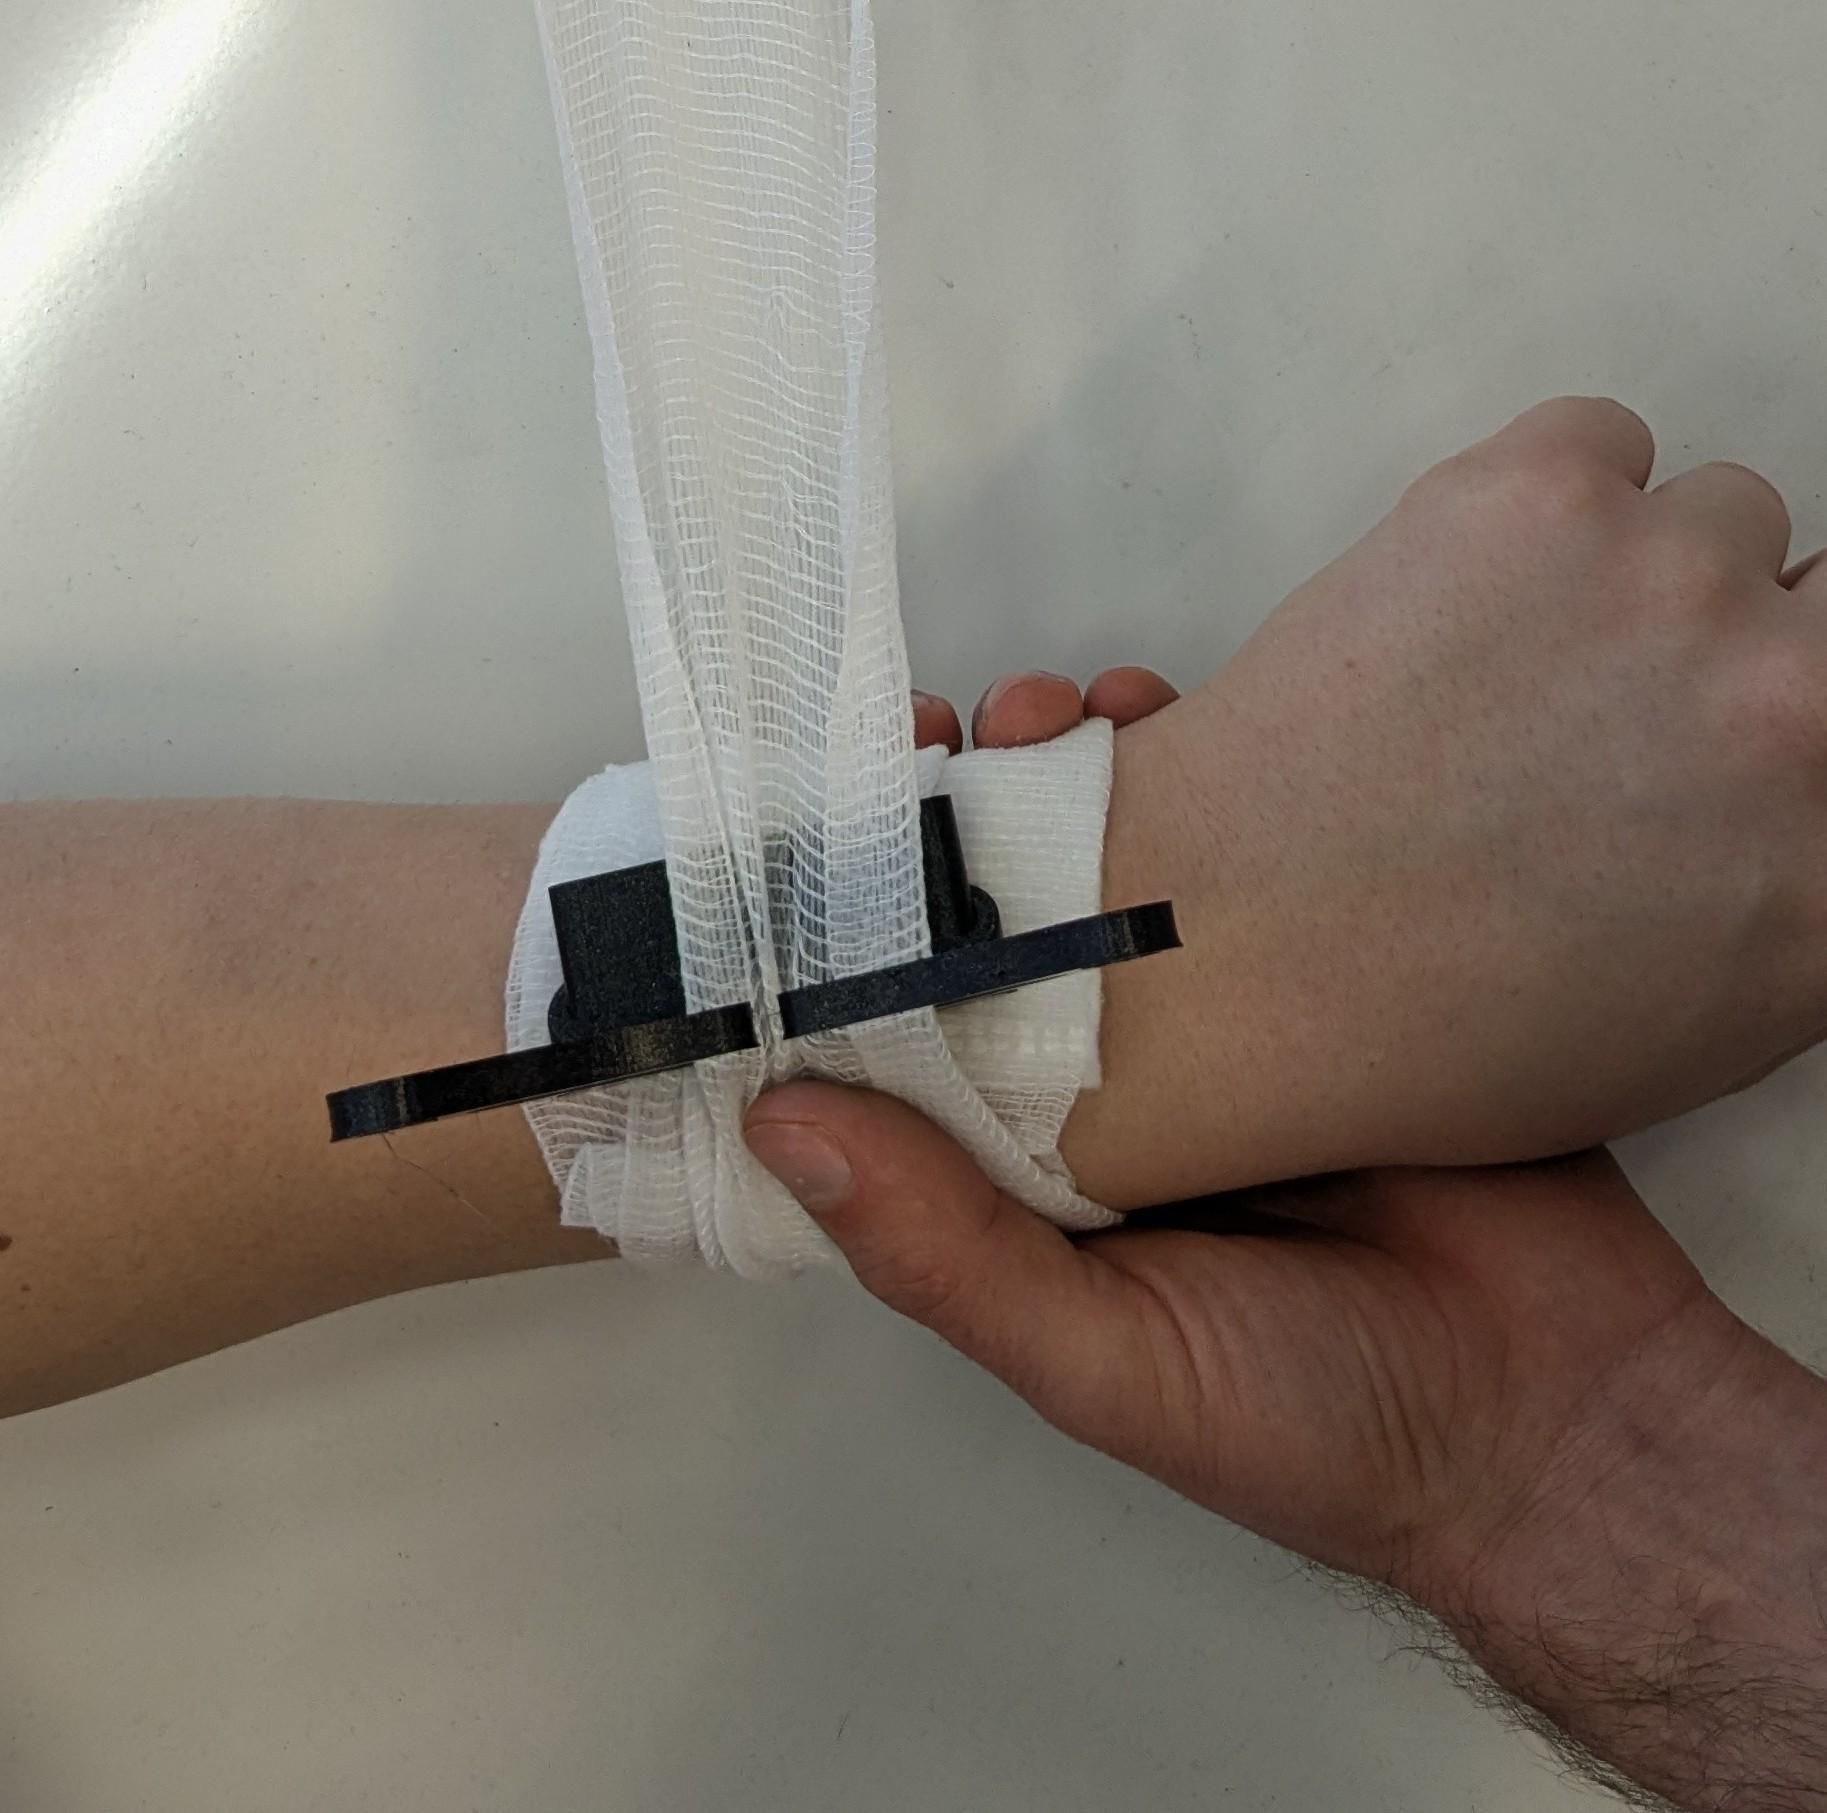 Step 3 : Do another turn around the limb and pass through the normal lever passage. |
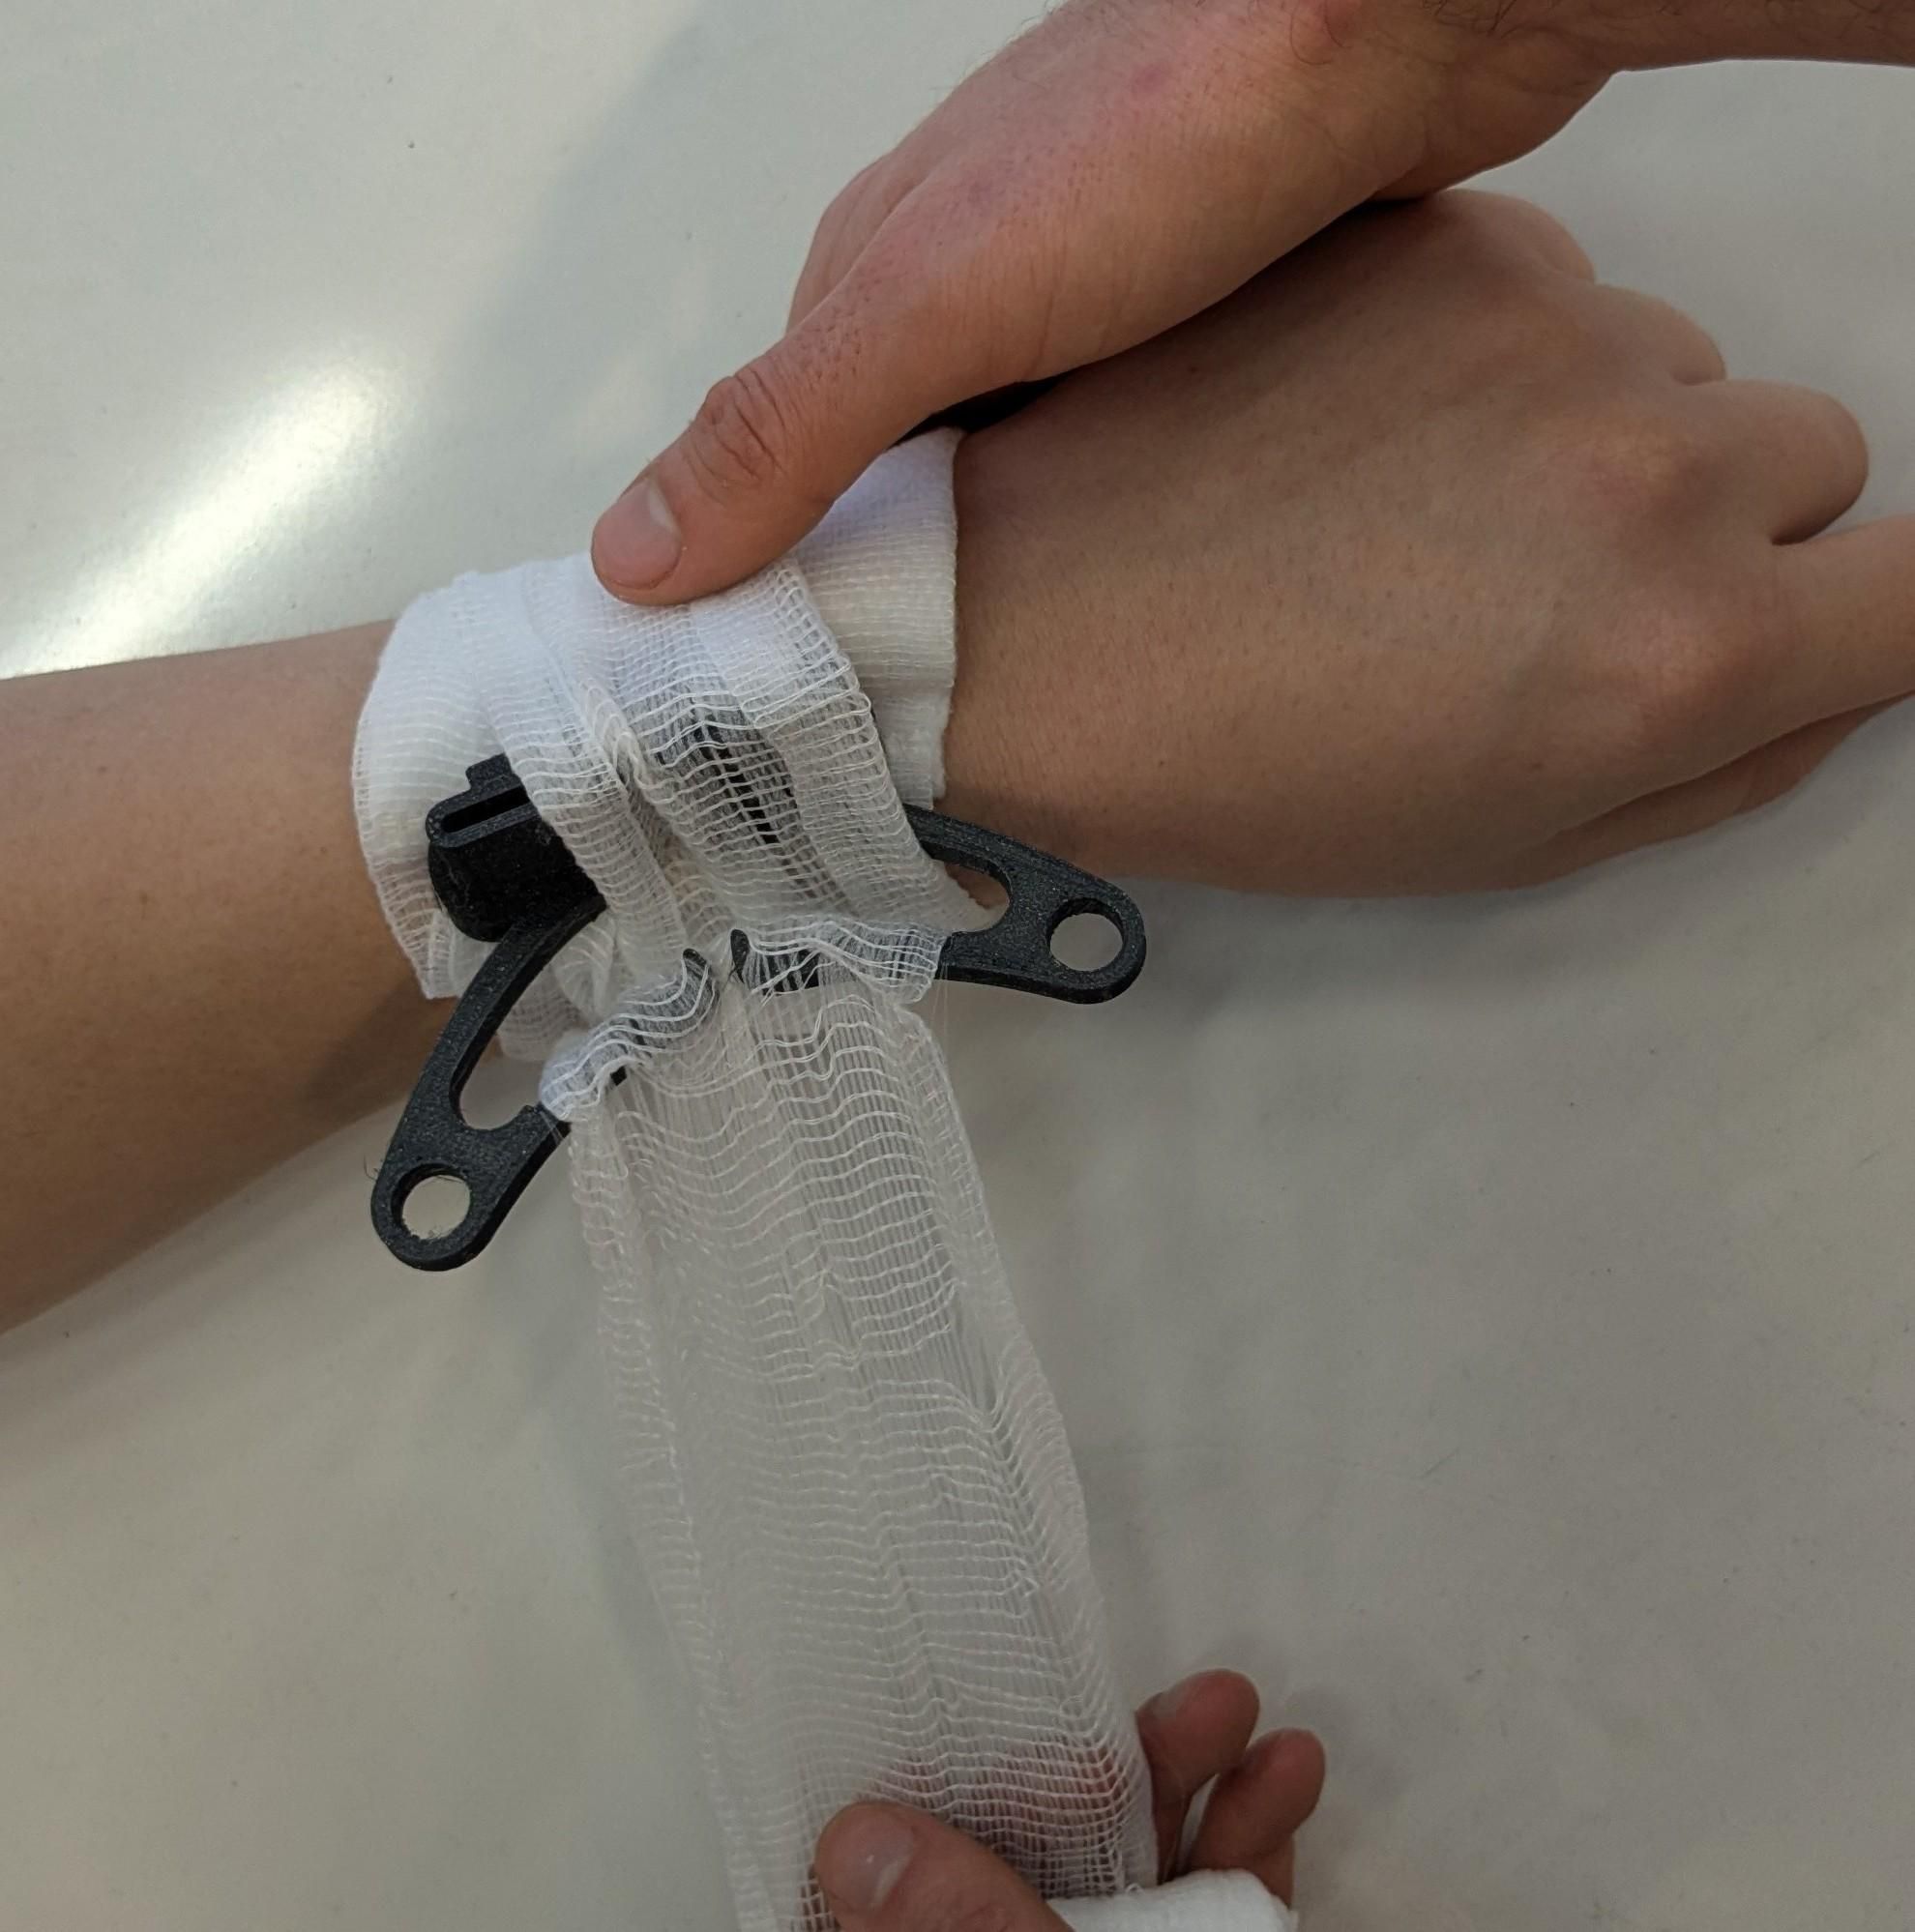 Step 4 : You can do an additional turn, and then you have to start widing the other way around the limb to flip the lever back to generate pressure. |
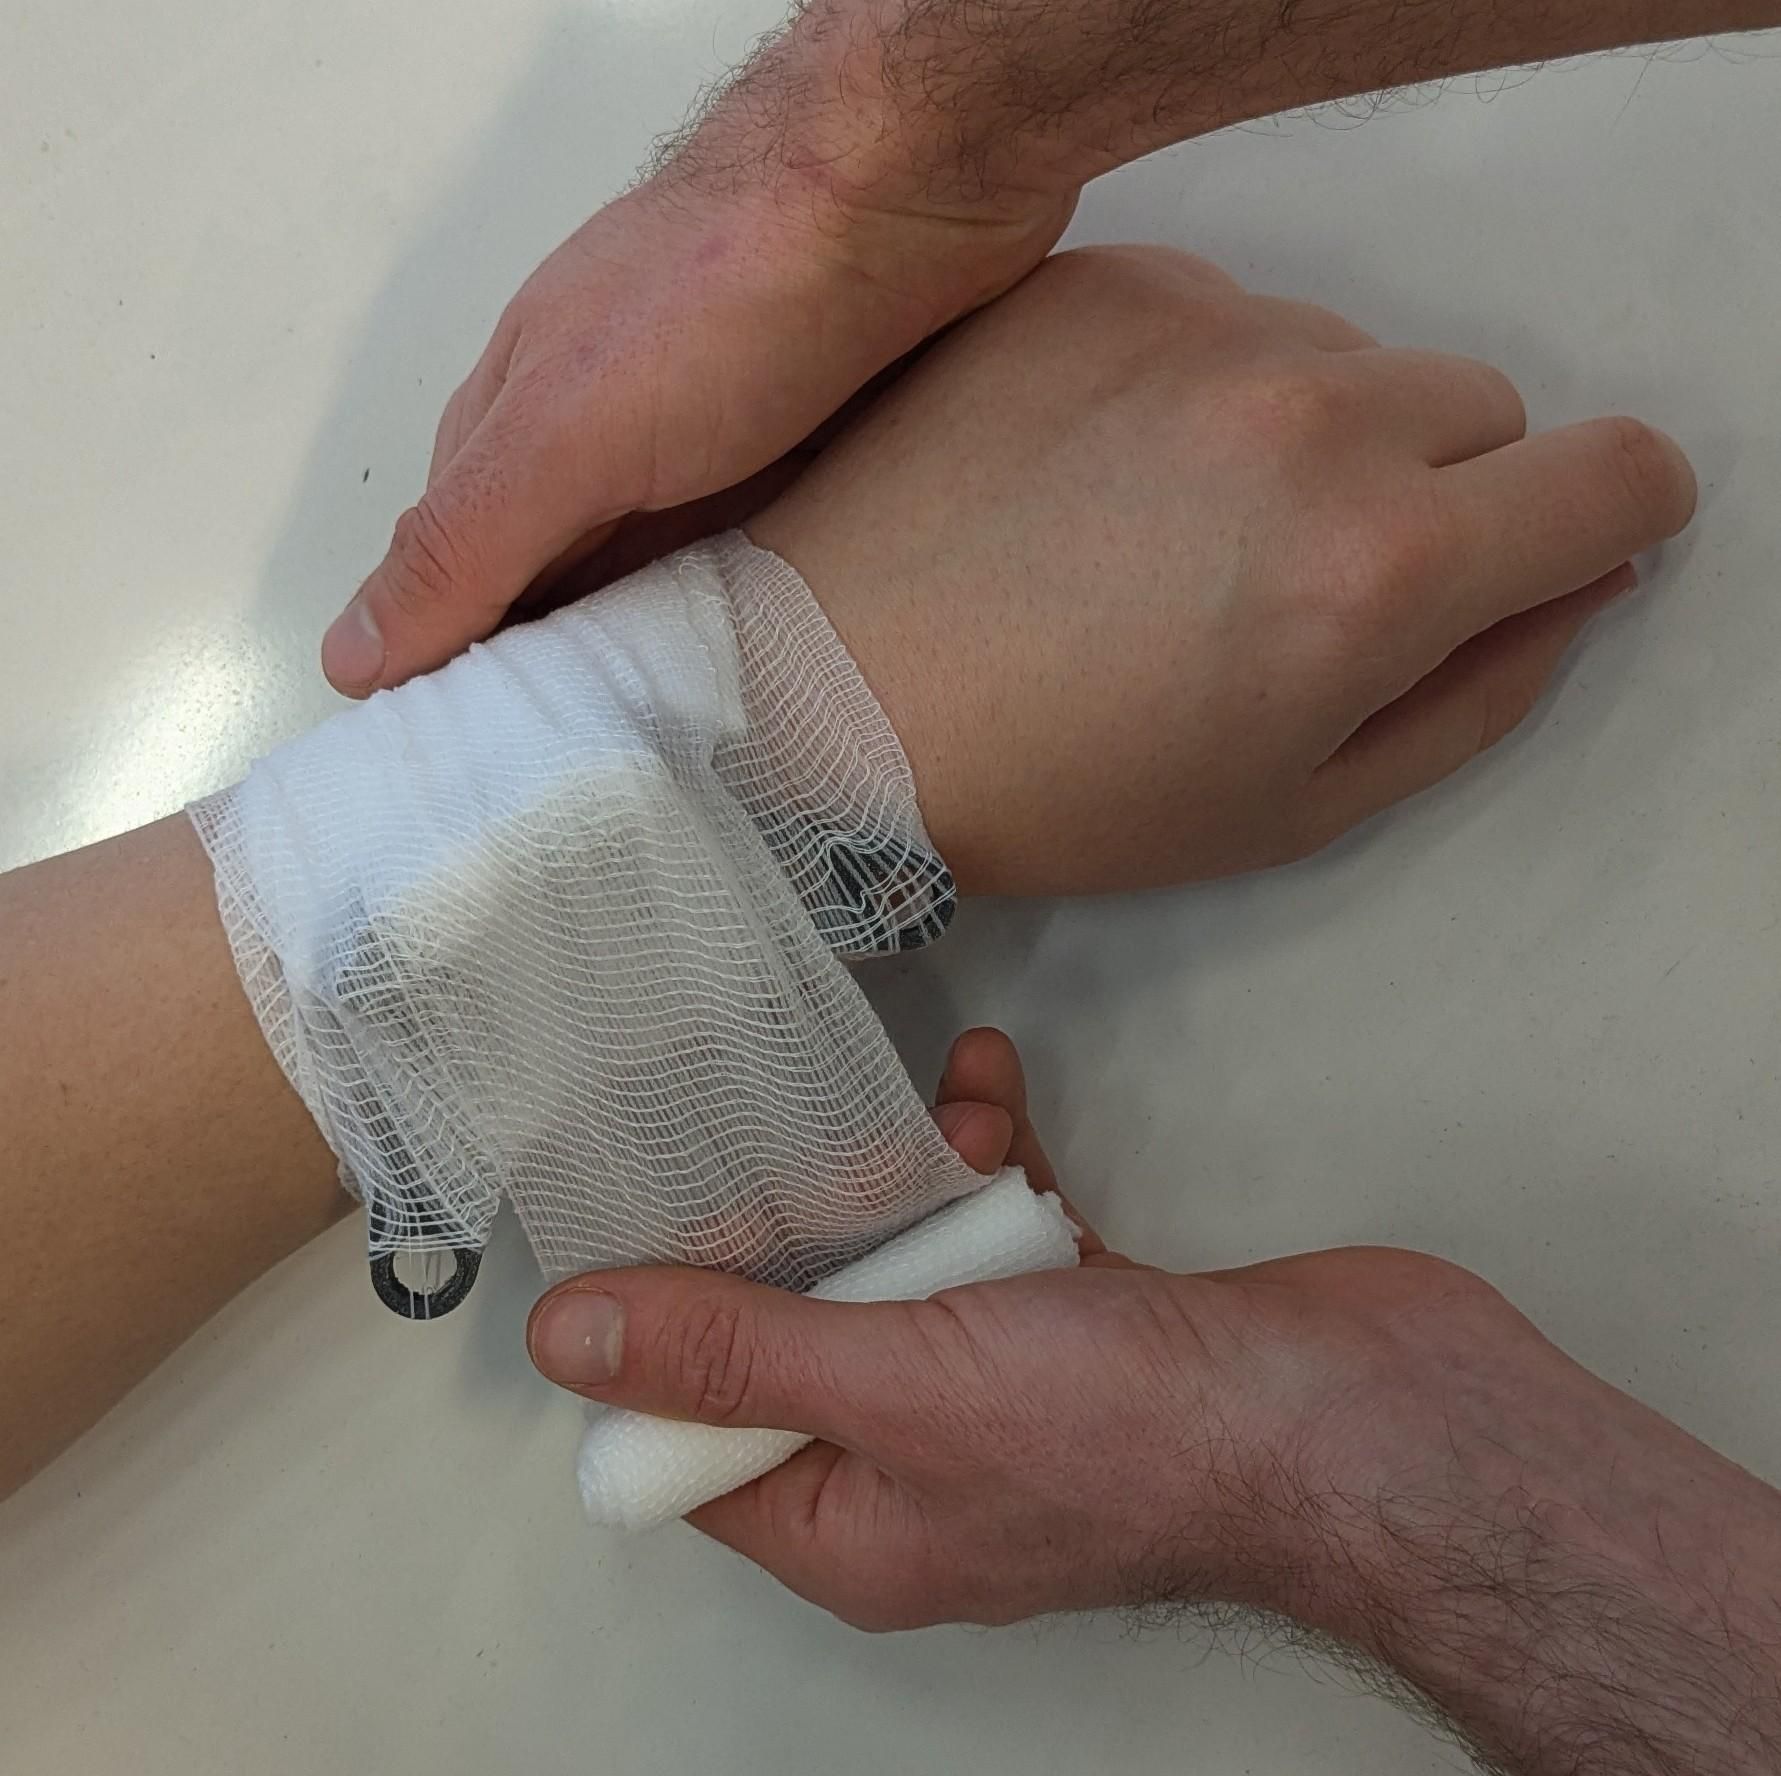 Step 5 : Keep winding around the limb to firmly hold the lever into place. |
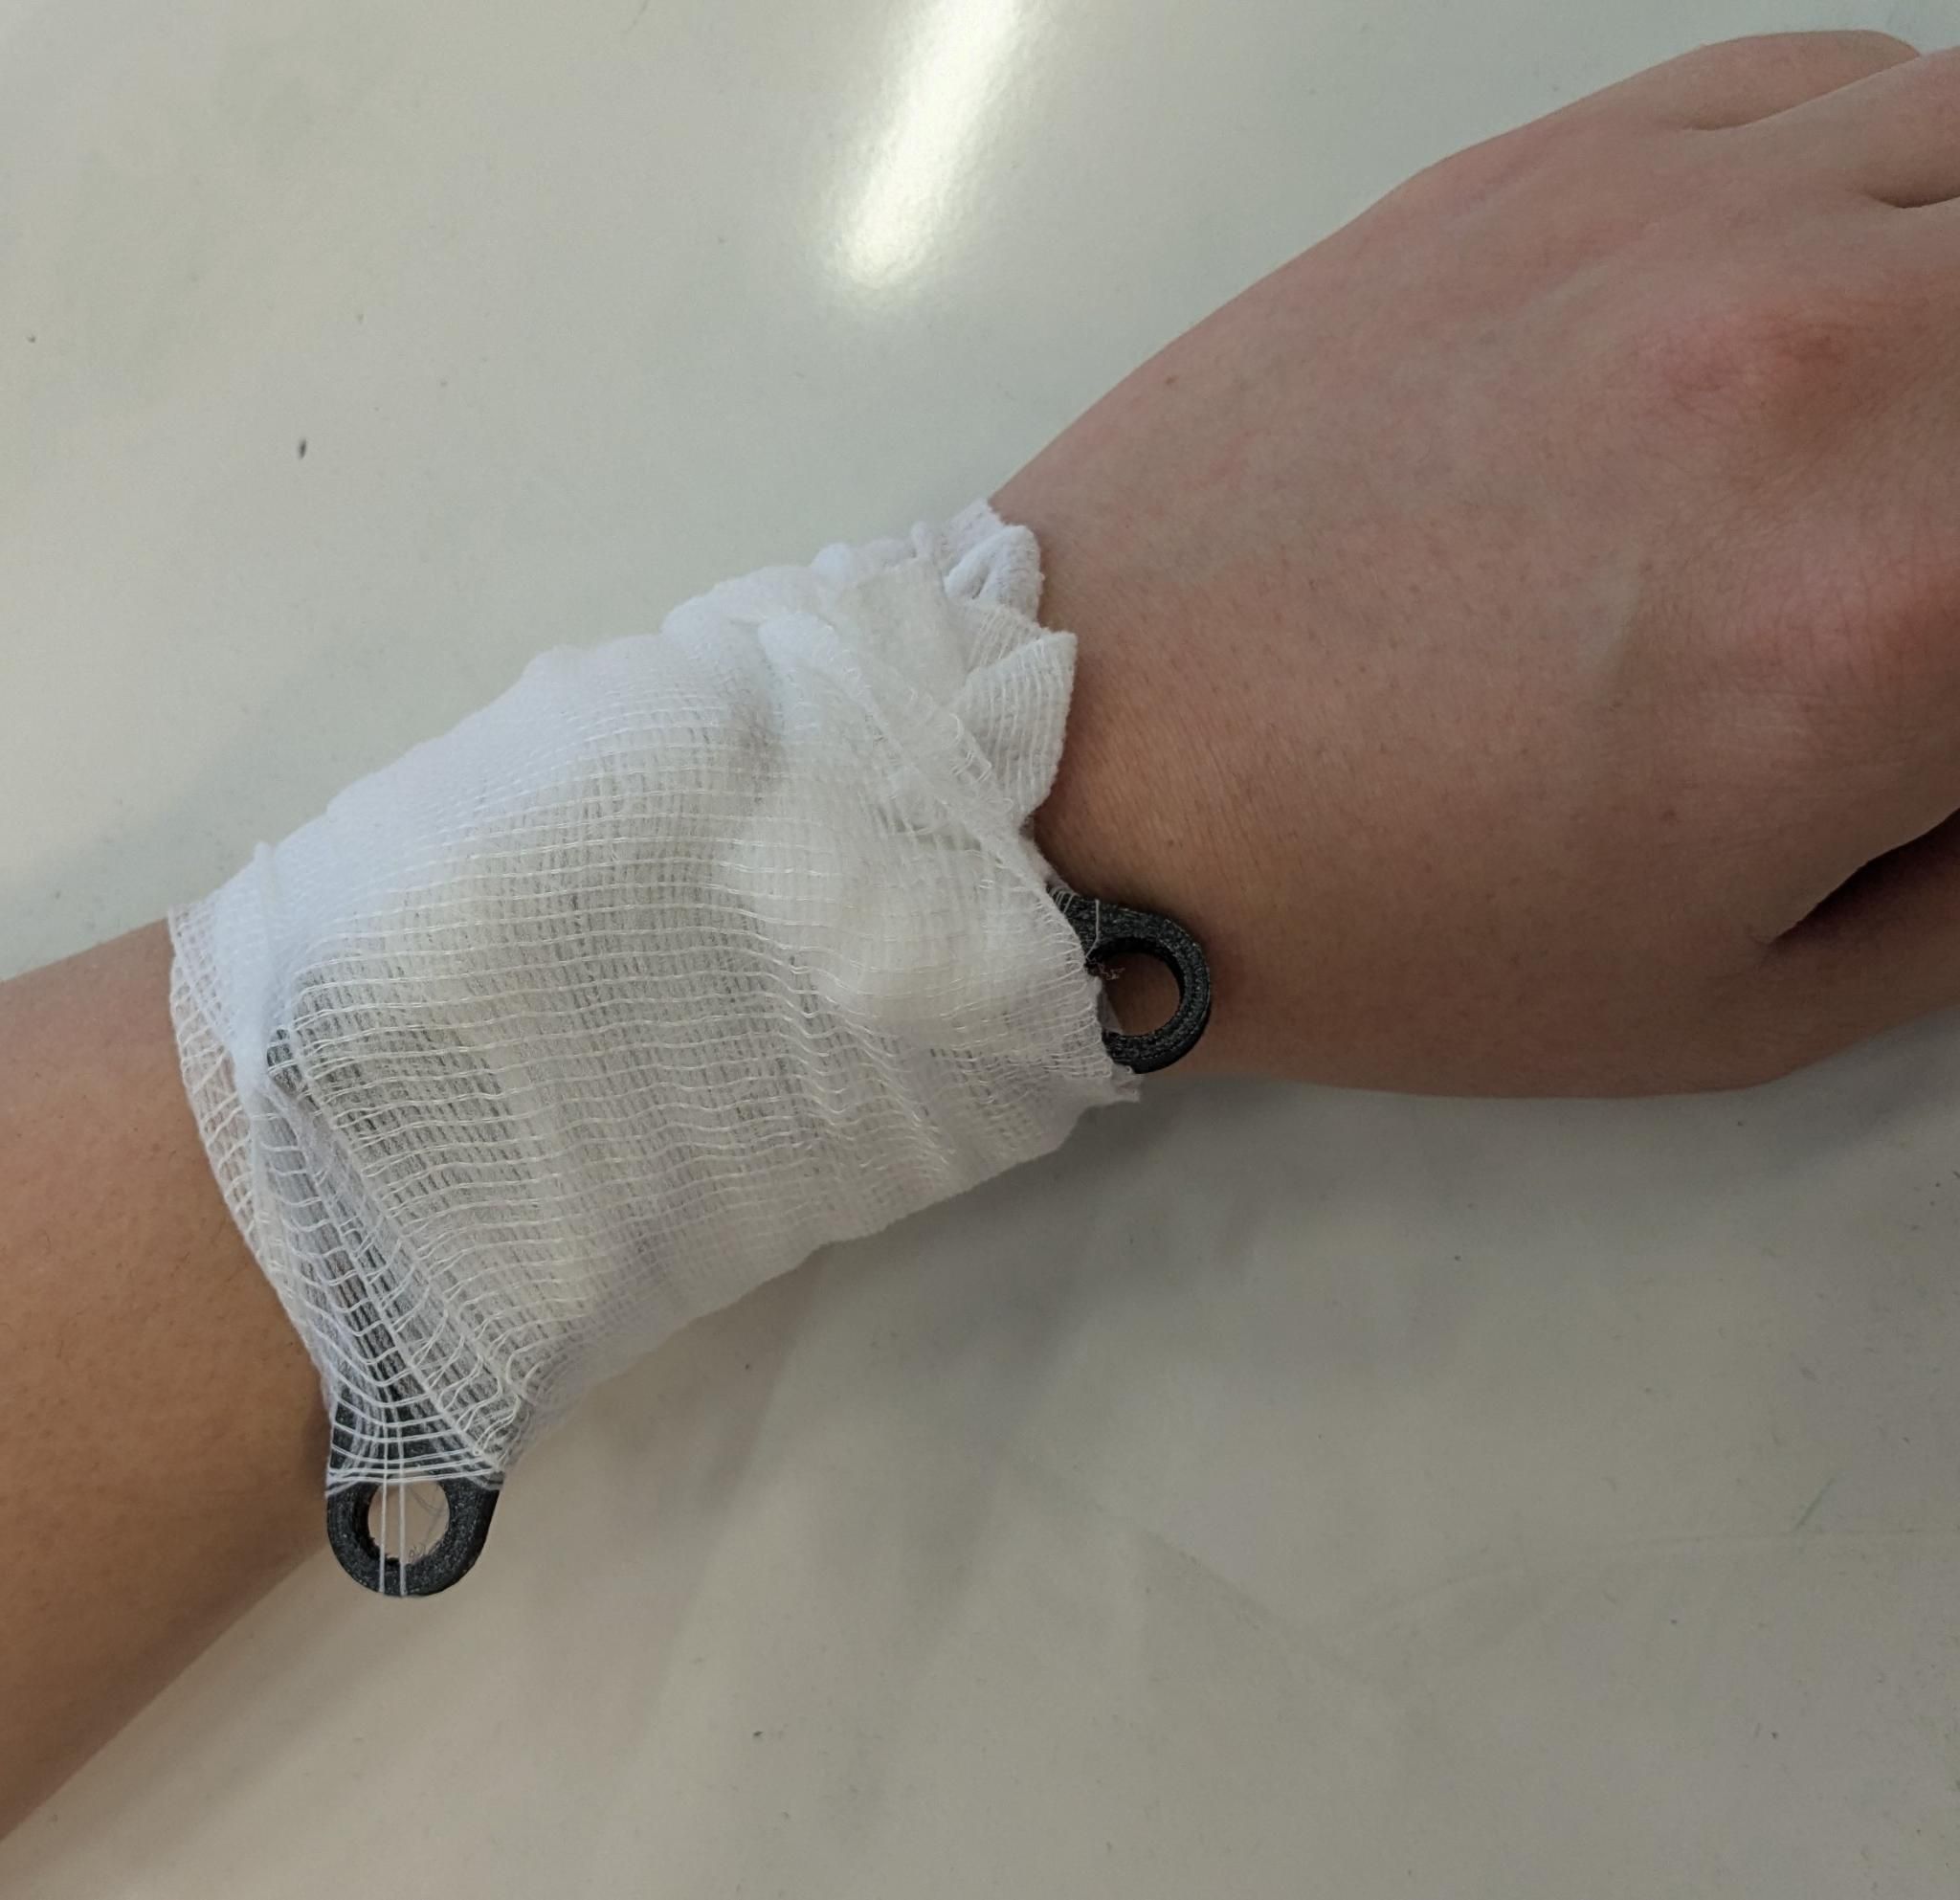 Step 6 : Once you have finished you can simply fix the end of the bandage into a tight part of the bandage to hold it in place. |
4 - Variants
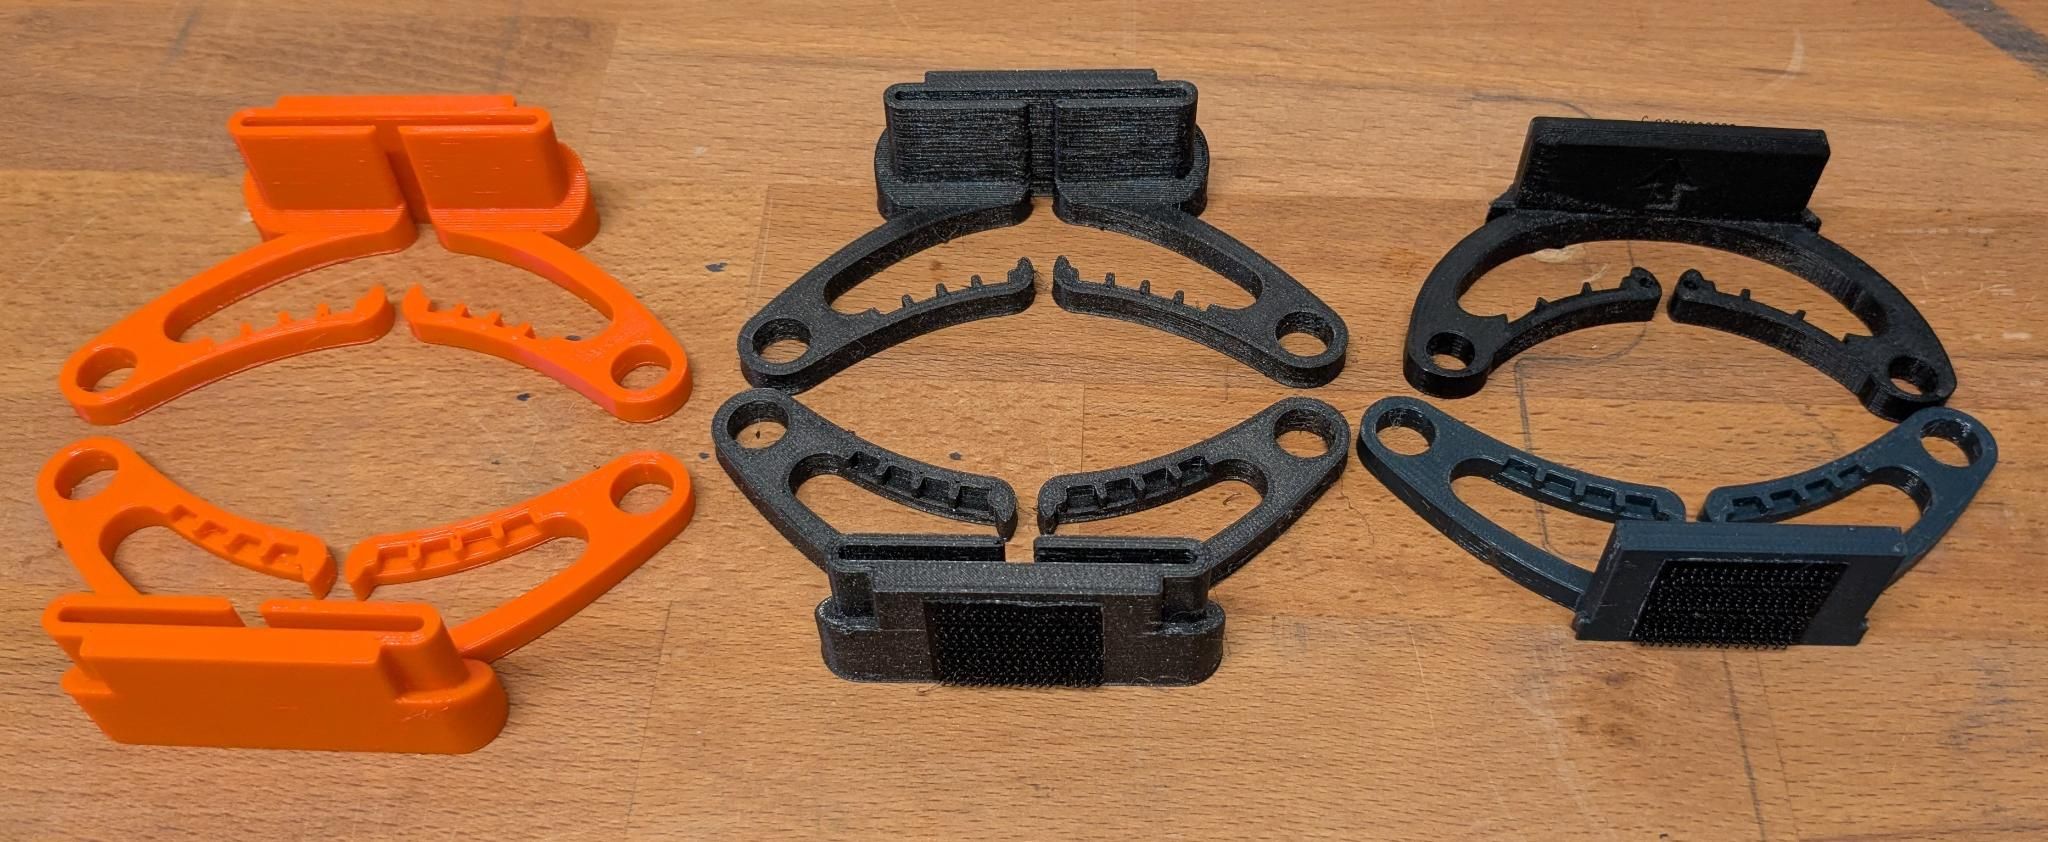
In the above picture we show three variants :
- (a) left : The most recent version of the lever, without velcro.
- (b) middle : The most recent version of the lever, with velcro.
- (c) right : A variety of older variants, without an inner passage, and with velcro.
If we sent you levers, we should have send you variants (a), (b) and potentially (c). We are interested in having feedback on the differences between variants.
Note that variant (c) are recycled old version - thus we won't print more -, with a variety of passage design. We don't intend to know more about the passage design, nor the structural properties, but we want to know if the inner passage of the latest versions are useful compared to a design without an inner passage.
If you print the lever yourself, we are interested in you adding adhesive velcro to only some of the lever so that we can get feedback on the usefulness of the velcro.