| 3Dfiles | ||
| manual | ||
| pictures | ||
| .gitignore | ||
| Readme.fr.md | ||
| Readme.md | ||
3D-printed SOF-T-like tourniquet
Tourniquet de type SOF-T imprimé en 3D (version francaise ici)
[English version automatically spell checked with minimum effort put into proofreading]
![]()
![]()
⚠️ WARNING : We strongly ADVICE AGAINST using this tourniquet in the field until further tests have been done. As shown in the section on testing the occlusion pressure is for now dangerously high, and we will soon create a new version where this is fixed. ⚠️
Here is the printable page for this model.
1 - GliaX 3D-printed tourniquet
If you want an actual field-tested tourniquet, please go check out GliaX/tourniquet.
We will use a lot of their testing as comparison, and recommend using the same print settings as them. We also designed our strap and windlass in comparison to theirs : the strap must be as wide or wider, and the windlass must be as thick or thicker (as they had windlass failure in an earlier version, thus we knew it was a potential weak point).
Even though the GliaX tourniquet project is an amazing and fully developed project, we still thought that their could be place four our design, as we designed a tourniquet that requires some sewing, but way less than the GliaX design (as ours is design around the SOF-T design rather than the CAT design) ; with also less printed parts.
We know our design makes application slightly slower than with a CAT-like tourniquet (like the GliaX tourniquet), but we estimate the difference to be marginal (less than 5 seconds), thus we believe the gain in cost and manufacturing could still make it a viable option in some context.
2 - The design of our tourniquet
We designed our tourniquet to have a similar application to a SOF-T tourniquet. The main difference is that the mechanism to slide and then hold tension of the webbing is a double-D mechanism (similar to motorcycle helmets).
This allows very simple assembly as only the double-D and windlass holder have to be held on one side of the webbing, then the windlass has to be fixed, which requires very little 3D-printing and assembly.
2.a - Application procedure
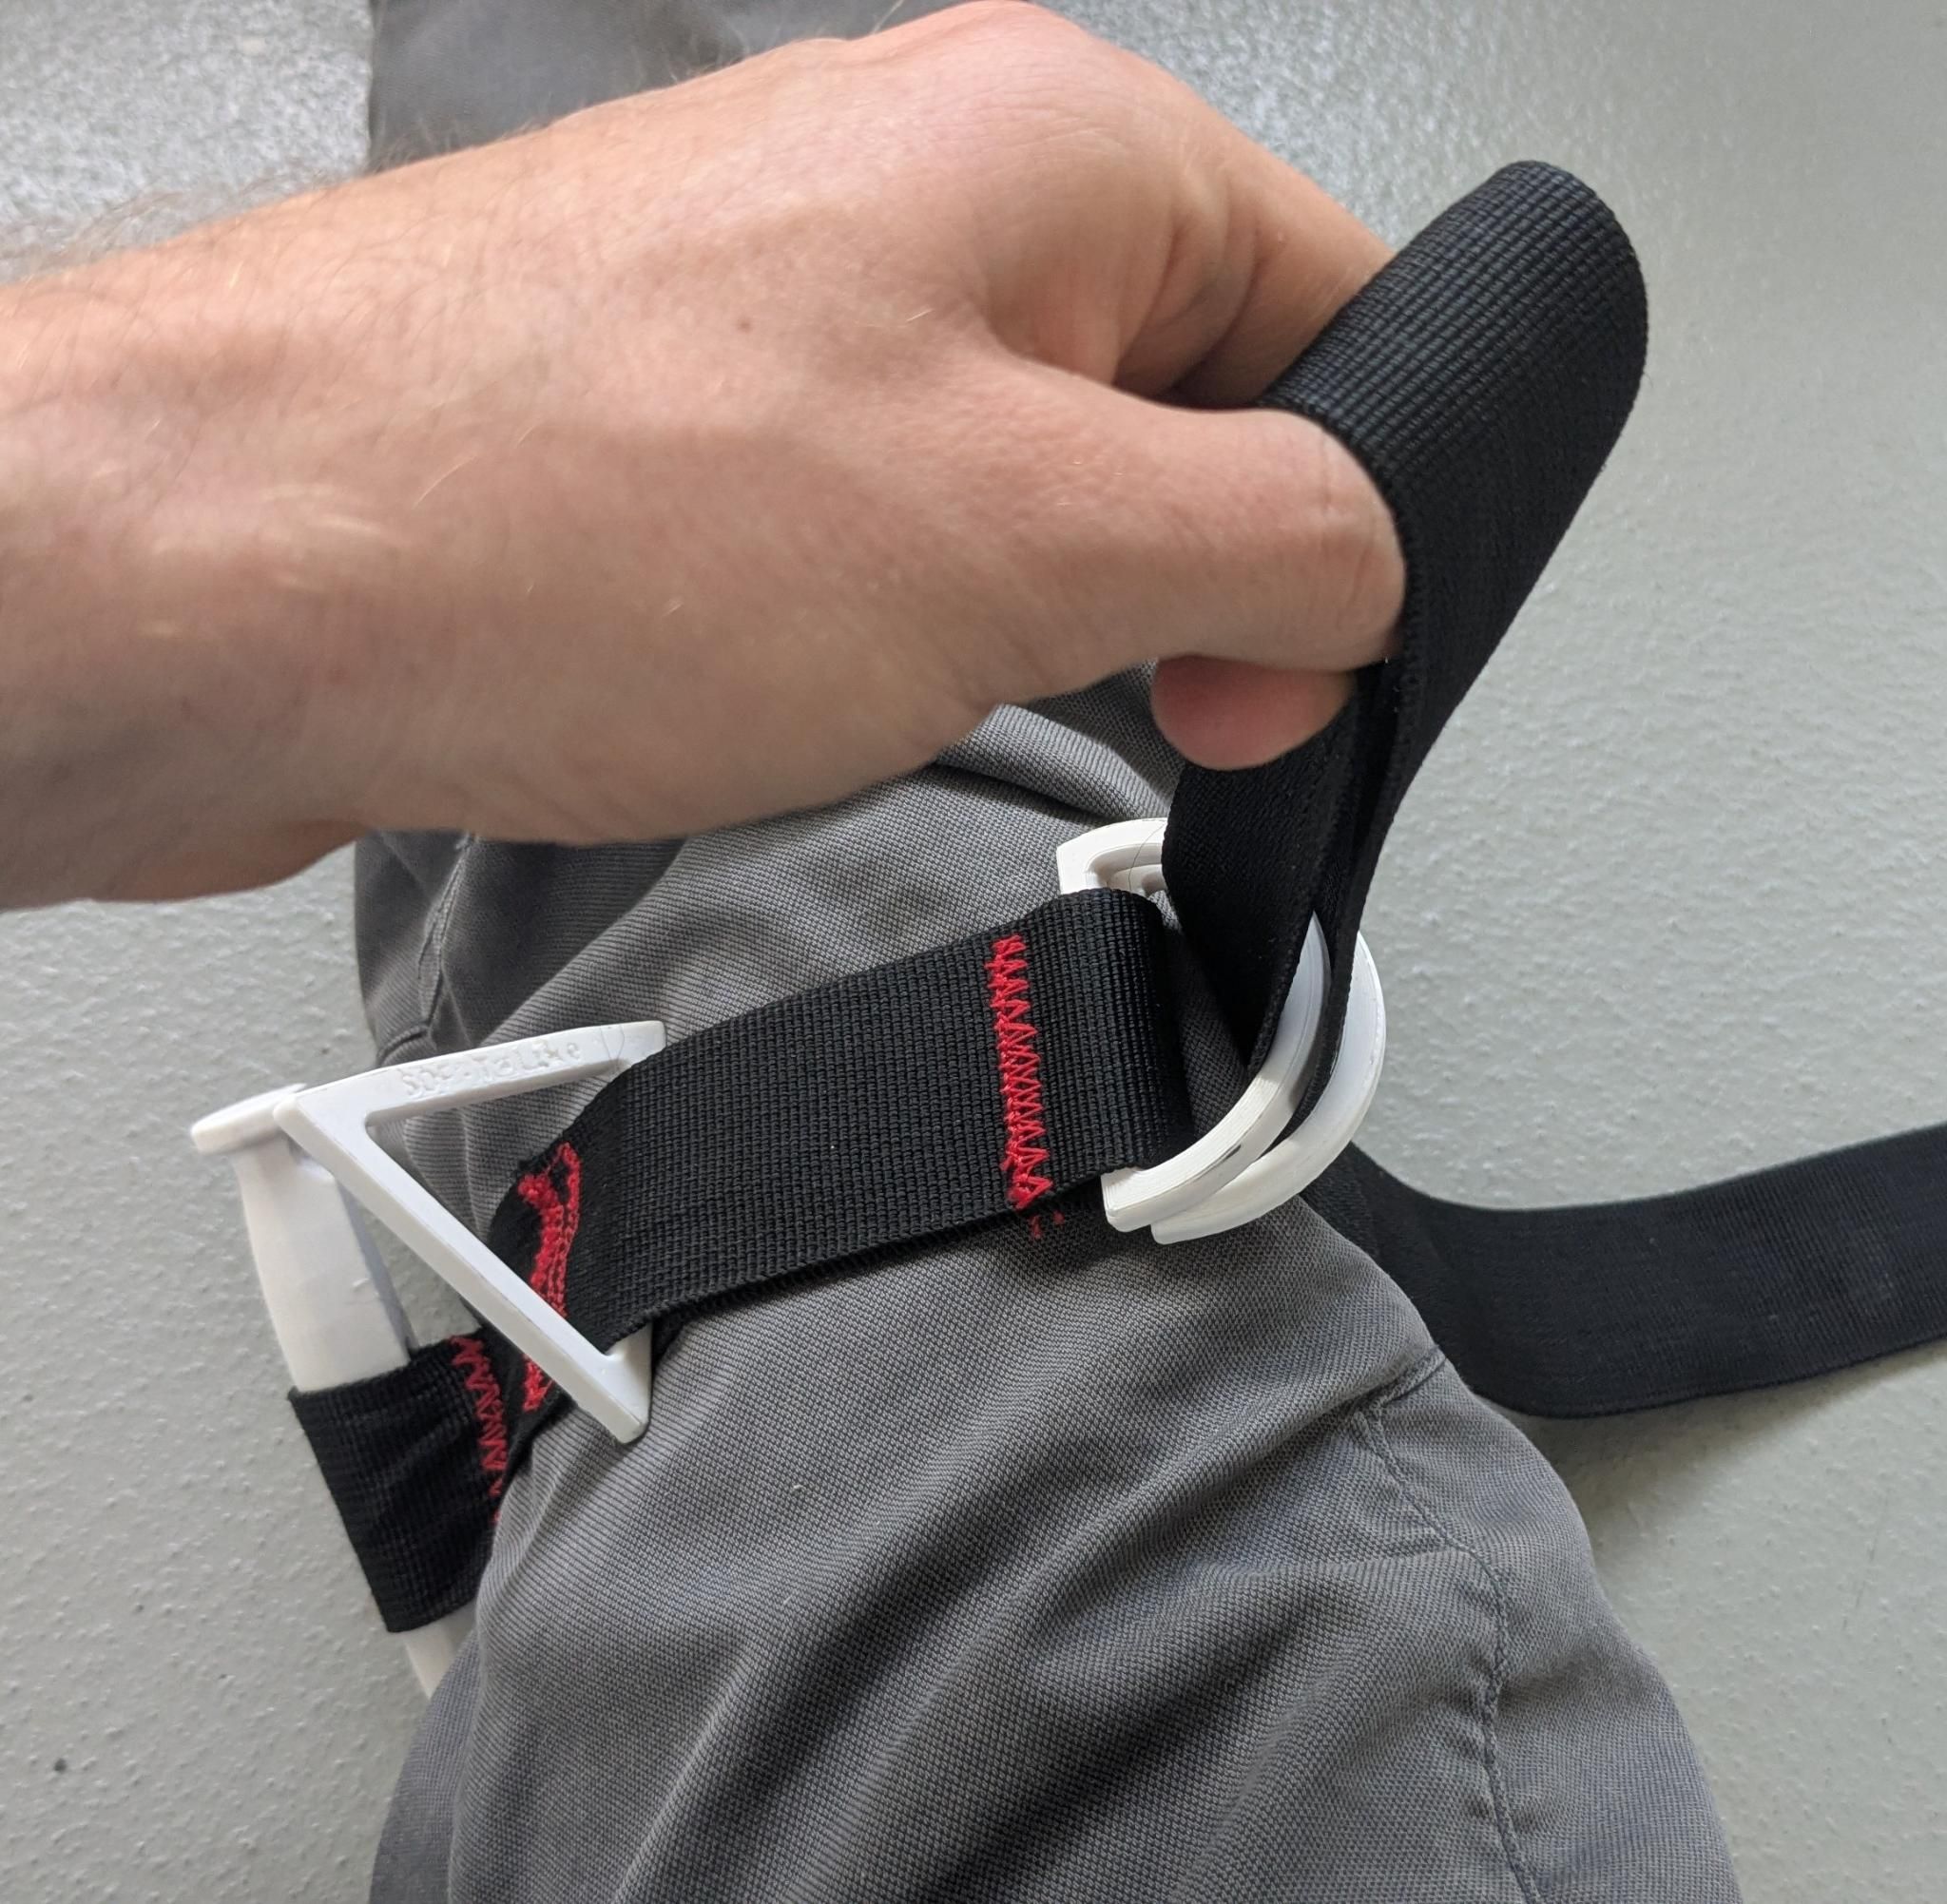 Step 1 : First slide the tourniquet over the limb, or pass the webbing around the limb and pass it through the double D. Then tighten it by creating a loop between the two D and pulling on it. |
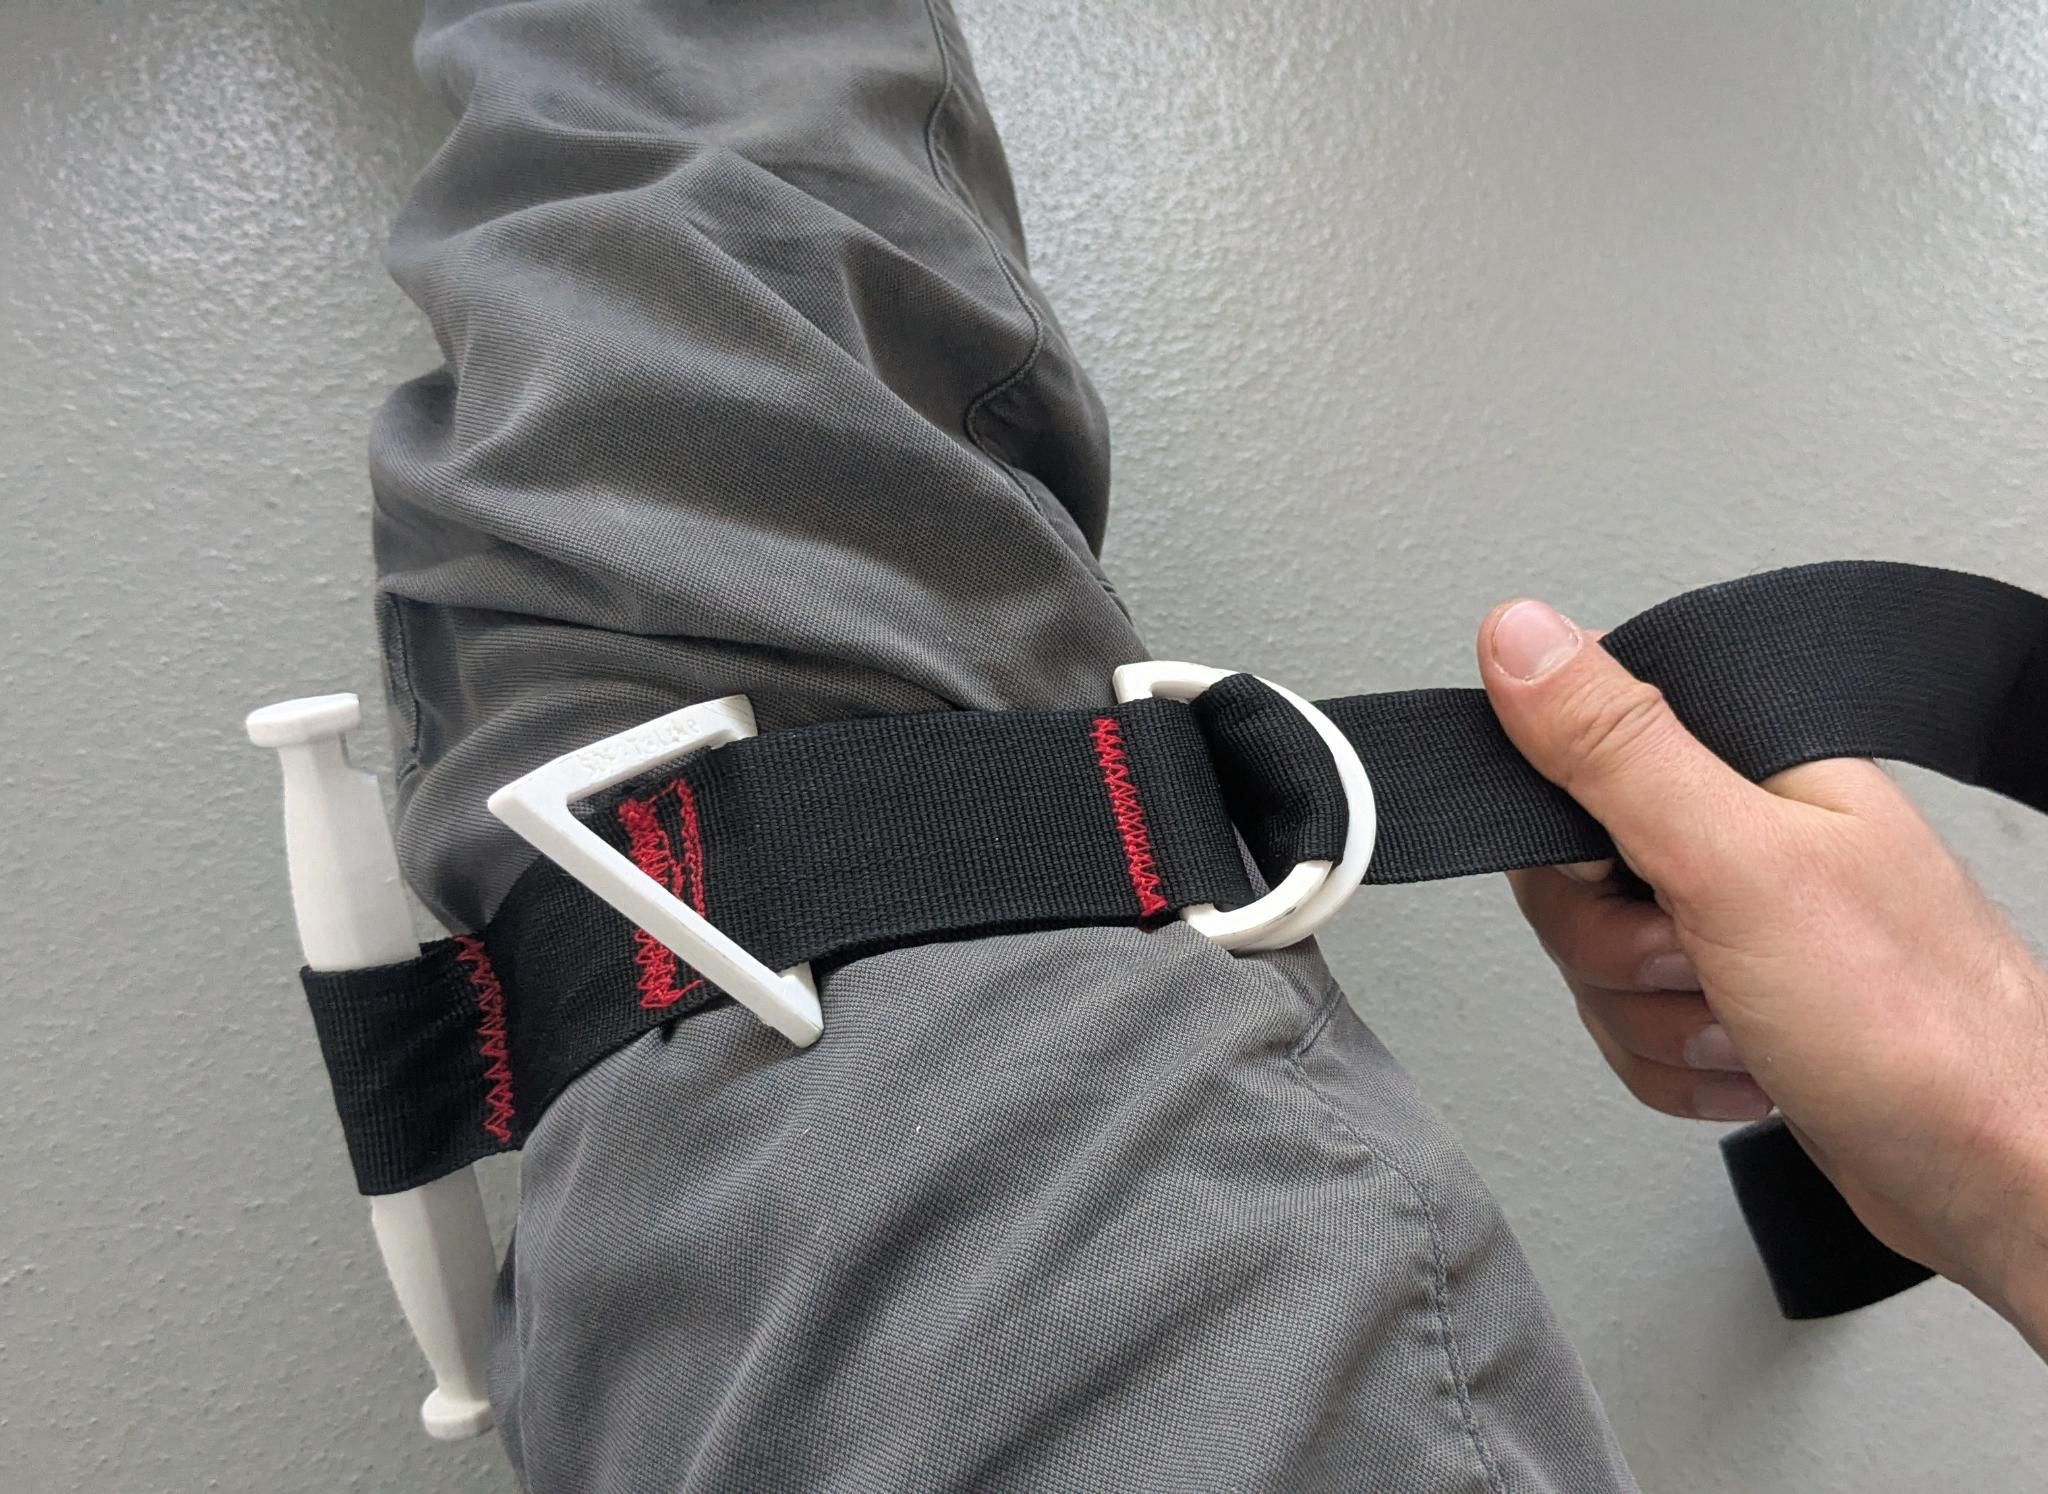 Step 2 : Pull forcefully on the part of the webbing exiting the double D to remove the loop and secure the webbing. |
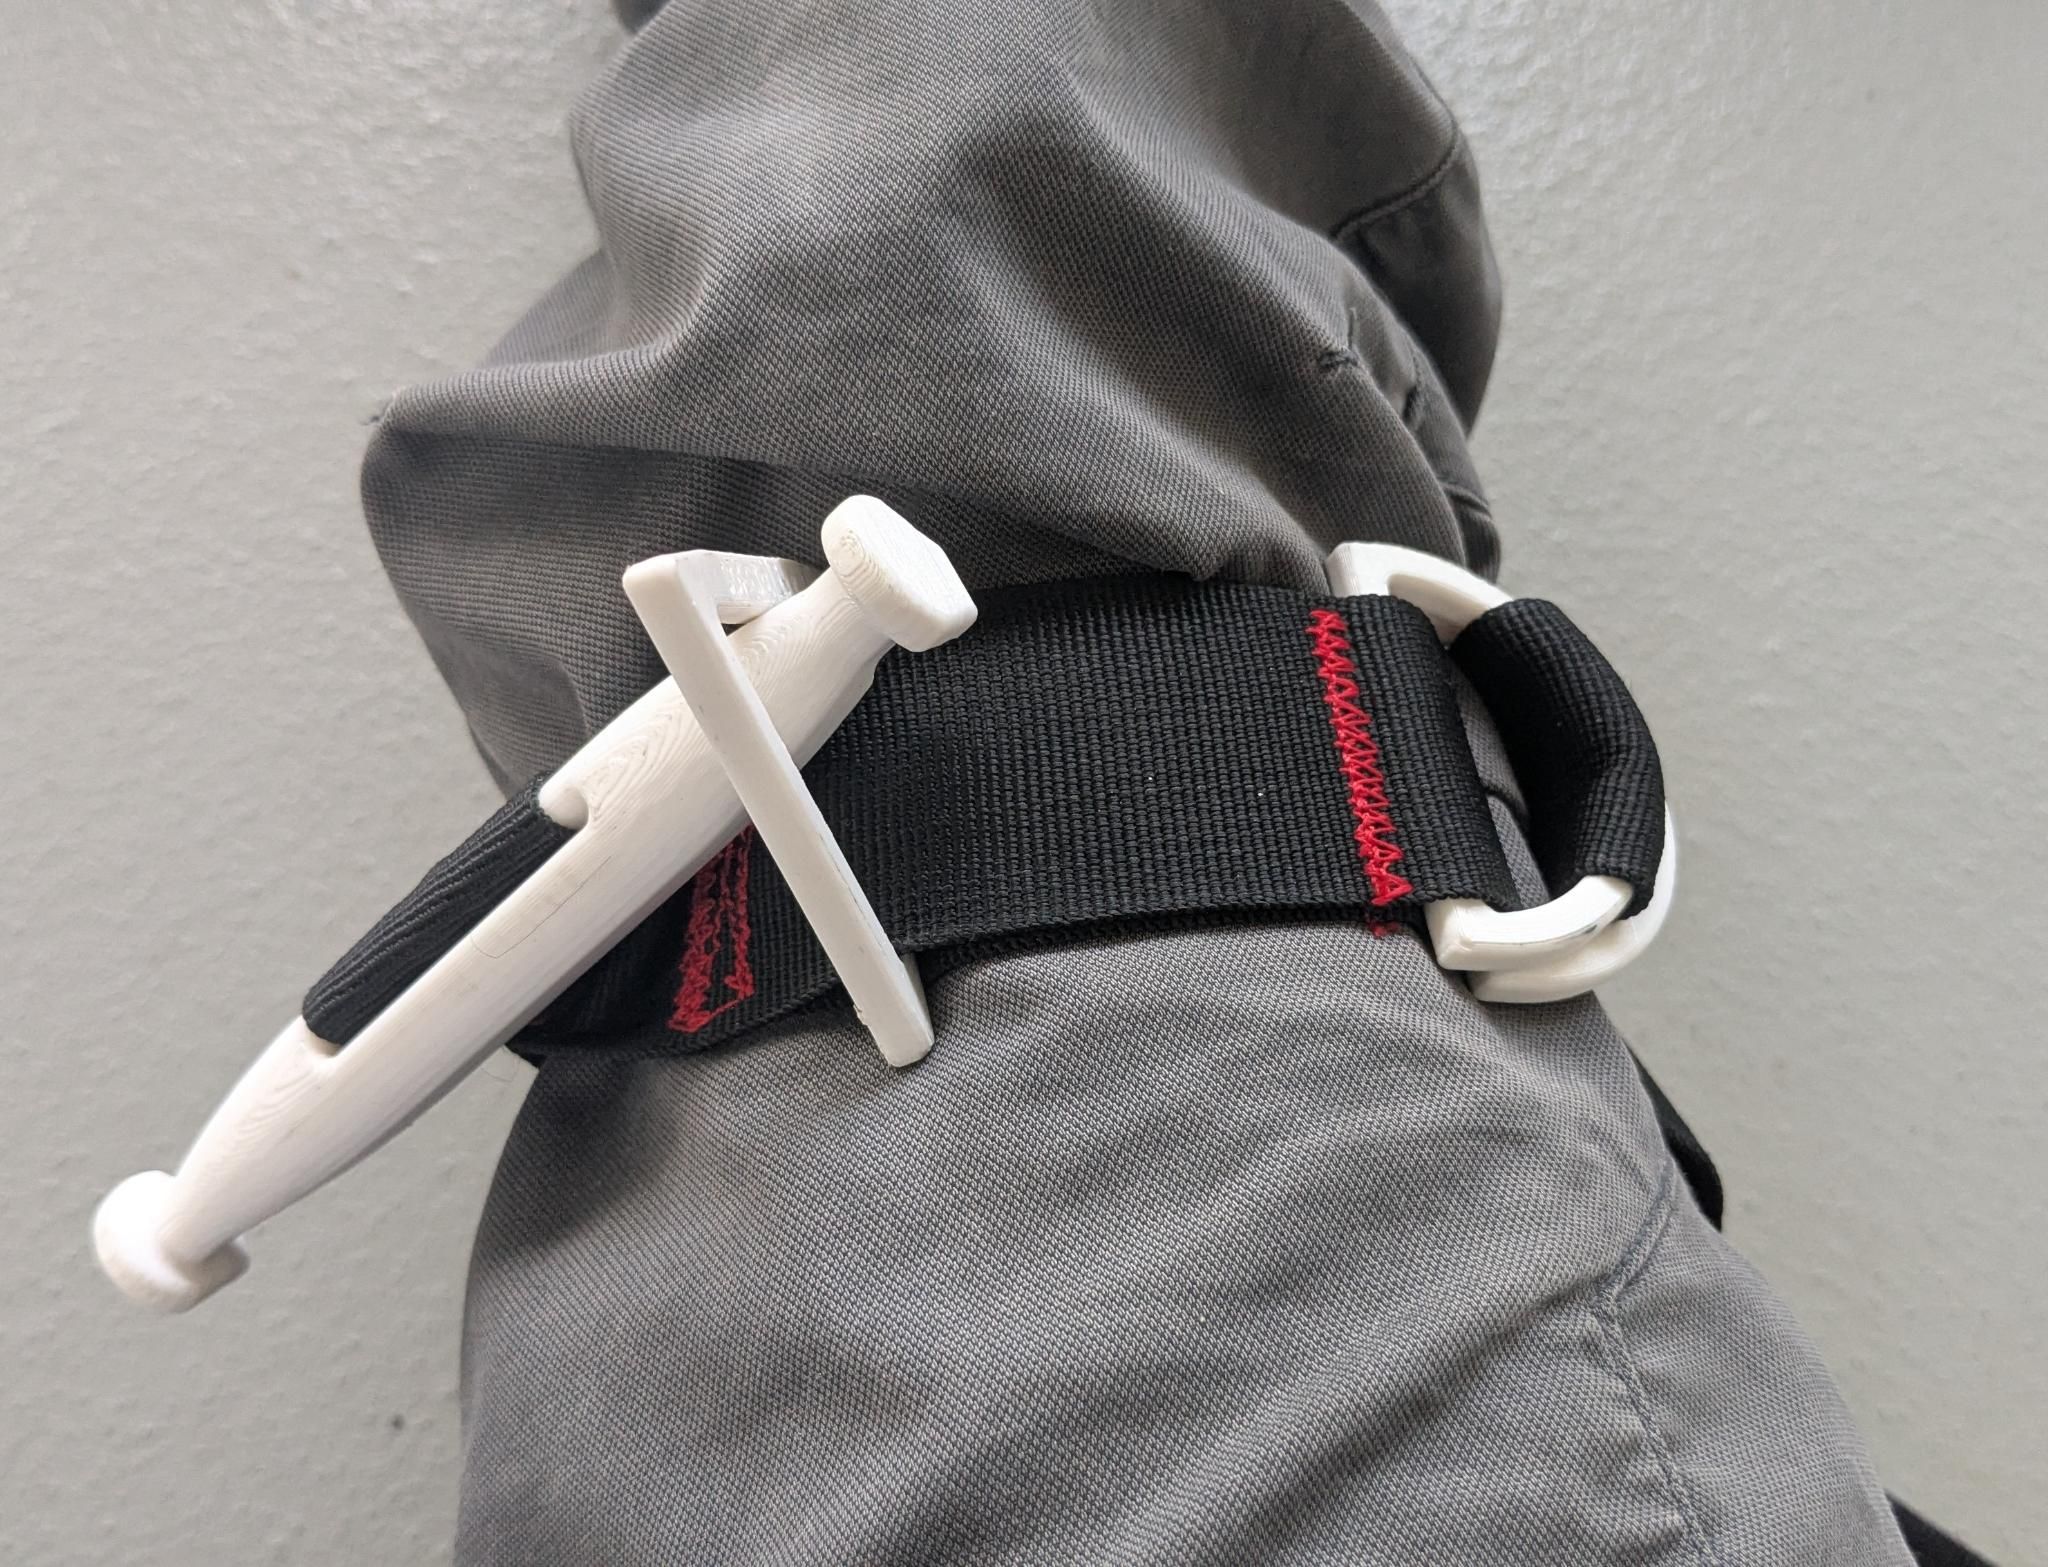 Step 3 : Turn the windlass until the bleeding stops, and secure it in the windlass holder (triangle). |
We propose storing the tourniquet with as little webbing passed through the double-D as possible. Then you can pass as much webbing as necessary through the first double-D to tighten the tourniquet around the victim's limb, then pass this webbing through the second D to tighten and block the webbing in place. You can then turn the windlass until bleeding stops, before passing one end of the windlass through the windlass holder to hold it in place.
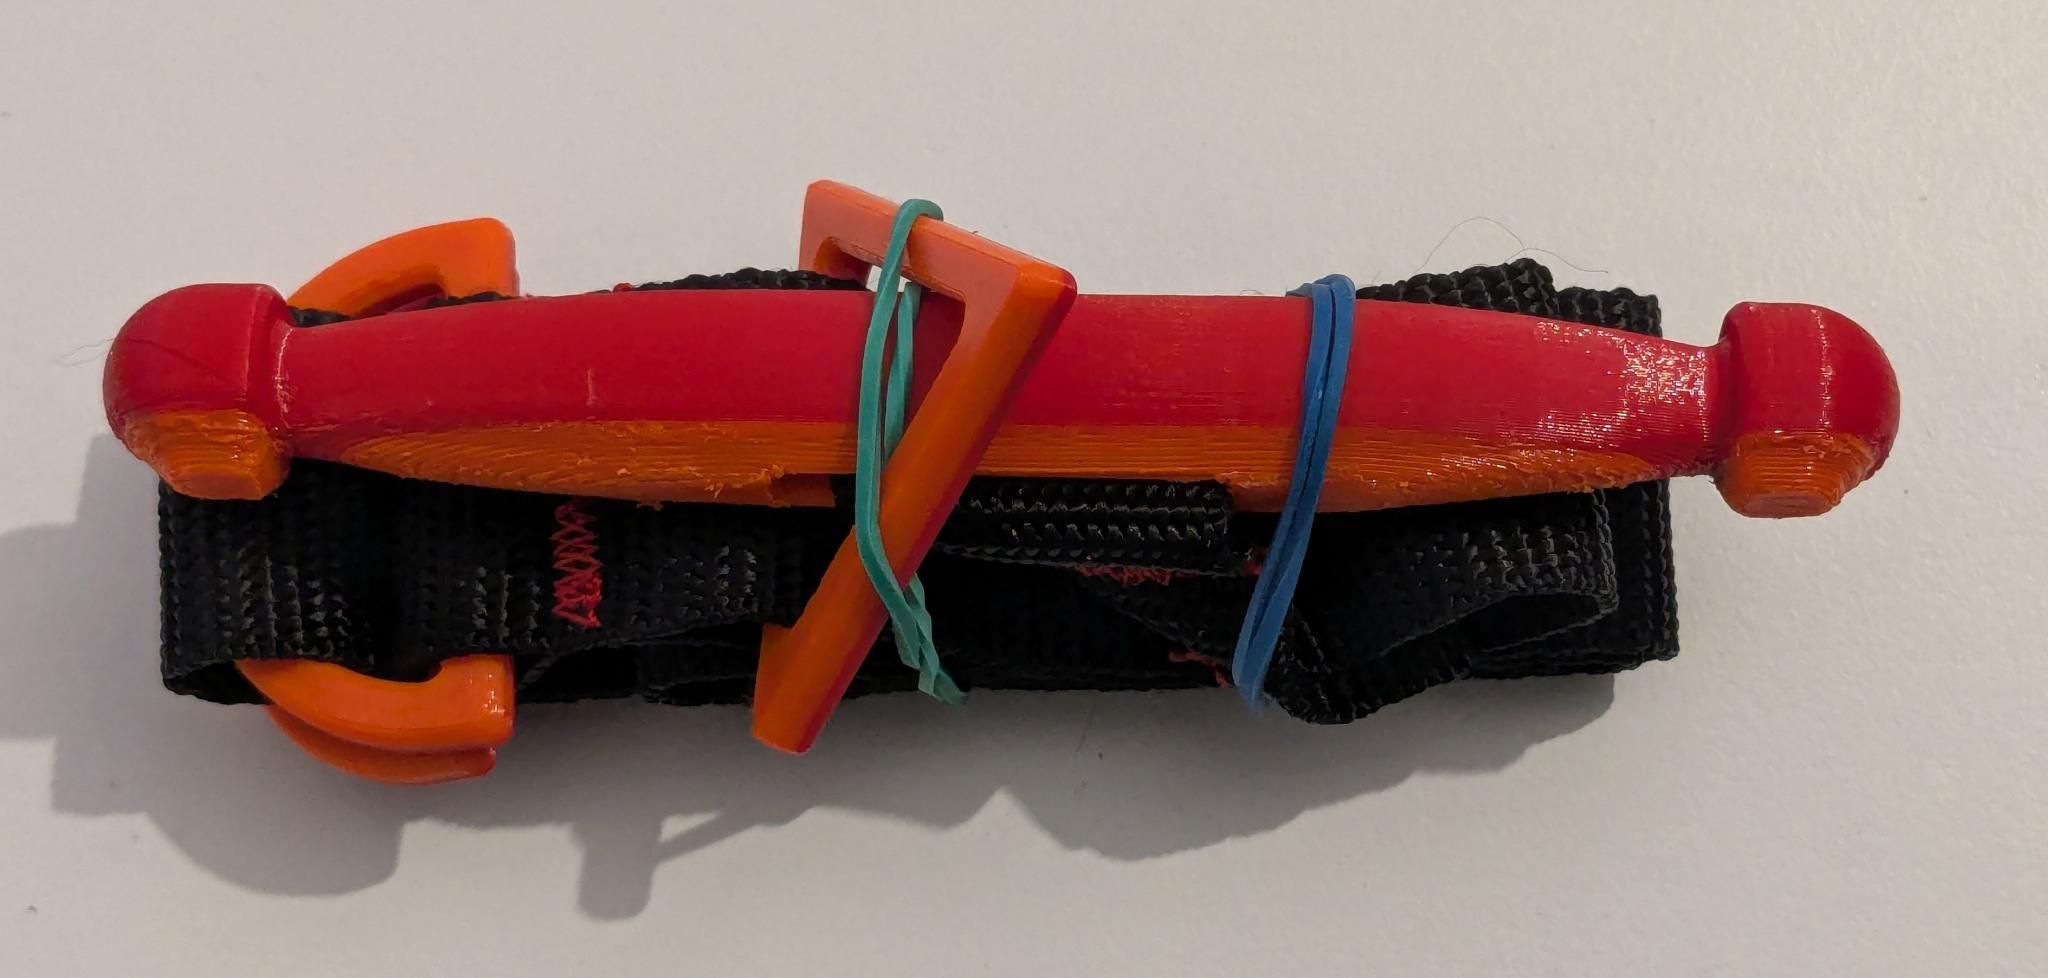
3 - 3D-printing the plastic pieces
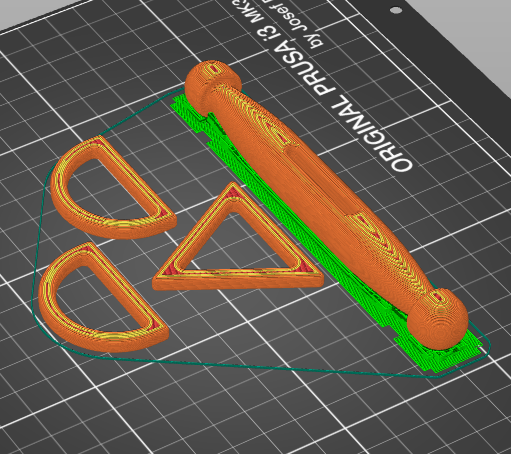
You simply need to print two D located at 3Dfiles/double_D.stl, one windlass holder located at 3Dfiles/windlass_holder.stl and one windlass located at 3Dfiles/windlass.stl (There is also an "easy-print" windlass located at 3Dfiles/windlass_easyprint.stl). Some minimal support is needed to properly print the underside of the windlass (not for the "easy-print" version).
We recommand printing using PETG (or ABS, but we haven't tested it), using the following parameters (taken from the GliaX tourniquet) :
- Layer Height: 0.2mm
- Infill: 100%
- 4 top and bottom layers
- 4 perimeter shells/walls
These parameters result in 42g of plastic being used (only 36g for the "easy-print" version !) for a single tourniquet, including ~3g of support material ; and a ~3h print on a prusa mk3.
Note that - although we don't recommend it - we tested a 0.3mm layer height with 60% infill, and while tightening the tourniquet between two metal posts (see manual/tests-results.md) we didn't observe any critical failure before our strength (with two hands !) was the limiting factor.
4 - Assembly of the tourniquet
In this section we will descibe the assembly procedure of this tourniquet. We won't go into detail into how to sew, as we consider you already need to know how to sew before assembling this tourniquet.
4.a - Supplies
To assemble our tourniquet, in addition to the 3D printed parts listed in the previous section, you will need :
- ~1m of 38-40mm heavy nylon webbing.
- Strong polyester thread (Tex-40 TK50/2 Poly Core is used by GliaX in their tourniquet).
4.b - Sewing
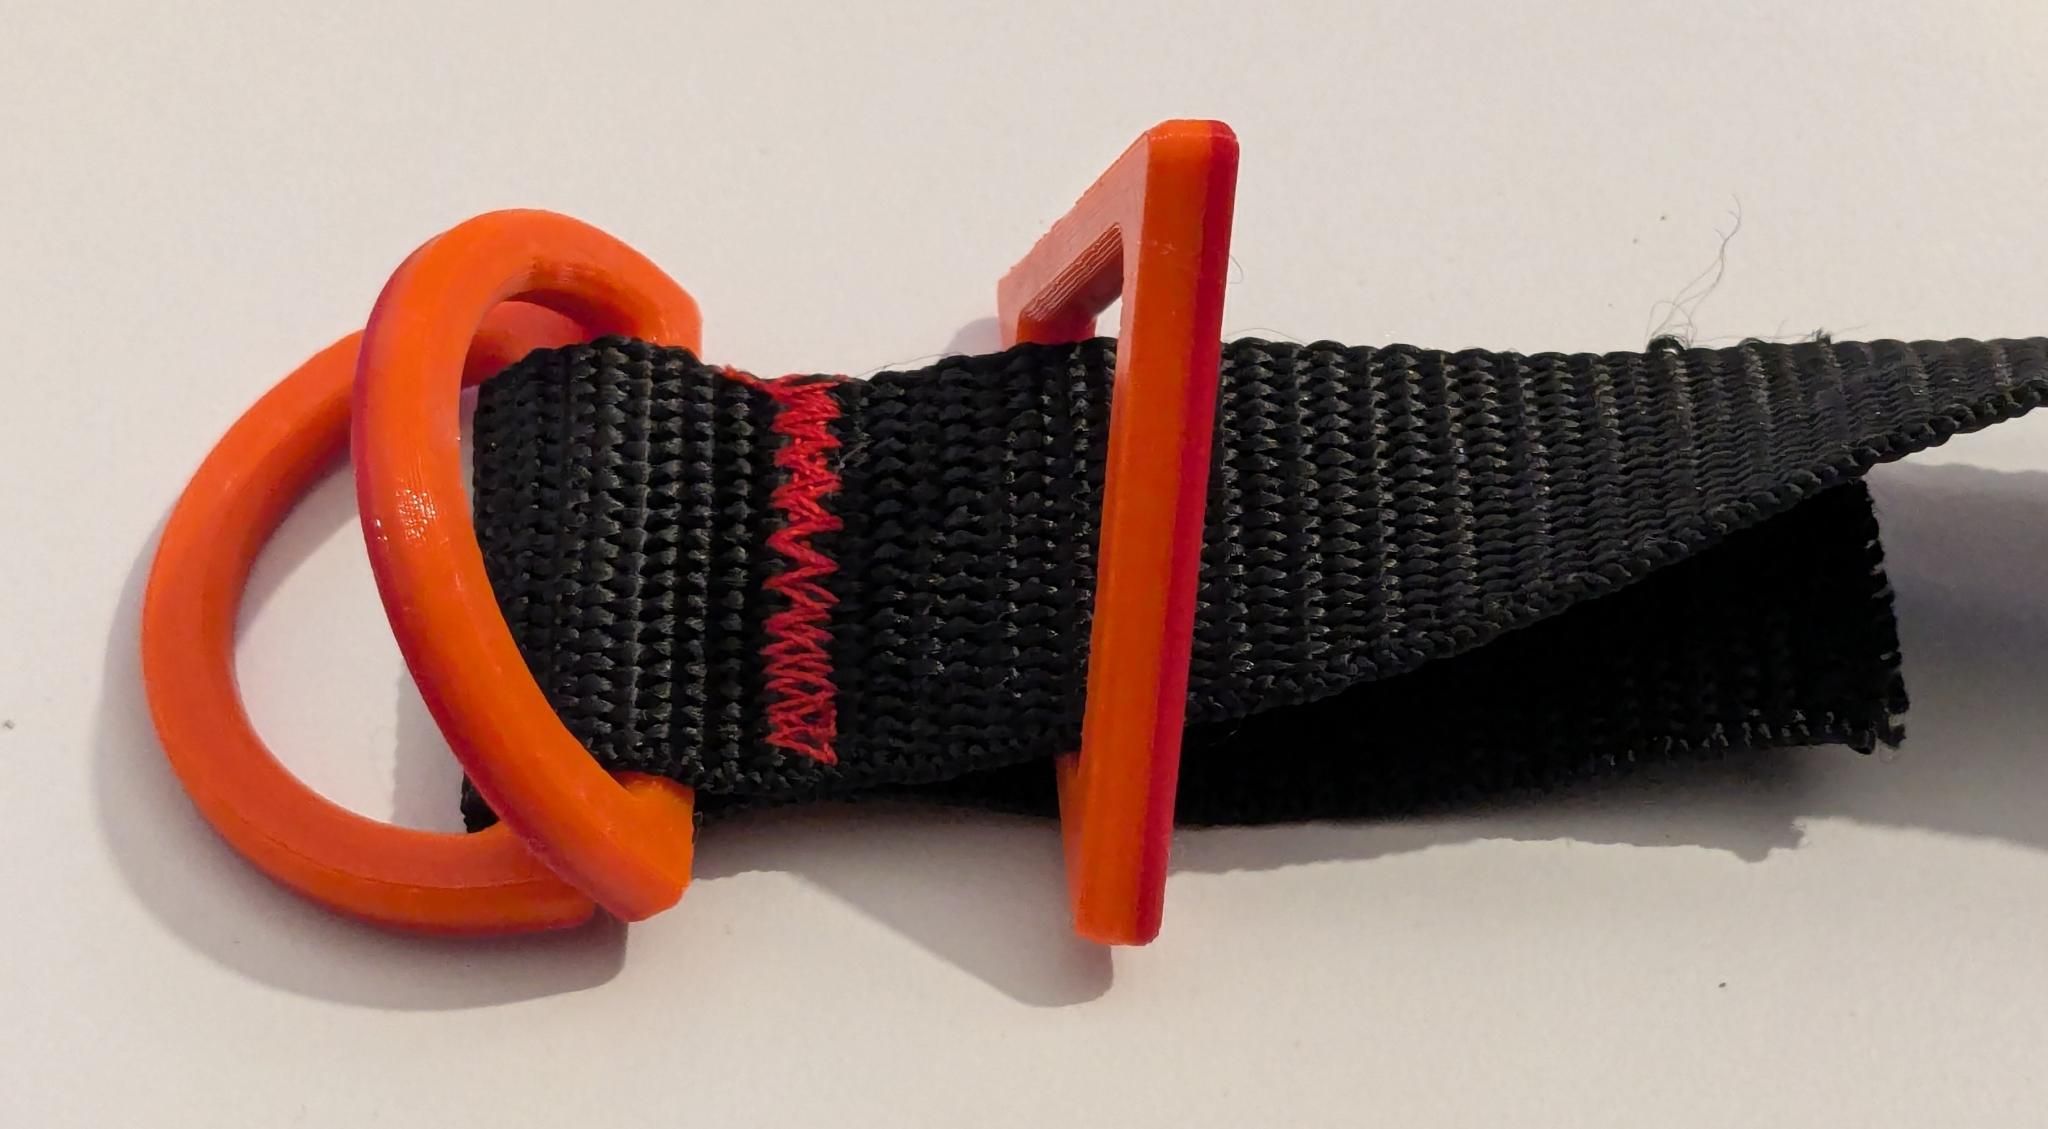
You first need to fold a ~8cm piece of the webbing, which will be used to hold the double-D and the windlass holder. After folding this piece, you pass the double-D and hold it in place by sewing as shown above.
You can then slide the long end of the webbing through the windlass holder to be in the same state as the above picture, before moving on to the next step below.
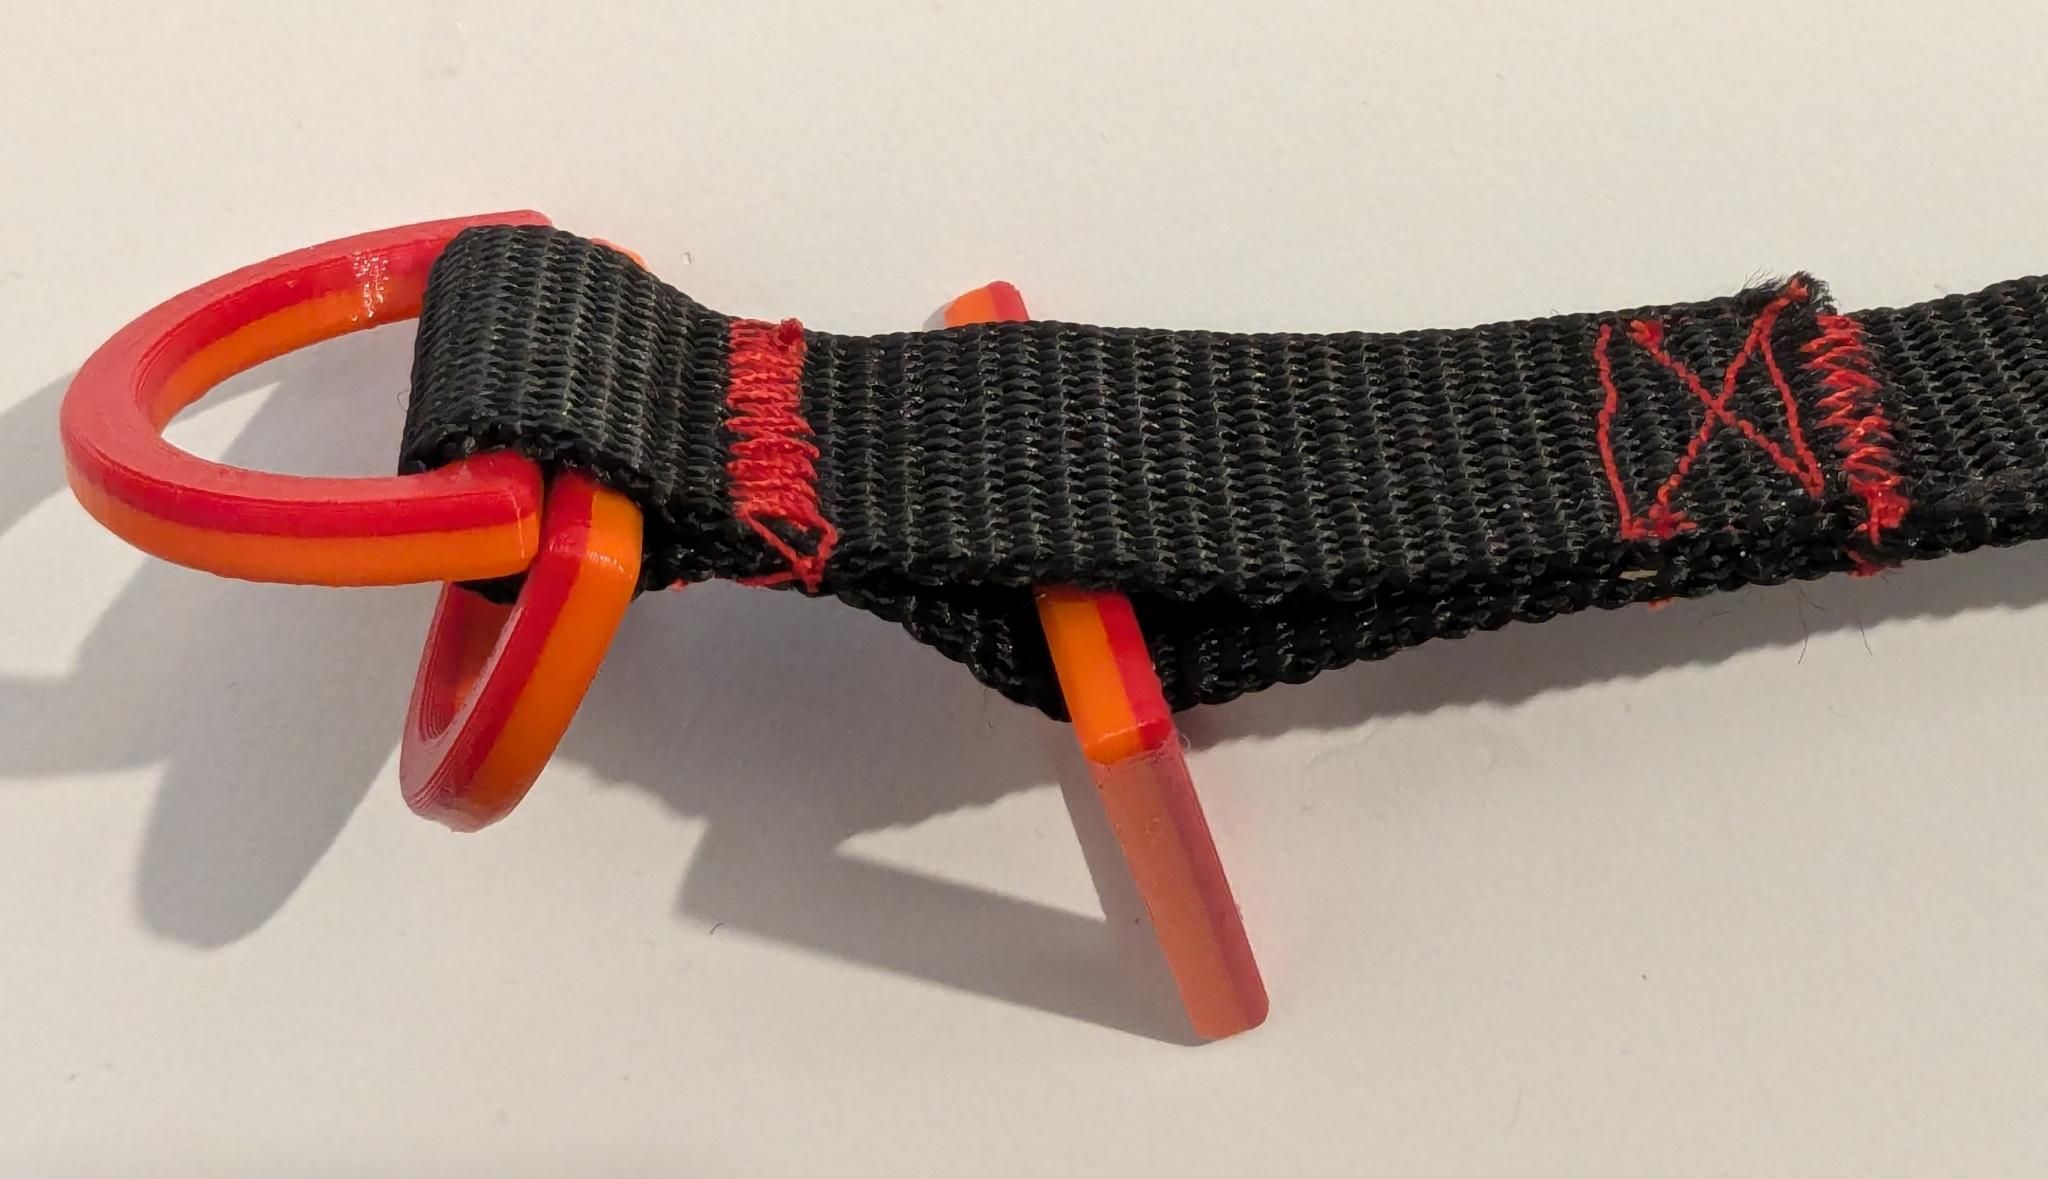
The second thing you need to fix is the windlass holder. As shown above, the windlass holder will be able to move a couple centimeter to make it easier to secure the windlass in the windlass holder in a variety of situations.
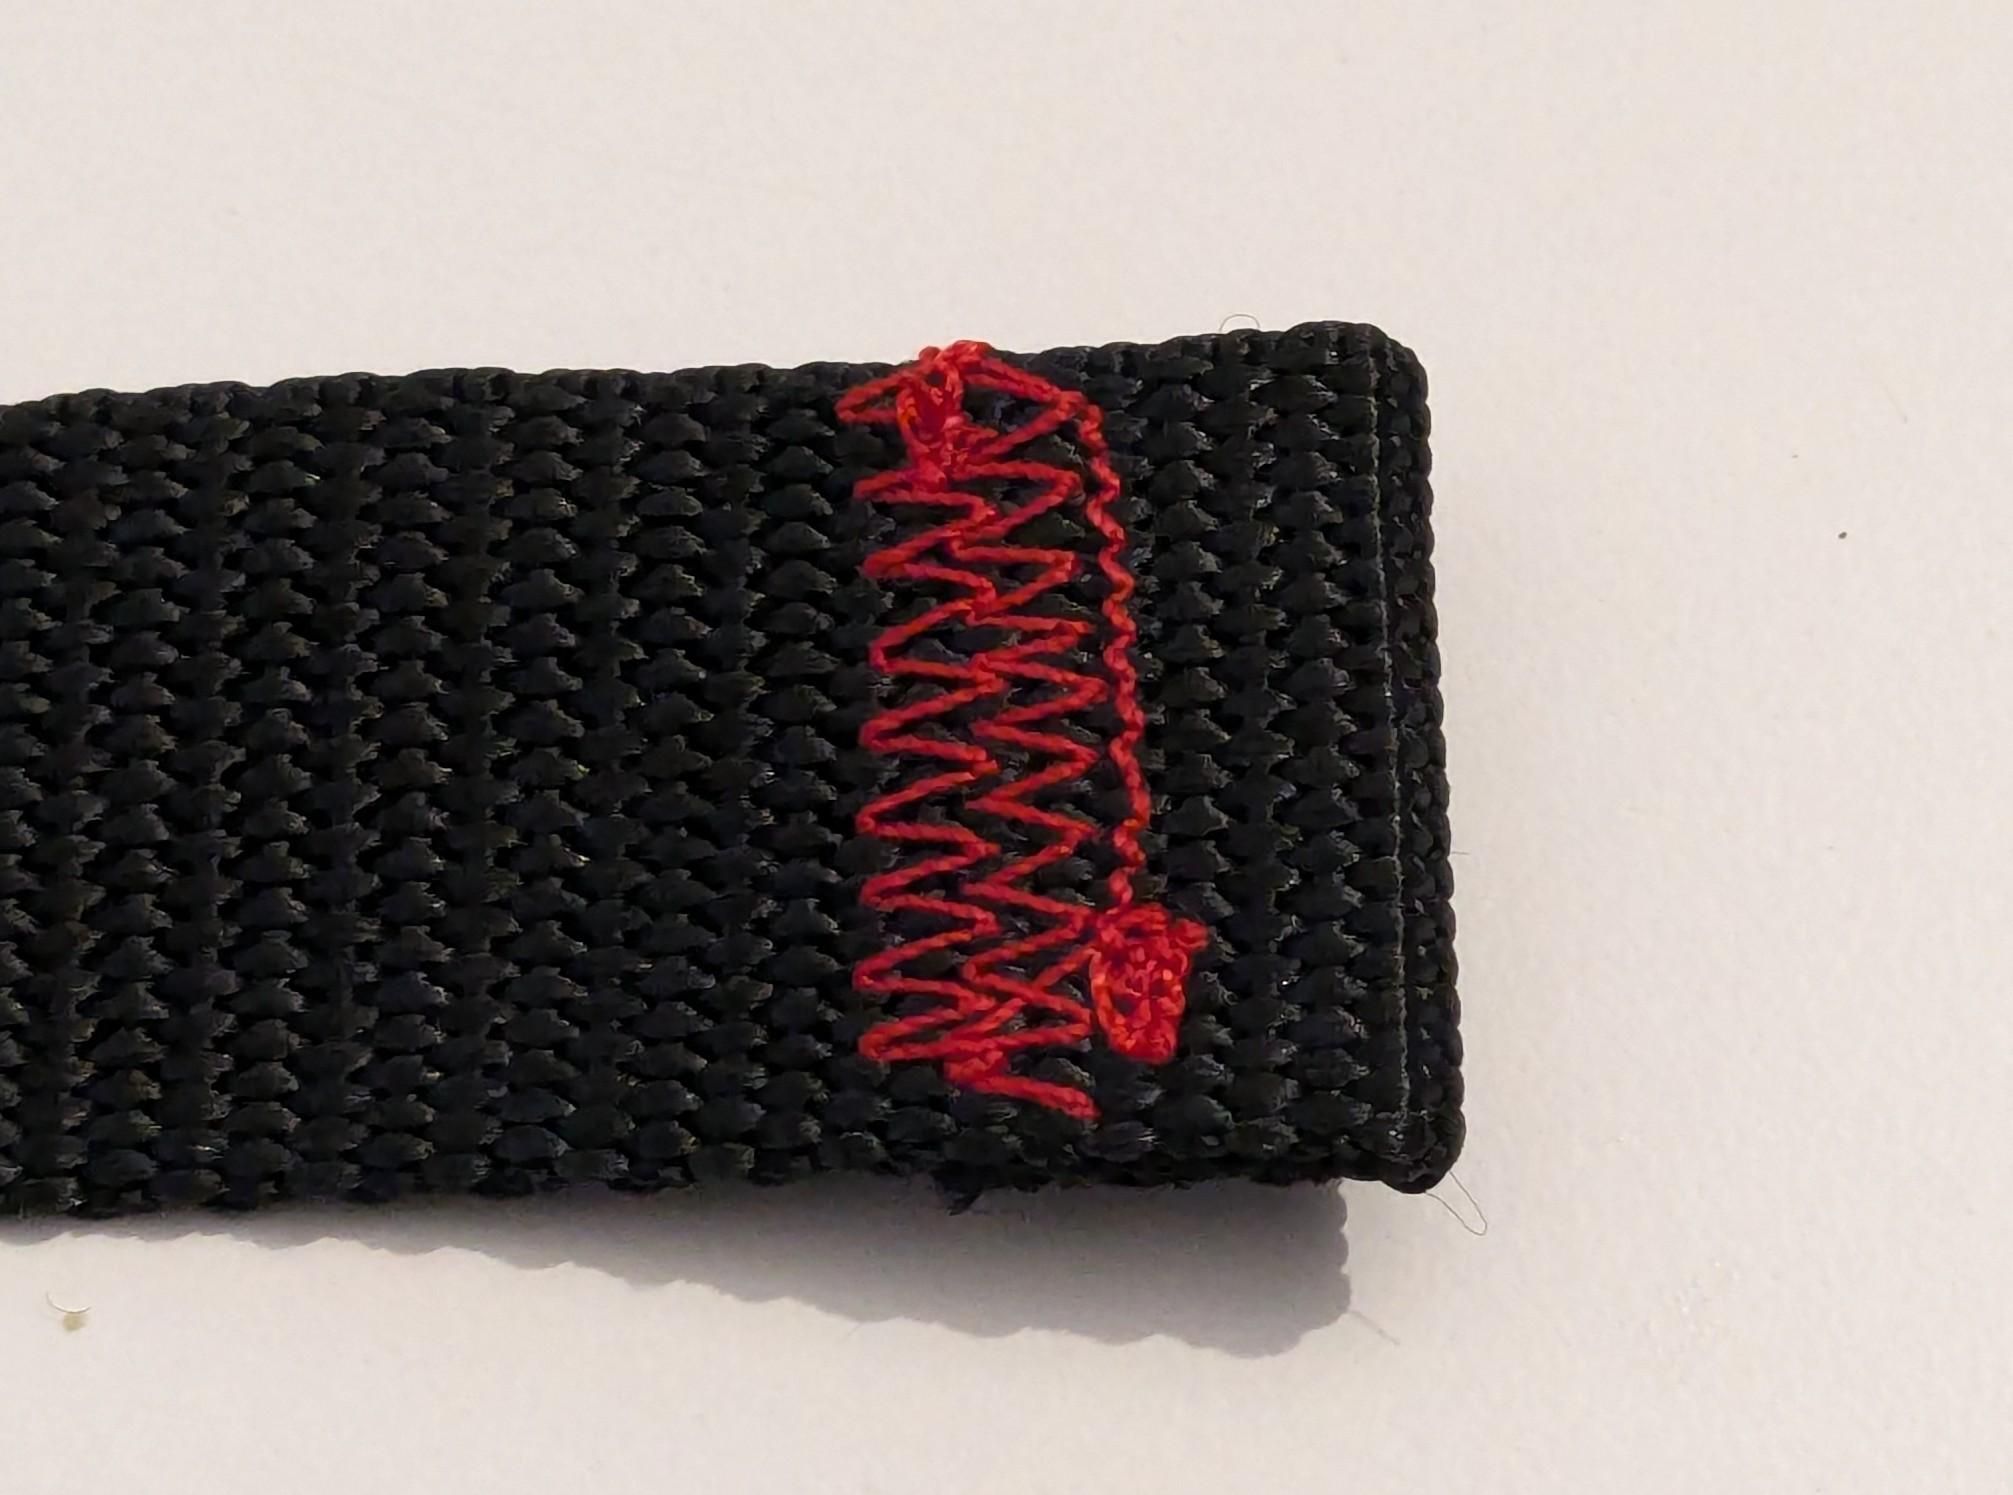
We can secure the windlass holder by sewing close the webbing loop, which you can firmly secure it in place using a 1cm X seam, with a zigzag over the delimitation to avoid fraying.
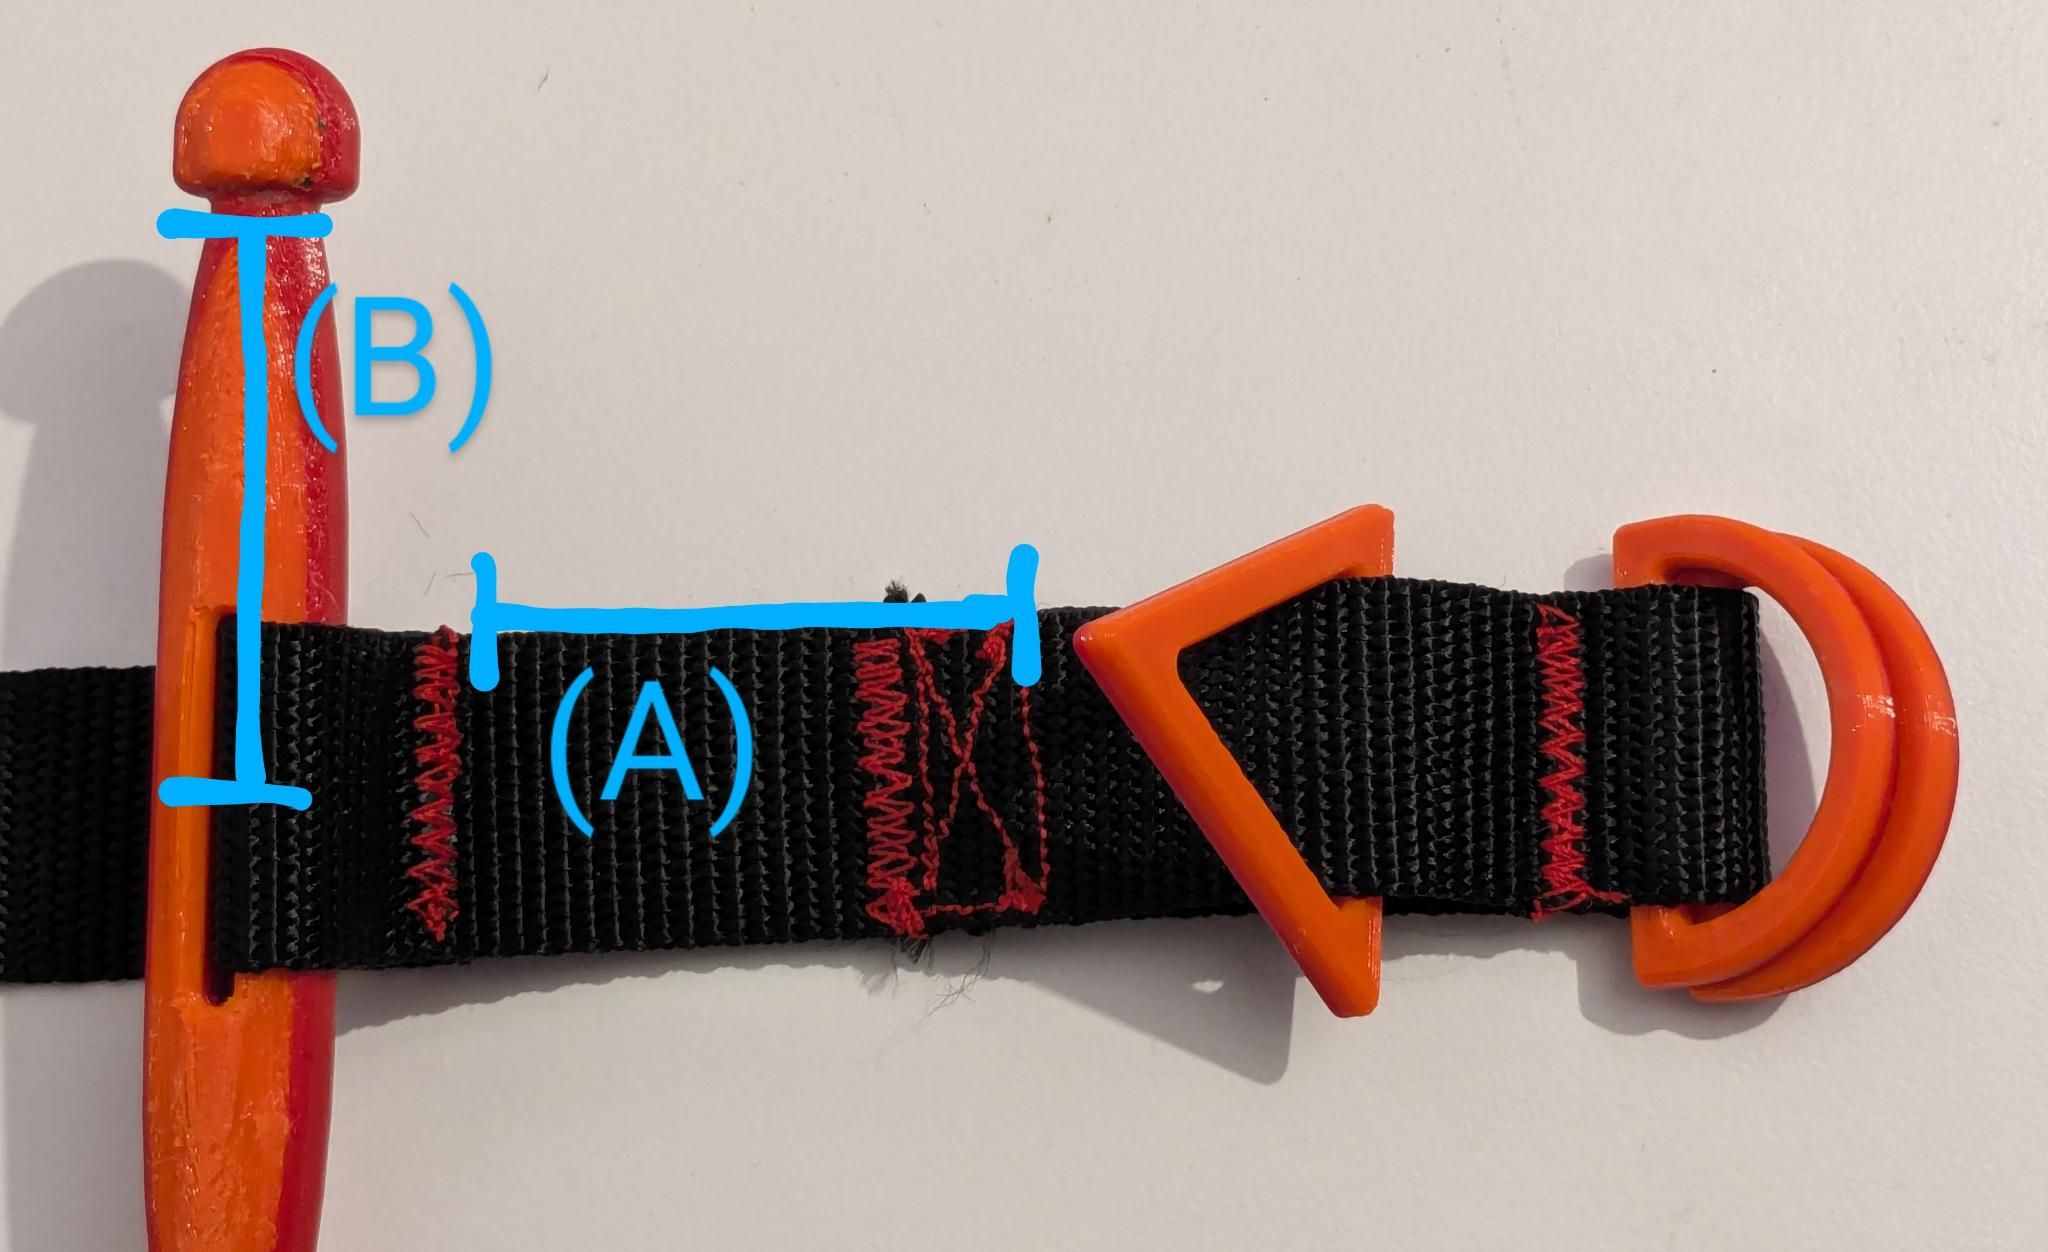
Avoid having a loop of more than ~6cm (equal to length (B) defined later), as this would make the windlass too close to the webbing loop. If you need to, you can cut the excess webbing before sewing the loop.
You then need to pass the webbing through the windlass before securing it in place by sewing together the webbing going through it just after and before the windlass, thus making a loop as shown in the above picture.
You need to offset the windlass from the windlass holder such that distance (A) (the distance between the seam holding the windlass and the closet position that the windlass holder can slide to) has to be equal to (B) (the length from center to tip of the windlass, not including the tip, which in the provided file is equal to 5.5cm). This is done so the windlass can fit through the windlass holder before turning it, and when turning the windlass, the windlass will approach the windlass holder which will be able to slide farther to still allow usage of the windlass holder.
The last part is to secure the end of the webbing as shown above. This needs to be done last, as otherwise the webbing won't be able to pass through the windlass.
5 - Testing and performance of our tourniquet
We tested our design using an open source tourniquet tester (Distributed manufacturing of an open-source tourniquet testing system, march 2023, Dawei Liu et al.).
The pressure when tightening the tourniquet was 35 mmHg, than 200 mmHg (350 mmHg and more is needed to guaranty occlusion) of pressure was generated after a single haf-turn of the windlass, then 520 mmHg after a second half-turn of the windlass. This is dangerous as 500 mmHg of pressure and more risk nerve damages. We will tweak our model to reduce this pressure. We believe it could be because of the width of the webbing being wound being large (the full 38mm width of the tourniquet) compared to most tourniquets having a smaller webbing for winding (19mm for the GliaX/tourniquet for example). We will however try to reduce this pressure without reducing the width of the webbing. We also note that it was sometime a bit tricky to secure the windlass (not significantly more than with other SOF-T tourniquets in our experience).
We are currently trying to reduce the generated pressure by tweaking the windlass design, through the 3Dfiles/windlass_easyprint_v2.stl prototype.
We have a detailed review of our current performance testing of this tourniquet available at manual/tests-results.md.
If you have the ability to do more lab performance testing, don't hesitate to contact us by email at the address distorsion@systemli.org, we would be happy to send you a few assembled tourniquet to get testing data !
License
"3D-printed SOF-T-like tourniquet" (c) by @distorsion

"3D-printed SOF-T-like tourniquet" is licensed under a
Creative Commons Attribution 4.0 International License.

You should have received a copy of the license along with this
work. If not, see <https://creativecommons.org/licenses/by/4.0/>.